

Chewy Japanese Mochi Cookies
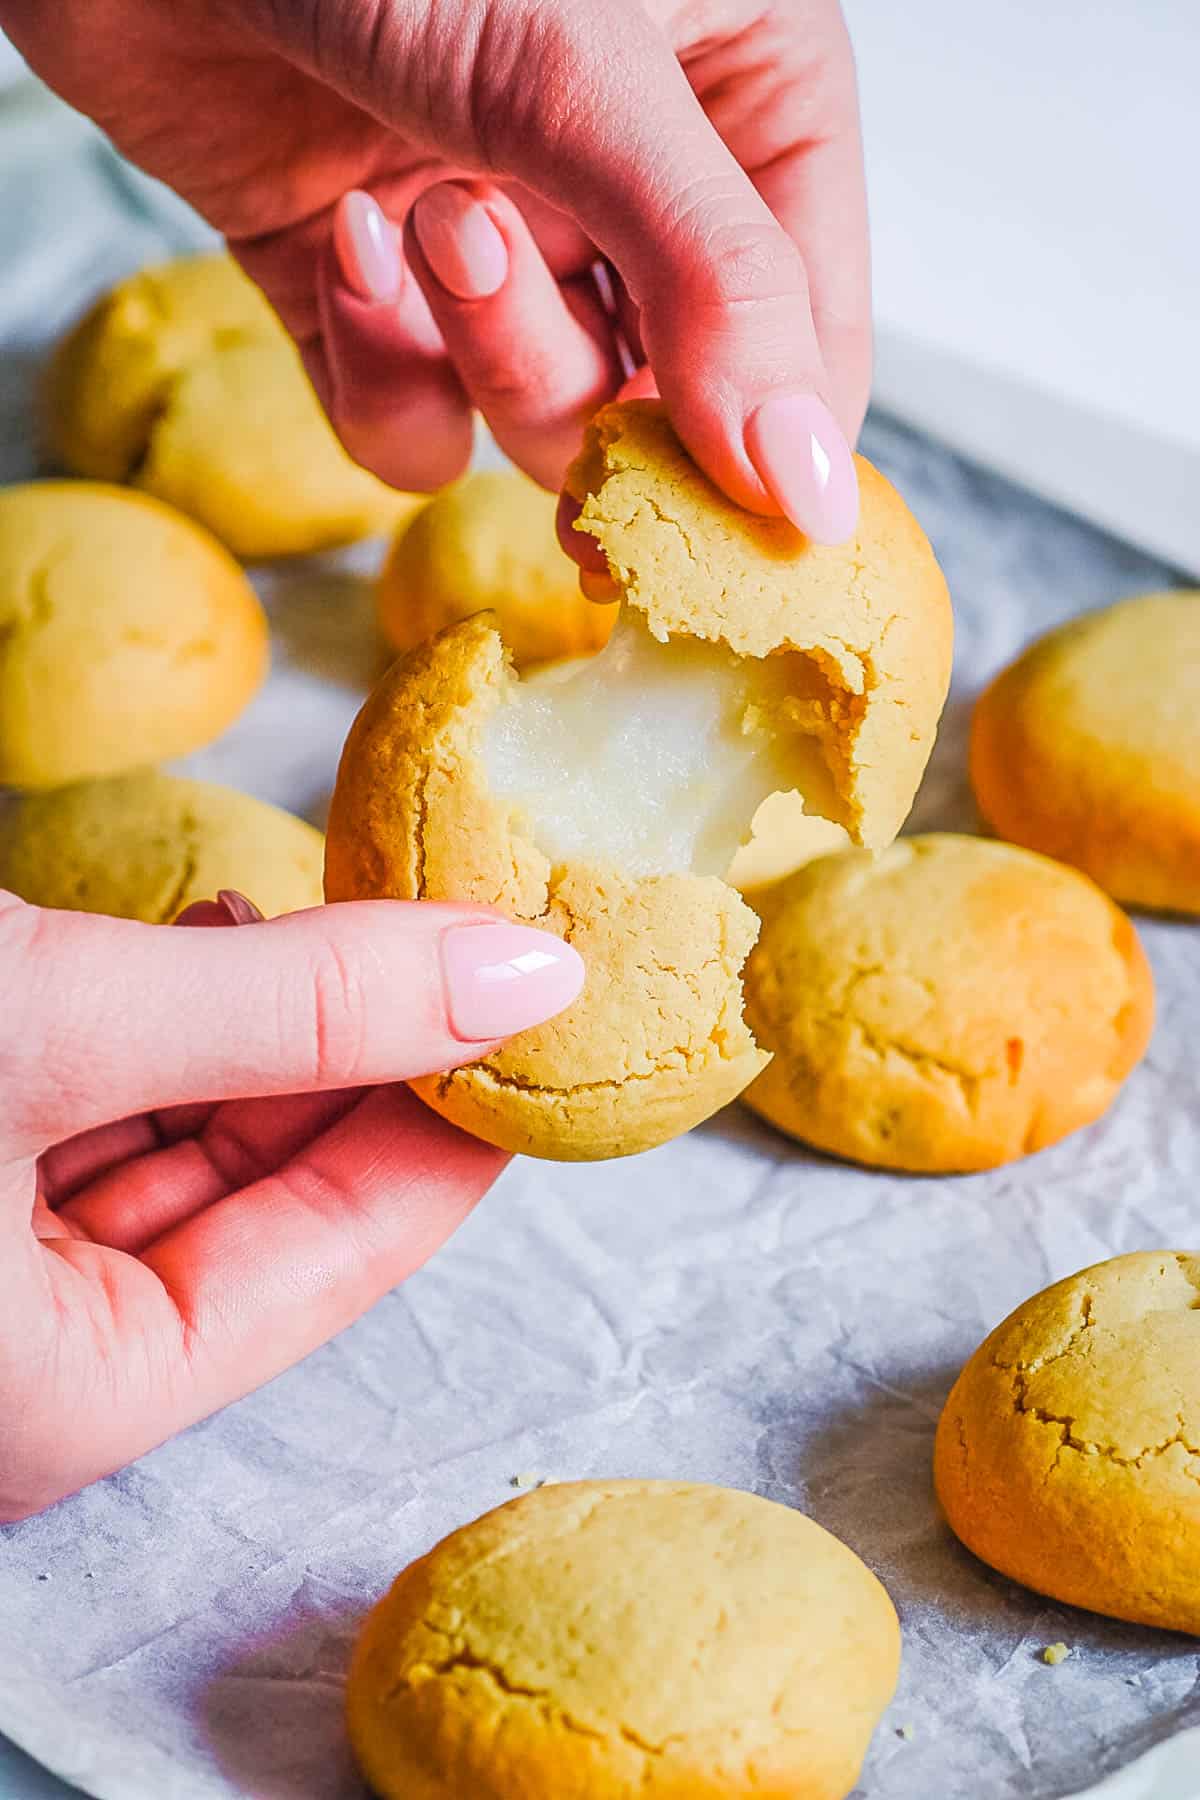
This post may contain affiliate links. As an Amazon Associate, I earn from qualifying purchases. Please read my disclosure.You have not experienced cookie bliss until you have had these chewy Japanese mochi cookies. I use butter, glutinous rice flour, and brown sugar to create a crisp cookie shell with a soft chewy center. Each bite has that trademark contradiction in textures that mochi desserts are famous for.

Japanese mochi cookies combine a classic butter cookie and the signature chew of mochi. I am no stranger to filled cookies, but not even my strawberry cheesecake cookies come close to the unique texture these mochi cookies offer. If you love varying textures and trendy food, be sure to make these mochi cookies.
Since 2021, there has been an increased interest in mochi. Whether sweet, savory, baked, or frozen, the world has gone mad for mochi, and I knew I had to hop on the trend. After mastering my mango mochi ice cream, I felt confident enough to take on mochi cookies, and my kids were eager for me to succeed. There was some trial and error in the beginning, but once I had perfected the recipe, I excitedly brought these cookies to every book club meeting, gathering, and friendly catch-up.
👩🏽🍳 Why I Love This Recipe
I love making these chewy Japanese mochi cookies from scratch, and knowing that I am using clean ingredients, while also saving money really appeals to me as a working mom and nutritionist. The butter and brown sugar create a rich base while the mochi filling adds a soft, chewy center, which makes eating this cookie an entire experience.
This recipe works well for me, thanks to timing and structure. I chill the cookie dough so it stays firm while wrapping, and make sure the mochi filling is smooth and fully cooled before shaping. Baking my cookies at a slightly lower temperature gives them time to cook through without browning too much, while keeping the center at the perfect stretchy consistency.
One of my favorite things to do is to make these cookies for my friends, without telling them about the delightfully squidgy surprise center. I made a tray for a school meeting once, and watched the confusion followed by the delight on some faces. There was one parent who saw the stretchy mochi pull after his wife took a bite, and he became overly excited, thinking they were some kind of cheese cookies. Ha! I recommend giving those same old cookie recipes a break and venturing out into the exciting world of mochi cookies.
Latest Recipe Video!
🥘 Ingredients
Japanese mochi cookies are made with a mix of baking staples and one key ingredient. This is what I use:
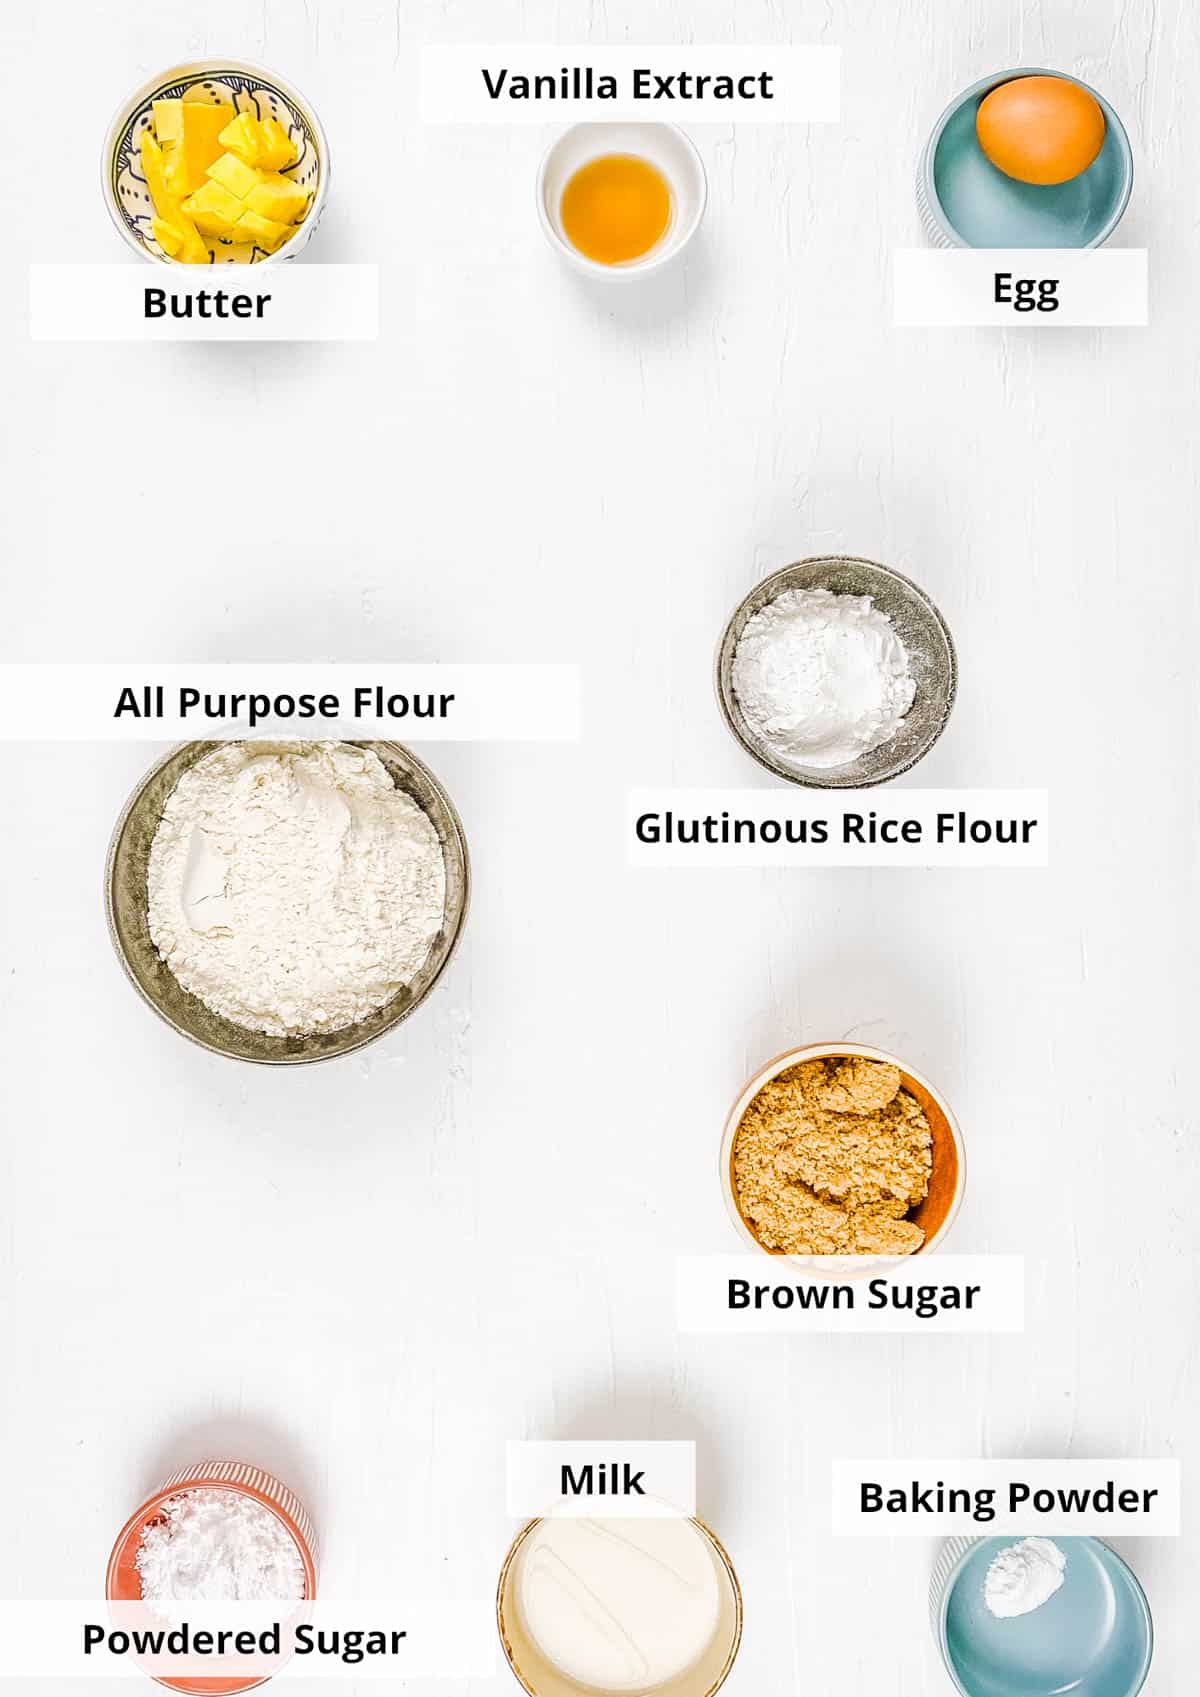
For the cookies
Unsalted butter: I use softened butter to create a smooth, rich cookie base.
Brown sugar: This is creamed into the butter and adds a caramel note while keeping the cookies soft.
Egg: I use 1 egg to bind the dough and provide structure during baking.
Vanilla extract: I add this for a warm background flavor. You could use store-bought extract, or you could learn how to make vanilla extract at home.
All-purpose flour: This forms the base of the dough and provides structure.
Baking powder: I use this to give the cookies a light lift without making them cakey.
For the mochi filling
Glutinous rice flour: This is essential for the mochi filling and creates the chewy, stretchy center.
Powdered sugar: I blend this into the filling for sweetness, without any grit.
Milk: This helps hydrate the rice flour and brings the filling together into a smooth mixture.
🔪 How To Make
I divide this recipe into 2 parts and focus on each separate component before bringing them together to create a mochi cookie. This is what I do:
Preheat and prepare: First, I preheat the oven to 340F, and line a baking sheet with parchment paper.
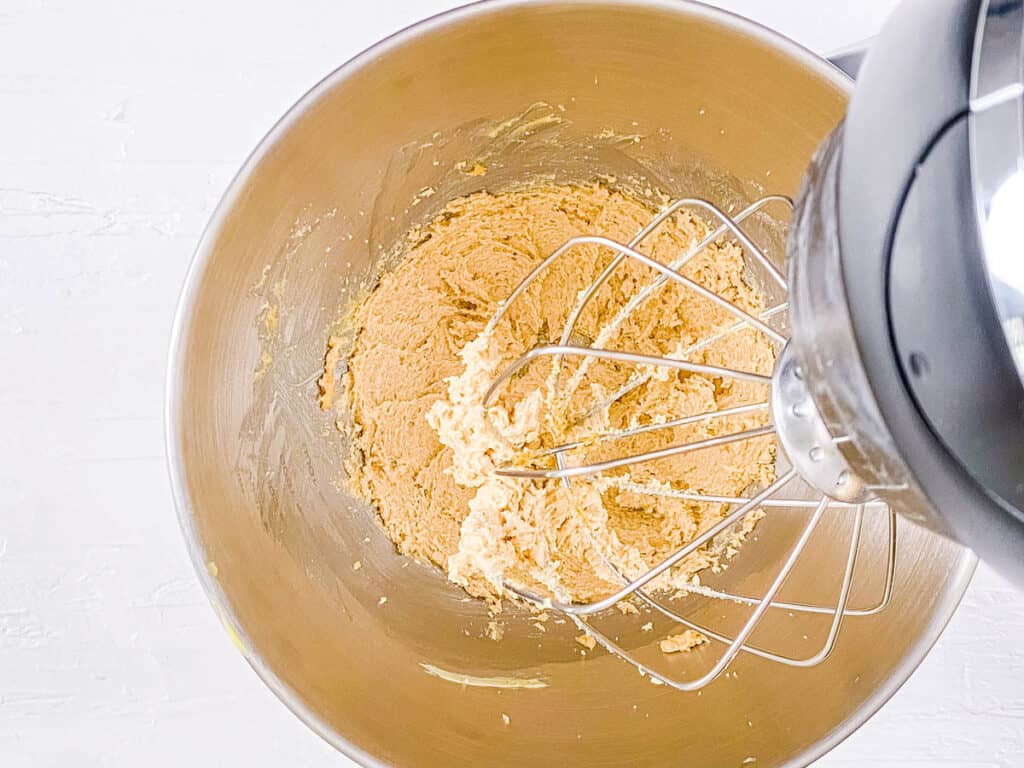
Cream butter and sugar: Then, in a mixing bowl, I cream the softened butter and brown sugar together for 3 minutes until lighter in color and fluffy.
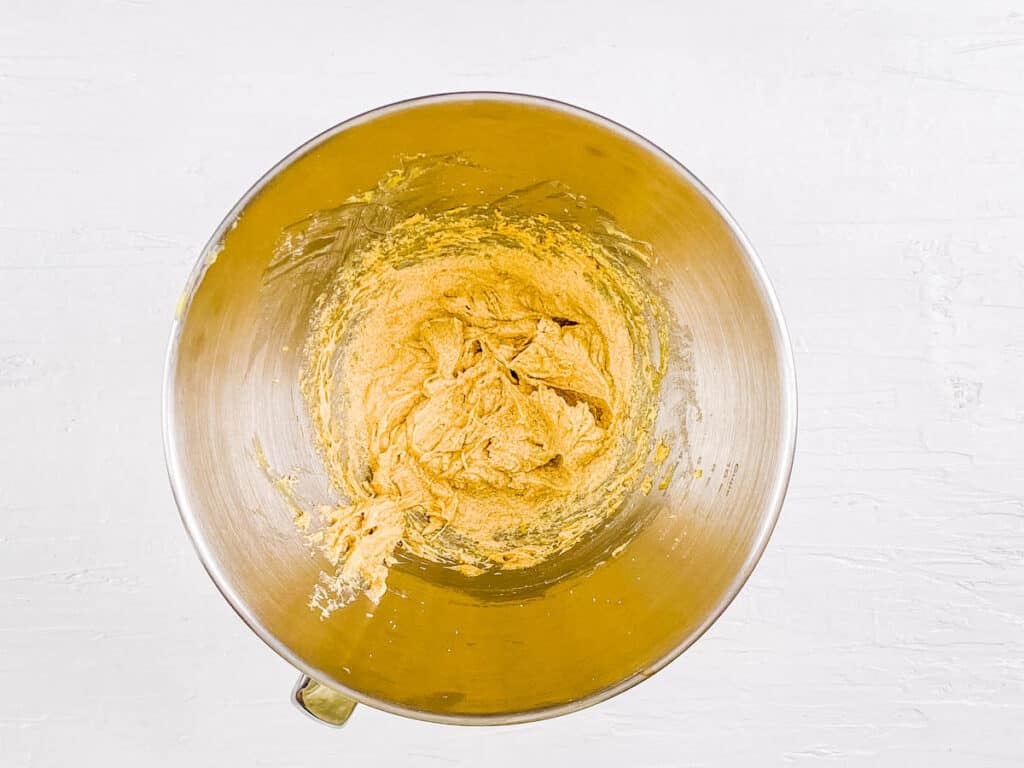
Add egg and vanilla: I mix in the egg and vanilla extract, scraping down the sides of the bowl so everything mixes.
Add dry ingredients: Next, I fold in the flour and baking powder using a spatula, mixing just until a soft dough forms. Then I chill the dough for 30 minutes.

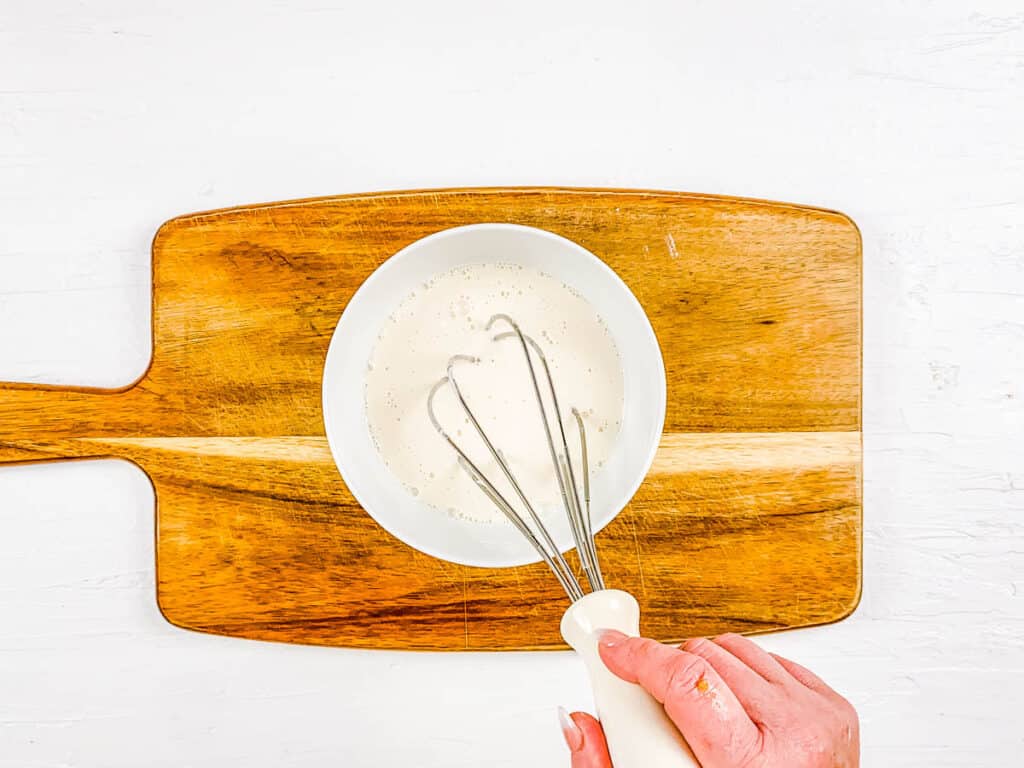
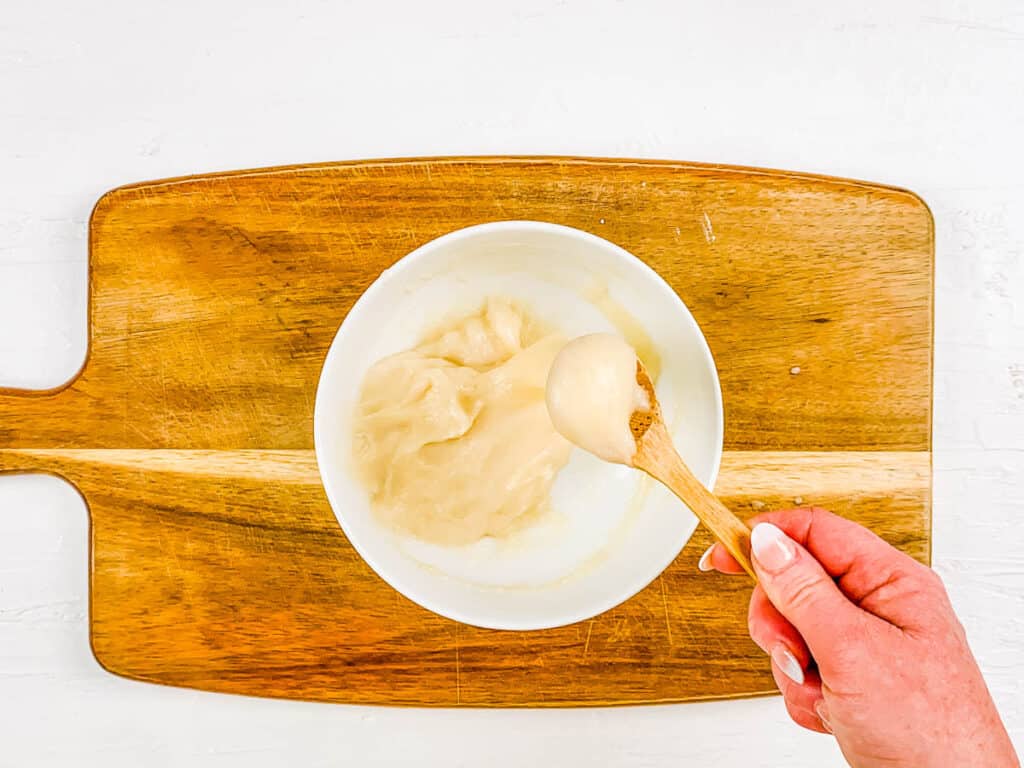
Make mochi: In a microwave-safe bowl, I whisk together the glutinous rice flour, powdered sugar, and milk until smooth with no lumps. I cover the bowl with plastic wrap and microwave it for 2 minutes, and then stir until the mixture becomes thick and stretchy.
Allow to cool: I let the mochi cool for 5 minutes at room temperature.
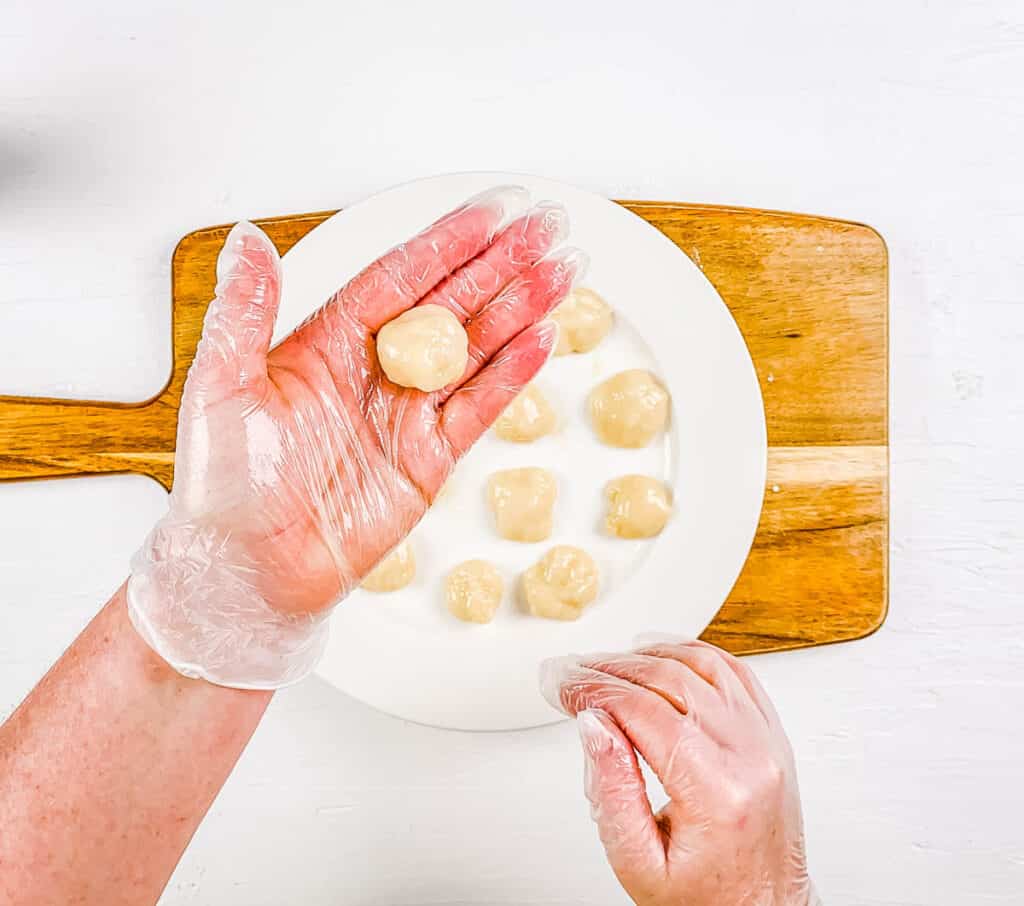
Divide filling: Then, I divide the mochi into 12 equal portions and roll them into balls.
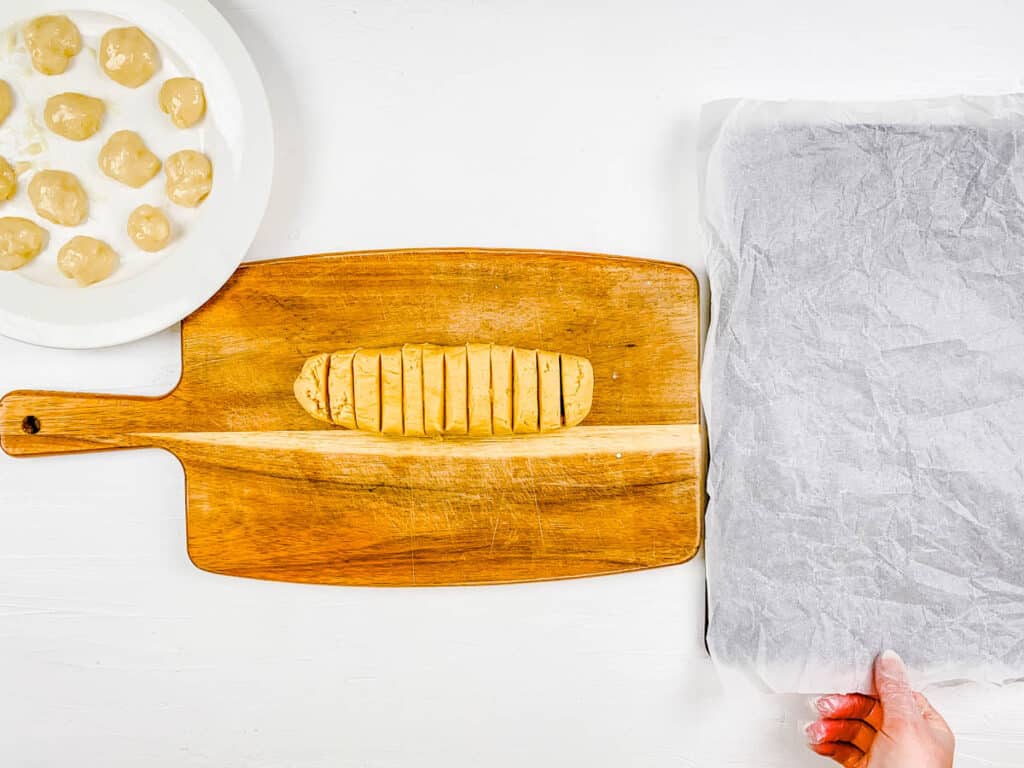
Cut cookie dough: I remove the cookie dough from the fridge, roll it into a log, and cut it into 12 equal-sized pieces.
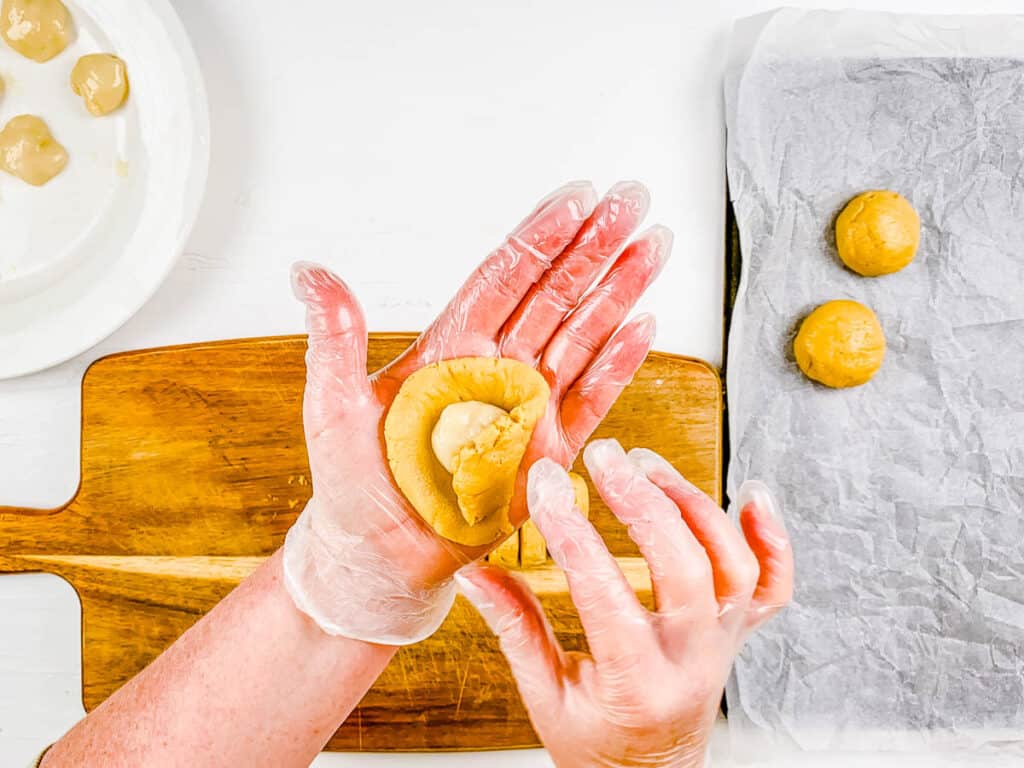
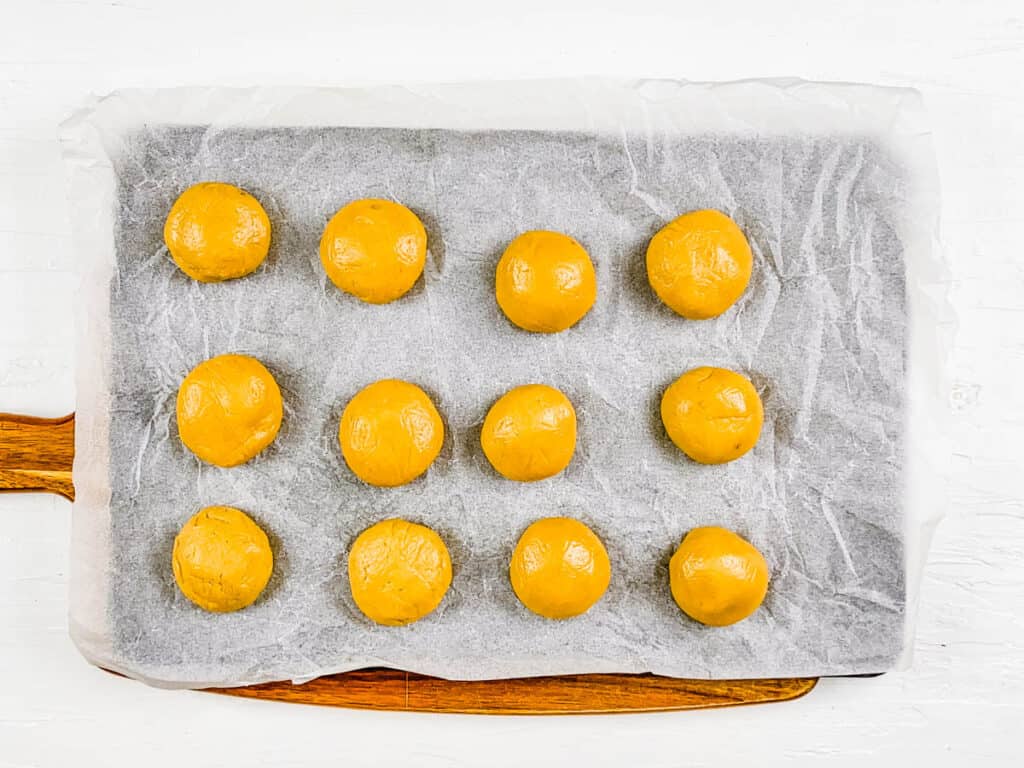
Wrap mochi filling: Next, I flatten each dough piece into a disc, place a mochi ball in the center, and gently wrap the dough around it. I seal the edges carefully and roll it into a smooth sphere with no cracks.
Bake: I place the filled cookie dough balls onto the prepared baking sheet with space between them and bake for about 10 minutes until the edges are lightly golden.
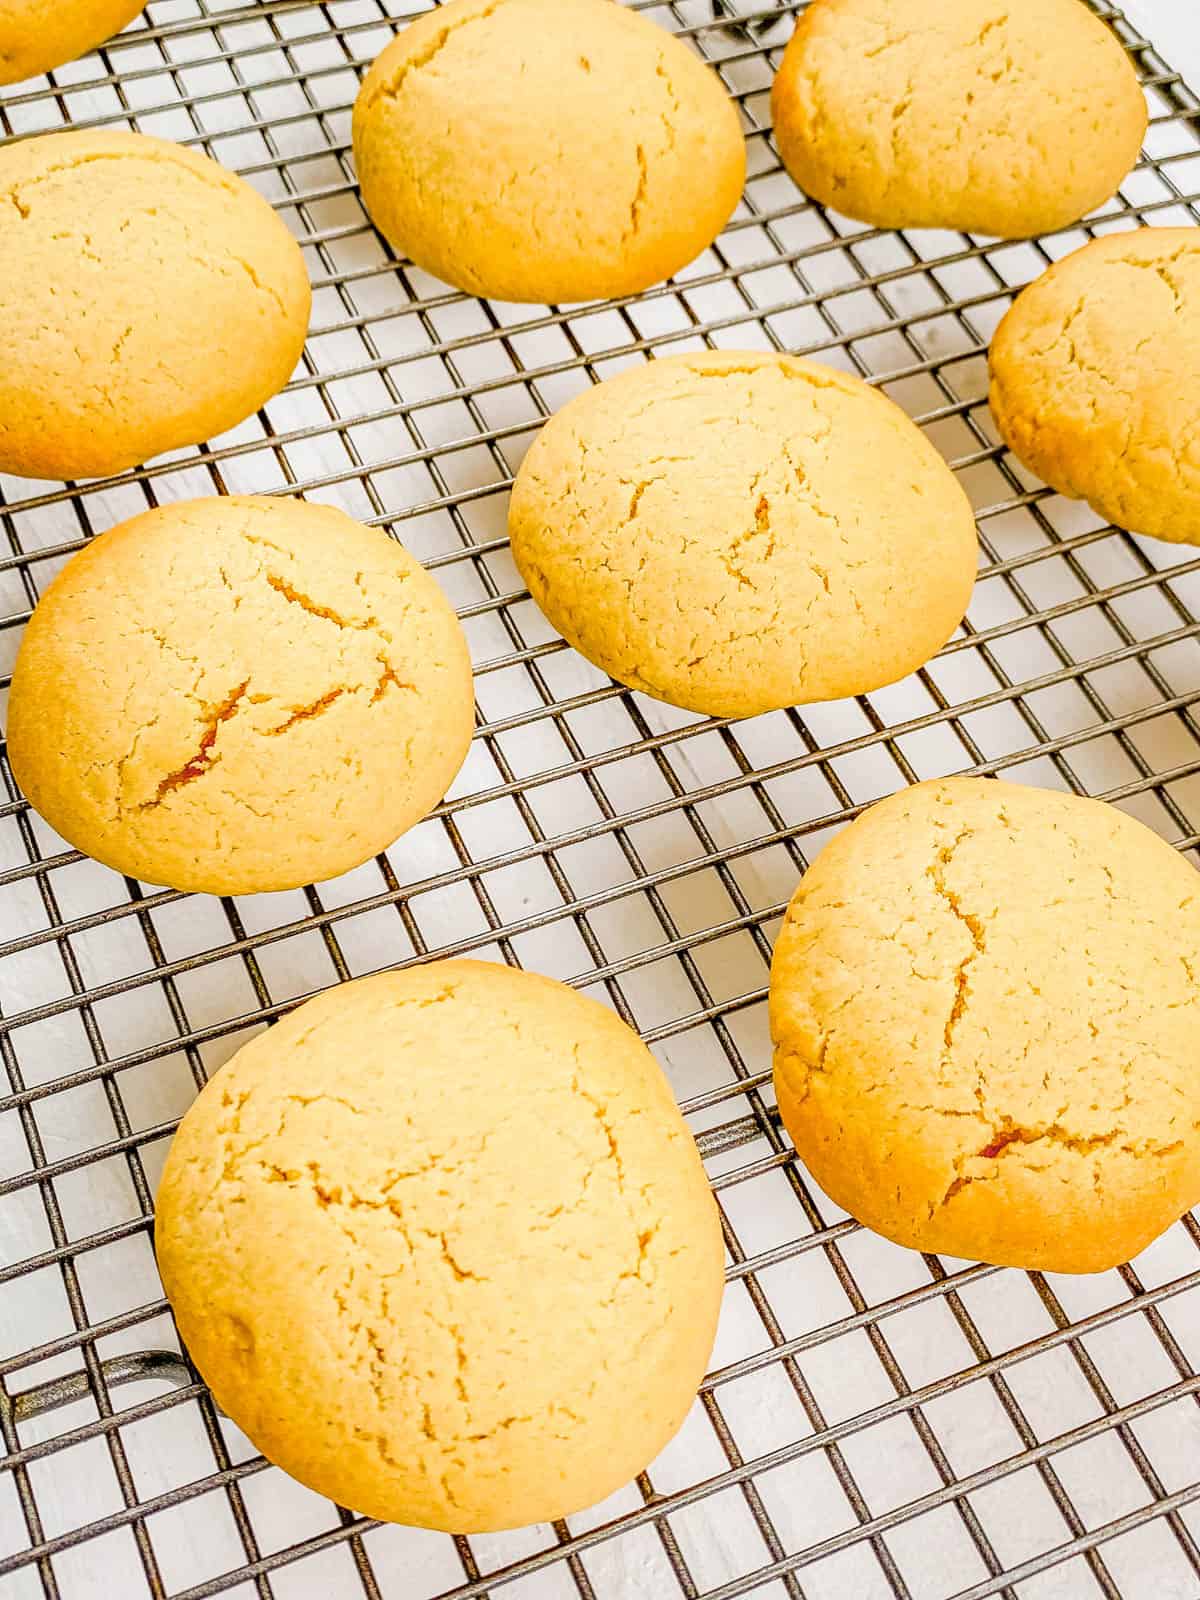
Cool: Finally, I transfer the baked cookies to a wire rack and let them cool fully, allowing the structure to finish setting.
💭 Expert Tips
My #1 Secret Tip for this chewy Japanese mochi cookie recipe is to let the mochi filling cool completely before wrapping. Warm filling sticks to the dough and makes sealing difficult, which can cause leaks during baking.
Other Tips To Keep In Mind:
- Keep water nearby to prevent sticking: When working with the mochi dough, I like to keep a small bowl of water close by to dip my hands or spoon into. This stops the dough from sticking and being unmanageable.
- Store with bread: Place a slice of fresh bread in the airtight container with the cookies when storing. This helps retain moisture and keeps the filling chewier for longer.
- Do not overbake: I remove the cookies as soon as the edges are a golden color. Extra time in the oven can firm up the center too much.
- Control stickiness: If water does not do enough for the stickiness, I lightly oil my hands when rolling the mochi balls to keep the surface smooth and manageable.
- Mix gently: I stop mixing the cookie dough as soon as it comes together to avoid a dense crumb.
- Leave space: These cookies spread, so be sure to leave enough space between them to avoid any fusing and leaking.
📖 Variations
The great thing about this Japanese mochi cookie recipe is that it is practically a blank canvas. I have had so much fun creating new variations, but these 3 are my favorites:
Matcha center: I mix 1 teaspoon of matcha powder into the mochi filling before I cook it. This adds an earthy note, which balances out the sweetness of the cookie. My kids love the bright green center.
Strawberry mochi: For a sweet, floral flavor, I add 1 tablespoon of fresh strawberry juice and 2 tablespoons of diced strawberries to the mochi filling before cooking in the microwave. I love the mild strawberry flavor with a blush hue. If you would like to make the color more noticeable, you could add a small drop of pink food coloring into the mochi.
Peaches and cream: I add 1/4 cup of freshly chopped peaches into the filling mixture before cooking it. The vanilla flavor of the cookie mimics a chantilly cream, which pairs well with the fresh peach. These are a summertime favorite.
🍽 Serving Suggestions
I like serving these Japanese mochi cookies slightly warm with a drink that balances out the sweetness, like my lavender latte. If you would like these cookies to be part of a more filling spread, I suggest adding them to a dessert board. You could include some vegan matcha ice cream, with a few mochi donuts and some fresh fruit.
My kids love pairing these mochi cookies with other desserts, especially ones with a completely different texture. Apart from every flavor of ice cream, they also claim these mochi cookies go really well with vegan vanilla pudding and my chocolate almond milk pudding. Honestly, I am waiting for them to find something that does not pair well with these cookies. Ha!
🧊 Storing And ♨️ Reheating
Room temperature: I store these cookies in an airtight container at room temperature for 1-3 days.
Refrigeration: I avoid storing these cookies in the refrigerator since the mochi center firms up and loses its softness.
Freezing: I wrap individual cookies tightly with plastic wrap and store them in an airtight container in the freezer for up to 3 months.
Reheating: I let frozen cookies thaw at room temperature, or warm them briefly in the microwave to soften the center again.
❓ Recipe FAQs
Why did my mochi filling turn out tough instead of soft?
This usually happens when the filling is overcooked or not mixed well enough after heating. If I microwave the mochi for too long, the starch tightens and loses its stretch. I fix this by heating just until thick, then stirring thoroughly while it is still warm, to keep the texture smooth.
Could I use regular rice flour instead of glutinous rice flour for this recipe?
No, regular rice flour cannot be used in this recipe if you want that soft, chewy center. Glutinous rice flour has a higher starch content, which creates that hallmark mochi texture. Regular rice flour does not behave in the same way and will result in a dry, crumbly filling.
How do I fix the mochi filling that has turned lumpy?
If the filling is lumpy, it usually means the ingredients were not mixed well enough before heating, or it was not stirred enough after cooking. I fix this by mixing it thoroughly while it is still warm, until it has become smooth. If needed, I press out any small lumps with a spoon while stirring.
🍡 More Sweet Japanese Recipes!

Love this vegetarian dessert recipe? Please leave a 5-star rating 🌟 in the recipe below and/or a review in the comment section further down the page!
You can also FOLLOW ME on FACEBOOK, INSTAGRAM, and PINTEREST to see more delicious, healthy, family-friendly food, and if you have any questions, I’m here to help!
📋 Recipe Card
🎥 Watch How to Make It

You have not experienced cookie bliss until you have had these chewy Japanese mochi cookies. I use butter, glutinous rice flour, and brown sugar to create a crisp cookie shell with a soft chewy center. Each bite has that trademark contradiction in textures that mochi desserts are famous for.
Servings: 12 cookies
Calories: 147kcal
Ingredients
For The Cookies
- ¼ cup butter softened at room temperature
- ½ cup brown sugar
- 1 egg
- 1 tsp vanilla extract
- 1¼ cup all-purpose flour
- ¼ tsp baking powder
For The Mochi Filling
- ⅓ cup glutinous rice flour
- 1½ tbsp powdered sugar
- ½ cup milk
Equipment
- Sheet Pan
- Microwave-Safe Bowl
Instructions
- Preheat the oven to 340 degrees F / 170 C. Line a baking sheet with parchment paper and set aside.
- In a stand mixer cream the softened butter and sugar.
- When light and fluffy add the egg and vanilla extract and continue to whisk until well incorporated.
- Add the remaining ingredients and stir to form a dough.
- Place the dough in the fridge for 30 minutes.
- Meanwhile prepare the mochi filling by mixing all ingredients in a microwave safe bowl, whisking to ensure there are no lumps.
- Cover with plastic wrap and microwave for 2 minutes.
- Remove the cover and mix well. Allow to cool for 5 minutes.
- Divide into 12 equal balls.
- Roll the chilled cookie dough into a sausage shape and cut into 12 equal parts.
- Take one portioned piece of cookie dough and shape it into a flat disc shape. Place a ball of filling on top and wrap the cookie dough over the filling, ensuring there are no holes.
- Place cookie on the prepared baking tray.
- Repeat with remaining dough and filling.
- Bake in the preheated oven for 10 minutes or until lightly golden.
- Remove and allow to cool completely on a cooling rack.
- Store cookies in an airtight container in a cool dry place for up to 2 days.
Notes
- My #1 Secret Tip for this chewy Japanese mochi cookie recipe is to let the mochi filling cool completely before wrapping. Warm filling sticks to the dough and makes sealing difficult, which can cause leaks during baking.
- Keep water nearby to prevent sticking: When working with the mochi dough, I like to keep a small bowl of water close by to dip my hands or spoon into. This stops the dough from sticking and being unmanageable.
- Store with bread: Place a slice of fresh bread in the airtight container with the cookies when storing. This helps retain moisture and keeps the filling chewier for longer.
- Do not overbake: I remove the cookies as soon as the edges are a golden color. Extra time in the oven can firm up the center too much.
- Control stickiness: If water does not do enough for the stickiness, I lightly oil my hands when rolling the mochi balls to keep the surface smooth and manageable.
- Mix gently: I stop mixing the cookie dough as soon as it comes together to avoid a dense crumb.
- Leave space: These cookies spread, so be sure to leave enough space between them to avoid any fusing and leaking.
Nutrition
Serving: 1cookie | Calories: 147kcal | Carbohydrates: 24g | Protein: 2g | Fat: 4g | Saturated Fat: 3g | Polyunsaturated Fat: 0.3g | Monounsaturated Fat: 1g | Trans Fat: 0.2g | Cholesterol: 24mg | Sodium: 42mg | Potassium: 60mg | Fiber: 0.5g | Sugar: 10g


Great success for me! I would consider microwaving the filling for longer to have a more malleable texture. Also, if you’re concerned about the plastic wrap being microwaved, you could cover your bowl with paper towels and then put plastic wrap over that so it doesn’t touch the filling.
Awesome!! Thanks for letting me know Claire – and good point about the microwave tips!!
Hi, this looks so delicious! Do you think it would be okay to use store-bought chocolate chip cookie dough with the mochi?
Hi Chelsea! Yes I think you could use store-bought chocolate chip cookie dough with the mochi! The baking time might differ – so that’s the only thing you’d have to watch/adjust as needed. Hope that helps!
Hi, this looks yummy, but i don’t have a microwave. can i use a steamer? And how long I have to steam mochi filling?
Hi Cynthia! Yes – if you don’t have a microwave available, you can cook the mochi filling on the stovetop using a steamer. Just place the filling ingredients in a heatproof bowl, cover it with plastic wrap, and steam over simmering water for about 10 minutes, stirring halfway through. Hope that helps!
hi this really looks interesting to make but i don’t have a microwave. can i use an air fryer for that 2min mochi filling in a microwave?
Hi! I haven’t tried using an air fryer for that step but theoretically I think it could work! If you test it out you’ll have to let me know how it goes!
Can I make these cookies (unbaked, filled w mochi), and freeze to pop into the oven one at a time?
Hi Jennifer! I’ve never frozen the cookie dough before baking — I have only frozen the cookies once they have been baked. That said, I think it’s worth a shot to try it out. You might need to adjust the baking time slightly, but I’d be interested to hear how they turn out!
These were tasty and easy to make! This was my first time eating mochi inside a cookie. It’s a fun and different way to eat mochi. I tried the pandan flavored variation. After tasting the milk with 1/4 tsp of flavoring, I decided to increase it to 1/2 tsp. I still didn’t get much of a pandan flavor after baking the cookies. The flavoring was McCormick brand, perhaps it was not as strong? I think I’d like to try making this again with a banana cookie dough on the outside. Thanks for a great recipe, I’ll be making this again and again.
Yay!! Regarding the pandan, it’s very brand specific, so you might just need more of it from the McCormick brand! I’m so happy you loved this recipe Kat!
These cookies are soft, sweet, and tasty. A nice treat for dessert.
Thank you so much Gina! 🙂
It looks so delicious and easy!This is such an easy and delicious recipe, I cannot wait to make it again!
Thanks Shadi!
How cool and brilliant are these cookies! Such a fun and unique cookie for the holiday baking season
Totally! Thanks so much Shashi!
The texture and chewiness is spot on! Delicious! My kiddos loved them and I took the few that were leftover to work and my co-workers loved them!
Awesome!! So glad you all liked this recipe Aimee!
These are absolutely delicious and so much easier than I thought they were going to be. I love them!
Aw yay! Thanks Gabby!
What a great idea! Love mochis and to have it inside a cookie would be so delicious! I’m trying these this weekend.
Thanks so much Mirlene! Enjoy!