



Halloween Fruit Tray
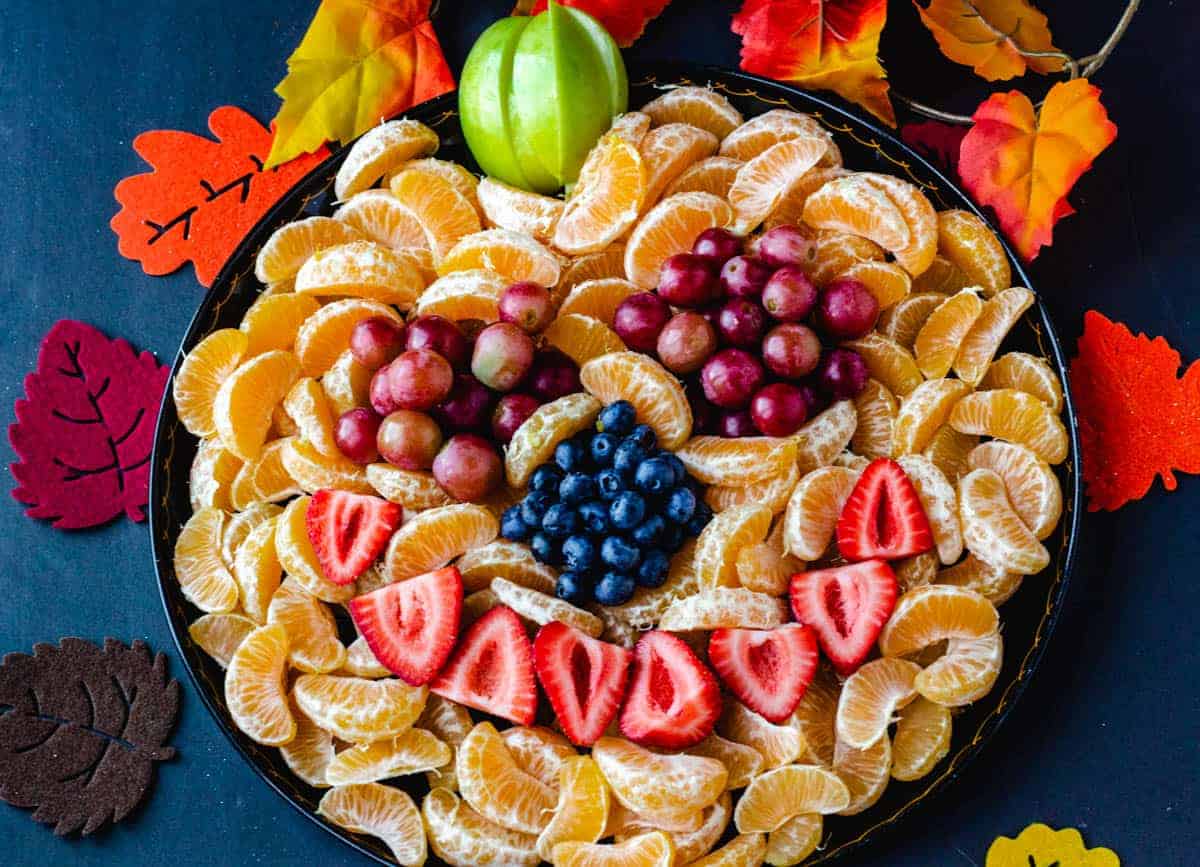
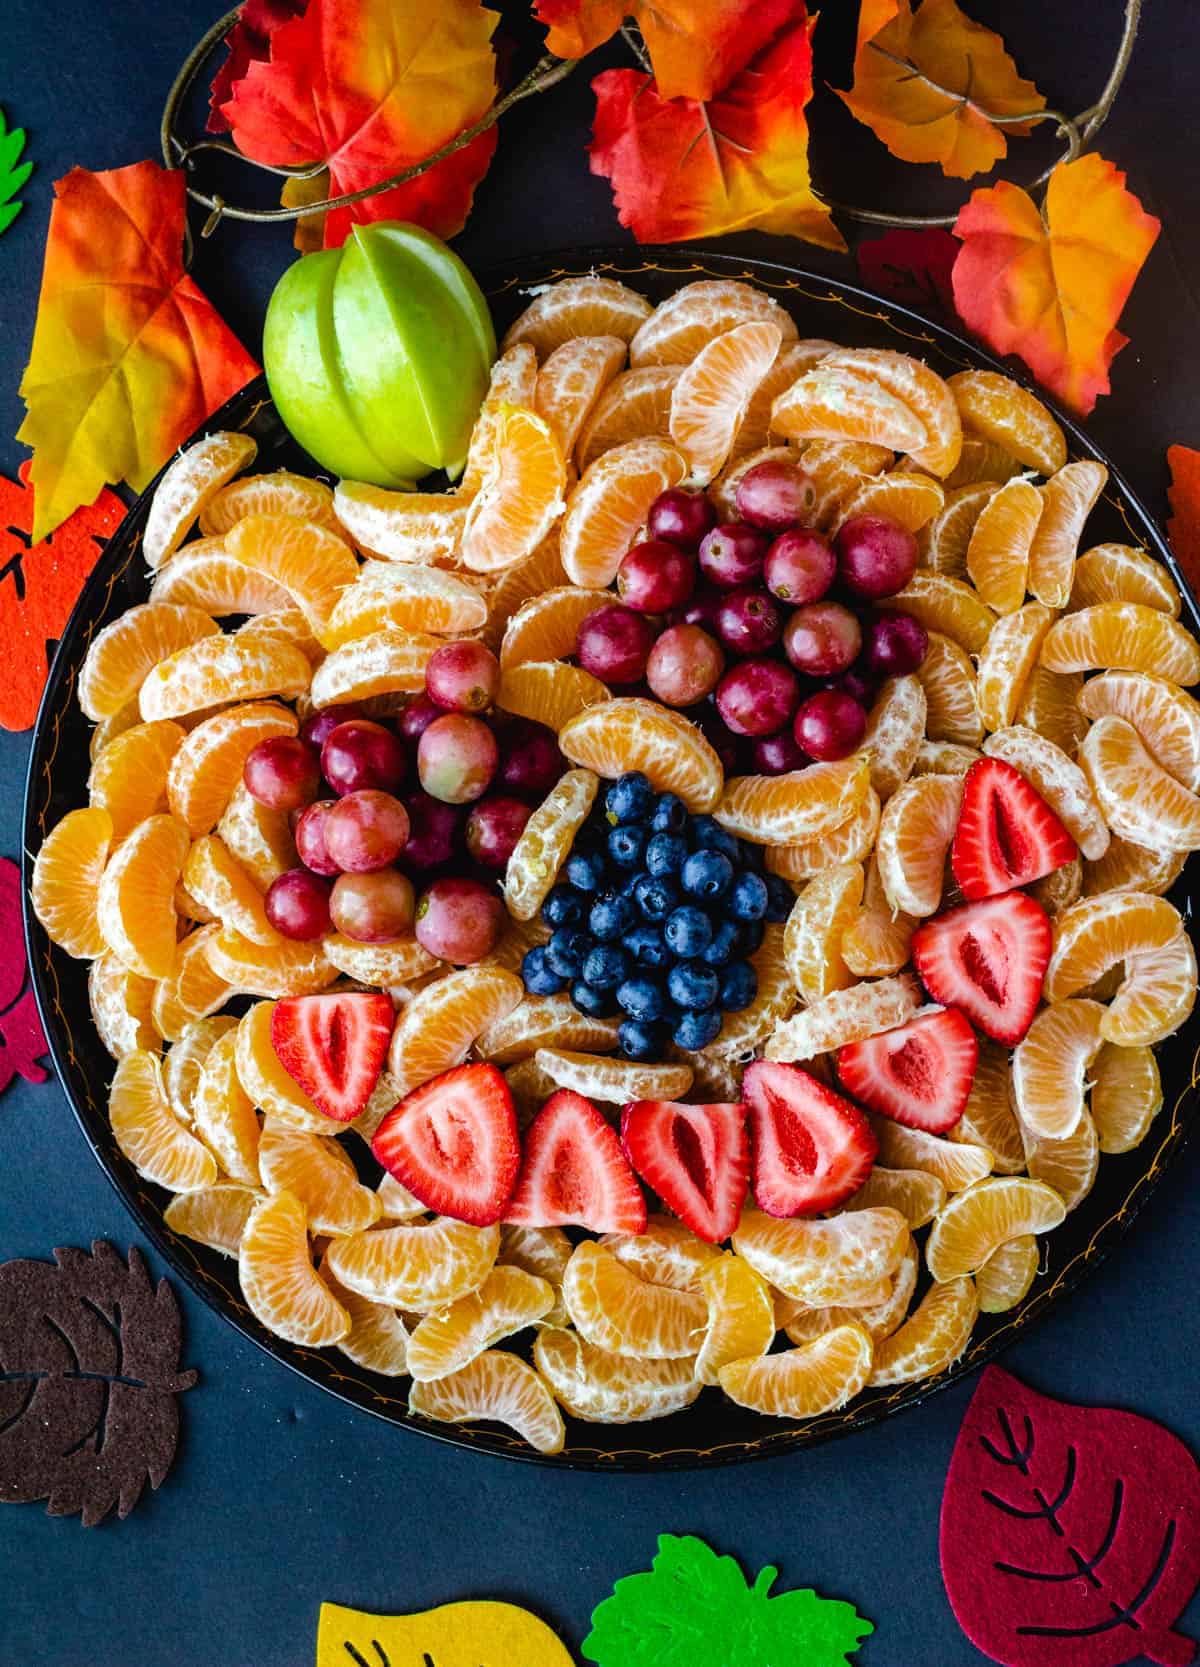
This post may contain affiliate links. As an Amazon Associate, I earn from qualifying purchases. Please read my disclosure.I make basic fruits instantly more festive with a Halloween fruit tray. I arrange clementines, strawberries, grapes, blueberries, and green apple slices into a jack-o’-lantern face that is the perfect healthy snack for Halloween parties. It takes just 10 minutes to make and will have everyone intrigued and reaching for fruit.
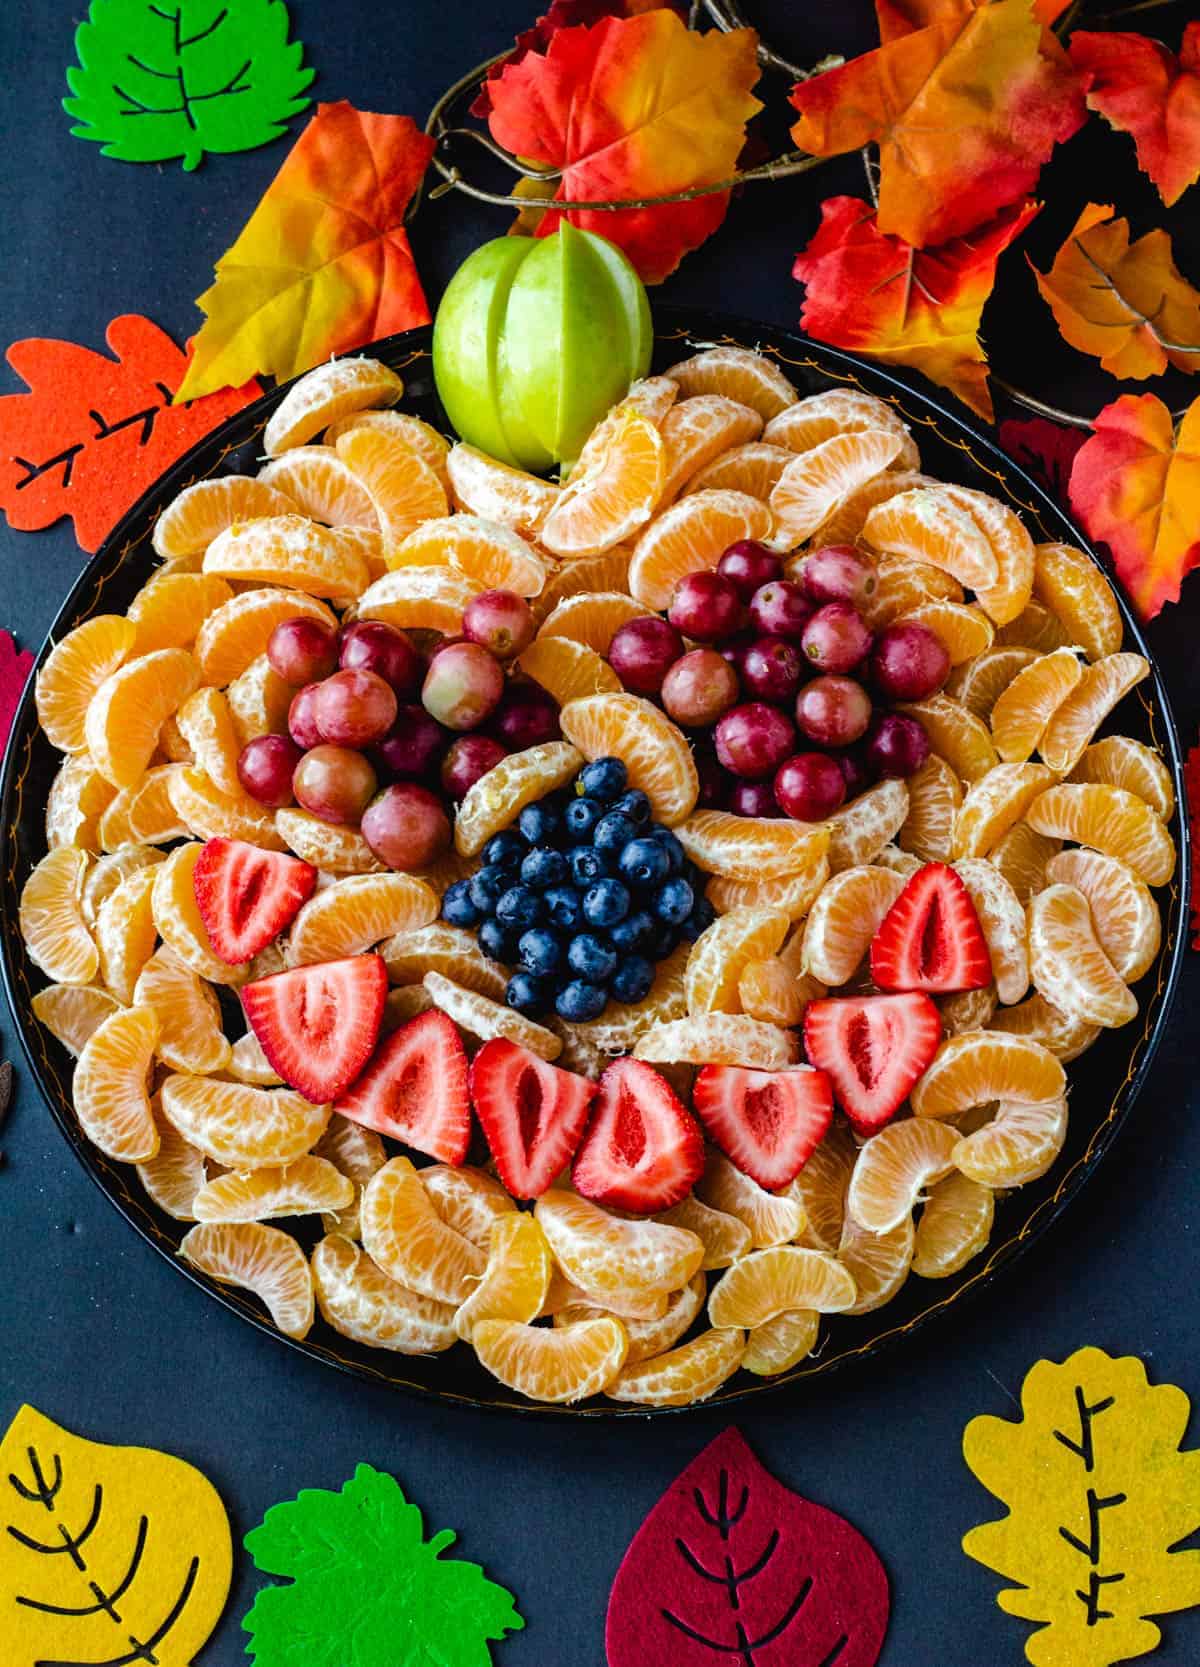
I really love how creative I can get with this Halloween fruit tray. The juicy citrus segments provide the perfect orange color for the pumpkin, while the strawberries are shaped into a bewitching smile. I have always enjoyed fruit dishes with a difference, like a Mexican fruit salad, and this pumpkin-shaped platter is guaranteed to be a showstopper at your next event.
As a mom, I have always found ways to sneak healthy snacks onto dessert tables. Especially those centered around holidays with a strong candy affiliation. My boys have always loved funny face Halloween apples, but a few years ago they asked if I could use more fruit to make funny faces. I told them I could do one better, and the look on their faces was priceless when I first brought out the tray.
👩🏽🍳 Why I Love This Recipe
This pumpkin fruit tray features a variety of fresh fruit, including clementines, grapes, strawberries, blueberries, and apples. As a mom and health coach, you know I love the fact that I can place this platter confidently on the dessert tables, knowing my guests will enjoy it. Even though kids tend to go crazy for candy and chocolates around Halloween, I was actually pleasantly surprised by how many of them preferred the natural sweetness of nature’s candy.
After prepping all the produce for my Halloween fruit tray, the real fun begins. I start by peeling the clementines and arranging their wedges across a large round platter to form the pumpkin. Next, I halve the strawberries and position them into a smile, then place the blueberries in the center for the nose. I separate the grapes into 2 groups for the eyes and finish by slicing the green apple into wedges for the stem. Once the face looks right, I fill any gaps with extra clementine wedges and bring the platter straight to the table.
One year, the kids asked if they could make the Halloween fruit tray. Yes! It would be a great way to keep them busy, and I would cut up all the fruit so that it would remain a safe activity. My boys excitedly told their friends about the pumpkin tray that they would be making as they arrived. My friends and I left our kids at a table with everything they needed and went off to socialize.
When the tray was ready for serving, my husband was summoned to carry it into the dining area. As he walked in, I noticed him stifling a laugh. I looked at the tray and saw an additional ingredient. My boys and their friends added pre-cut raw pumpkin cubes to the tray, which they got out of the fridge. According to them, it made the tray more realistic. What fruit will you add to your tray this Halloween?
🥘 Ingredients
I use 5 types of fruit to create the classic jack-o’-lantern face in this Halloween fruit tray. This is everything I need to make a festive platter:
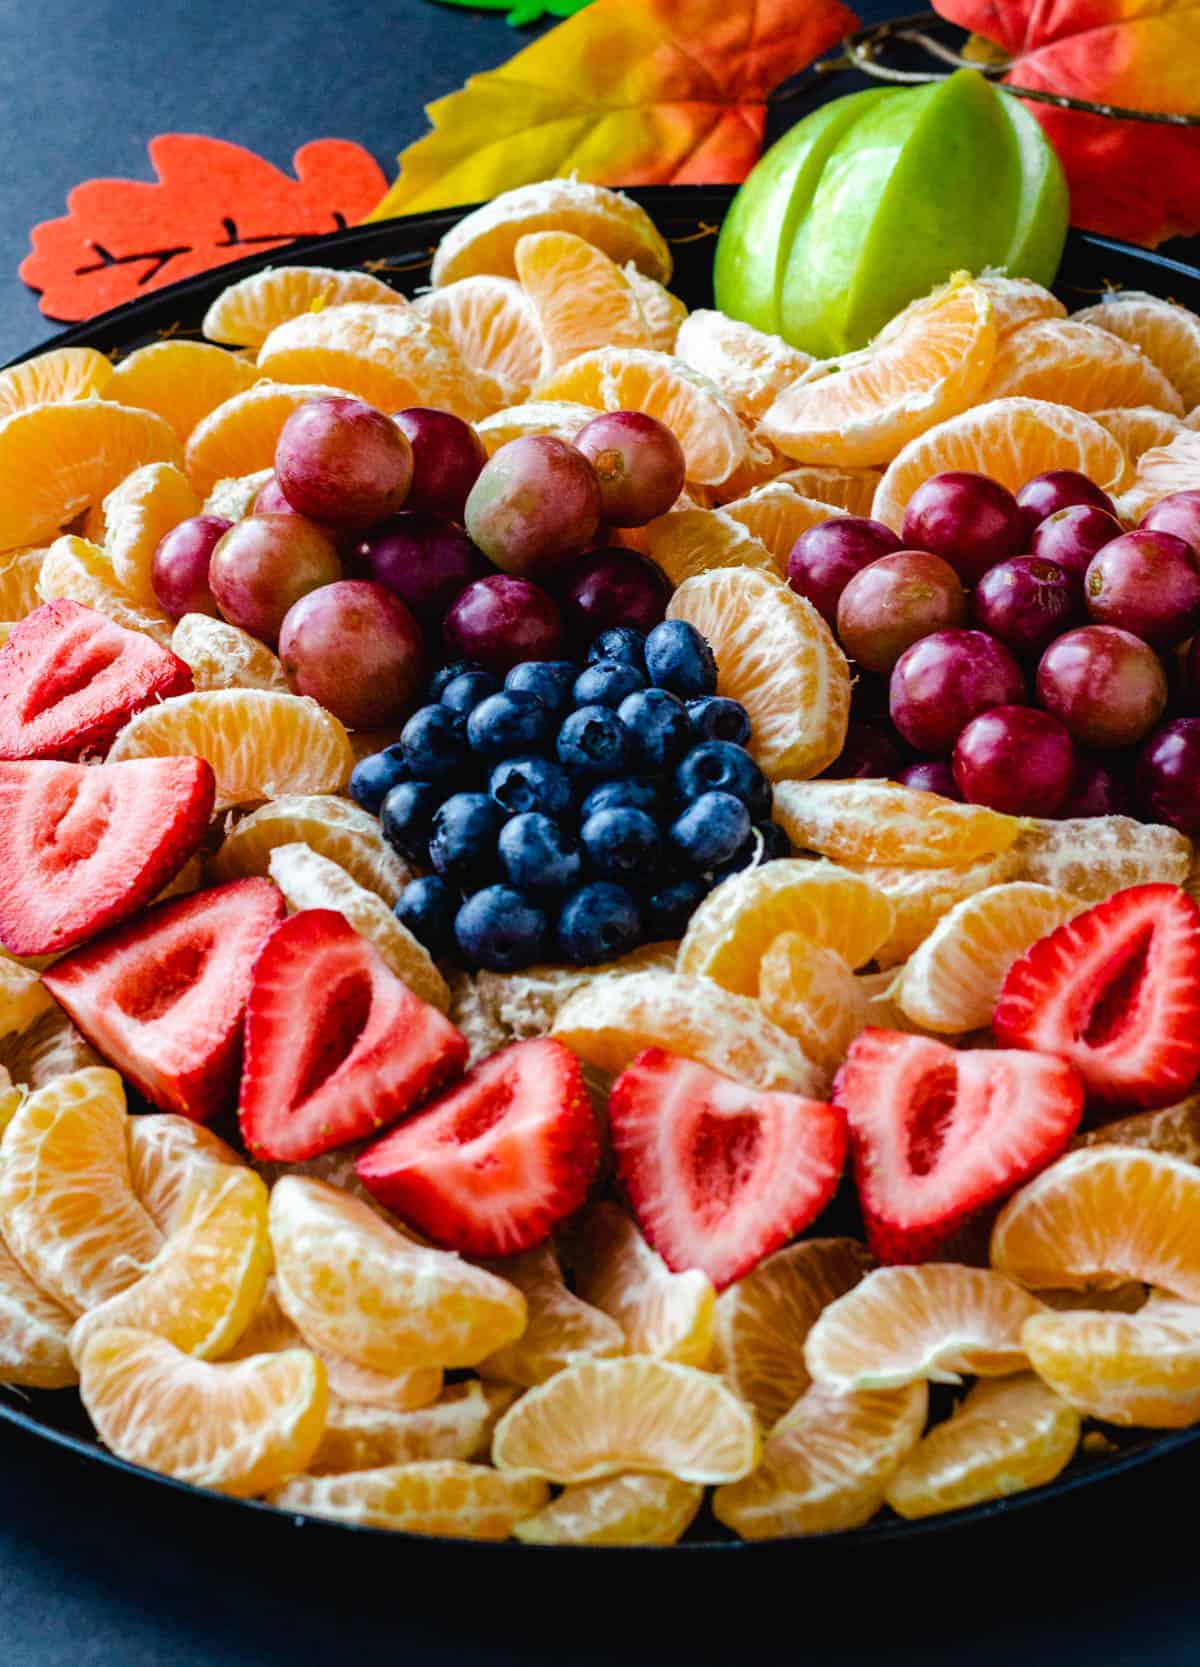
Clementines: I peel and separate the clementines into wedges to form the orange background of the pumpkin. Their bright color creates the main shape of the jack-o’-lantern.
Red grapes: I use washed red grapes to create the 2 eyes on the face.
Blueberries: I arrange blueberries into a small circle or triangle for the nose. Their dark color stands out against the clementines.
Strawberries: I halve the strawberries and arrange them into a curved smile. I choose berries that are similar in size so the mouth looks balanced.
Granny Smith apples: Slicing these into wedges creates the pumpkin stem. Their green skin adds a contrasting color at the top of the platter.
Large round platter: I use a large platter with enough space to arrange the clementine segments into a pumpkin shape.
🔪 How To Make
I assemble everything directly on the serving platter when creating this Halloween fruit tray. This is how I do it:
Prepare the clementines: I start by peeling the clementines and separating all the segments, removing any loose pith or seeds I spot along the way. Then, I arrange the segments across the platter until they form a broad, rounded pumpkin shape.
Create the smile: After washing and removing the green tops from the strawberries, I slice them in half. I arrange the halves into a curved smile near the lower part of the pumpkin.
Add the nose: I place the washed blueberries in the center of the face, arranging them into a small circle or triangle. I keep the shape compact so it stands out clearly against the clementines.
Arrange the eyes: Next, I wash the grapes and separate them into 2 similarly sized groups. I position the groups above and adjust the grapes until both eyes look balanced.
Make the stem: Finally, I cut the Granny Smith apple into wedges and arrange them at the top of the pumpkin to form a green stem. I finish by filling any visible gaps with extra clementine pieces and serve the platter fresh.
💭 Expert Tips
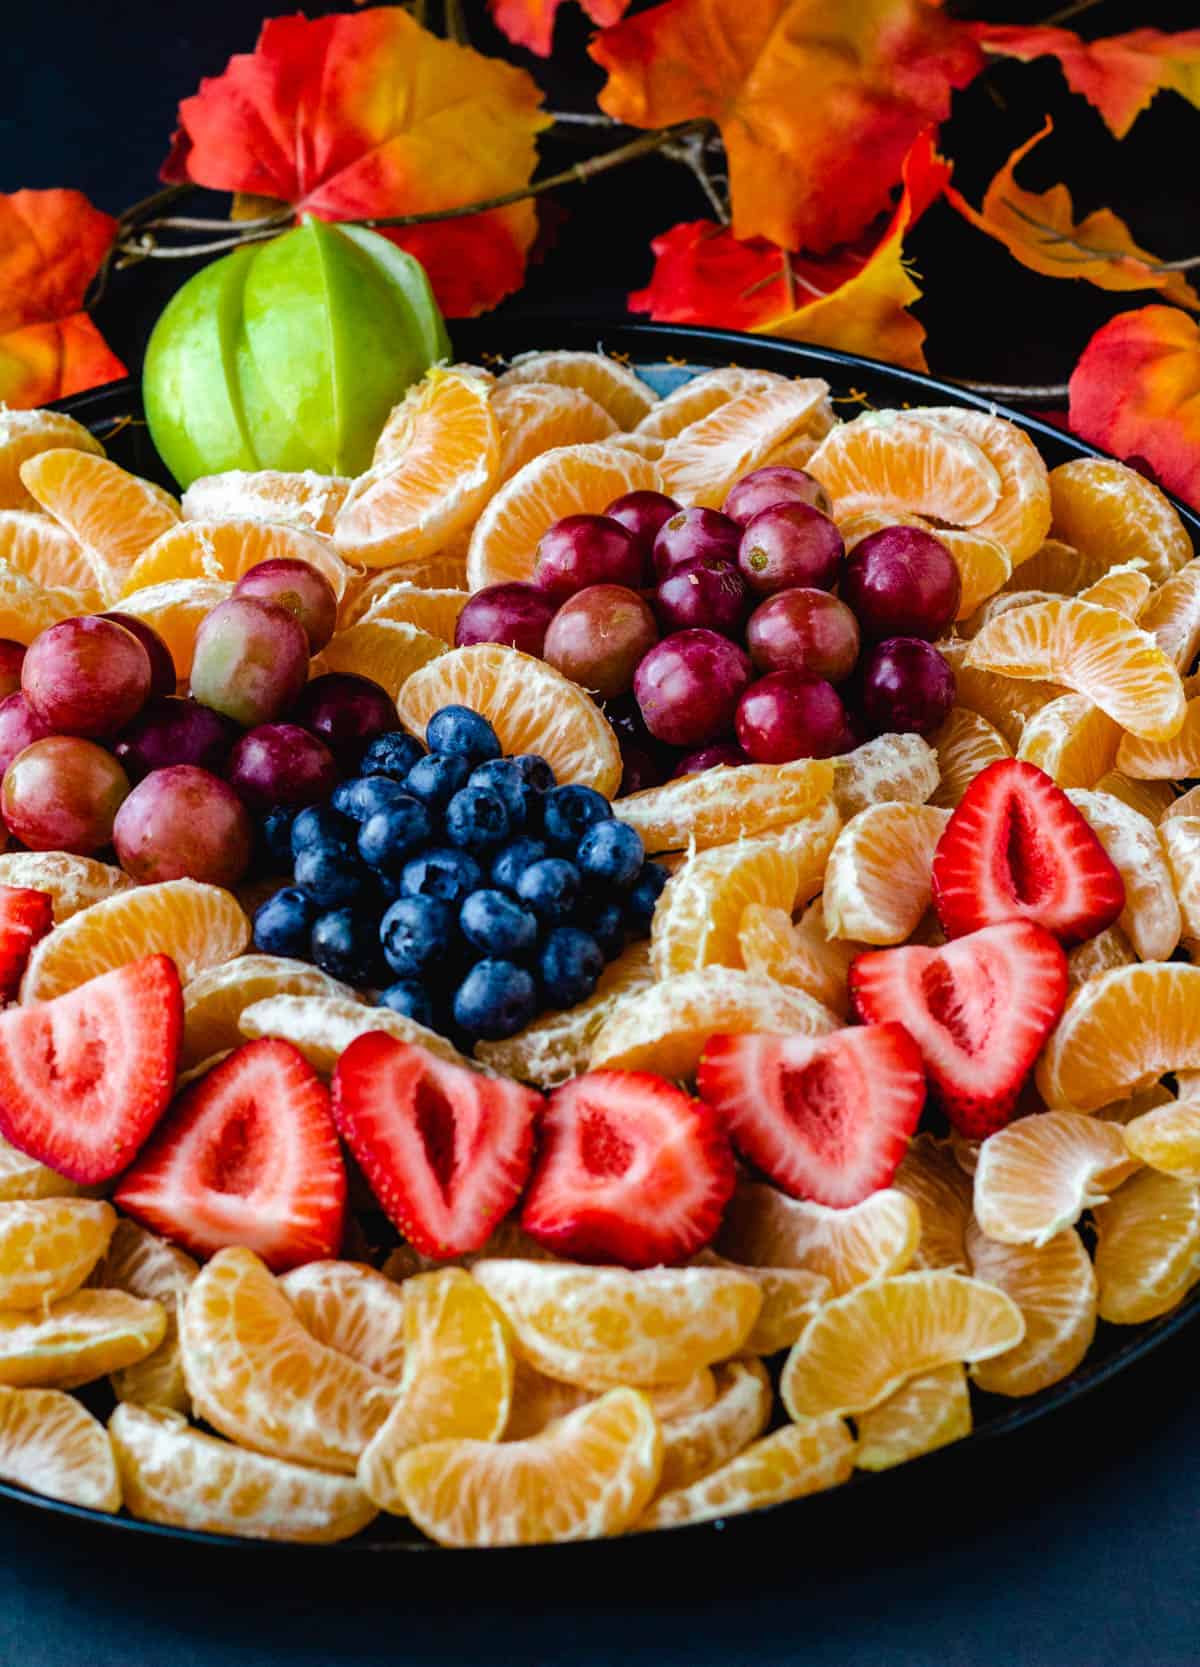
My #1 Secret Tip for this festive Halloween fruit tray recipe is to always arrange the clementine wedges into the pumpkin shape before adding any facial features. This gives me a clear area to work with, and I can adjust the overall outline before placing the small fruit pieces. I also leave a little room around the edges so the pumpkin shape stays recognizable.
Other Tips To Keep In Mind:
- Dry the fruit: I pat the grapes, blueberries, and strawberries dry before arranging them. Excess water can make the platter slippery and cause the smaller pieces to shift.
- Choose similar-size grapes: I group grapes of similar size for the eyes so both sides look balanced. Larger grapes can be cut in half lengthwise for a flatter arrangement.
- Keep the strawberry smile in place: Arranging the strawberry halves close together with their cut sides facing down provides a little more security on the platter. When the pieces are slippery, I pat them dry again before positioning them.
- Cut the apple just before serving: I slice the Granny Smith apple near serving time to reduce browning. A little lemon juice brushed over the cut surfaces can also slow discoloration.
- Keep extra fruit nearby: I reserve a little of each fruit to refresh and refill empty areas as guests snack. This also lets me adjust the face if pieces move while the platter is being carried.
📖 Variations
With all the wonderful fresh produce out there, I like changing the facial features on this Halloween fruit tray. These are 3 different ways you can make it:
Sweet and savory tray: For a more filling party platter, I arrange cubes of vegan cheese and crackers or pretzels within the jack-o’-lantern face. The cheese adds savory bites, while the crackers or pretzels can form extra facial features or background scenery. I like making this for holiday cocktail parties.
Mini fruit pumpkins: For individual snack-sized pumpkin faces, I use half a clementine or orange and keep them intact. Then I use blueberries for the eyes, a tiny strawberry sliver for the mouth, and a piece of almond for a rugged little nose. I secure these with sticky peanut butter and place them carefully in lunchboxes or on party snack boards.
Kiwi stem: I replace the Granny Smith apple stem with 1 peeled kiwi cut into short wedges. I arrange the kiwi pieces at the top of the clementine pumpkin just before serving. I really love the vivid green color of this stem.
🍽 Serving Suggestions
When serving this Halloween fruit tray, I recommend surrounding it with other appropriately spooky and fall-themed snacks. If you have a large gathering, easy-to-grab, individually portioned treats like layered vegan pumpkin desserts are always a smart choice. And for those with a savory tooth, a bowl of healthy homemade Cheez-Its will pair nicely with the fruit and some cheese.
Last year, this tray was front and center for my boys’ Halloween party. I surrounded it with bowls of baked corn tortilla chips, a tray of Halloween Jack-O-Lantern quesadillas, more traditional Halloween candies, some vegan peanut butter cups, and then vegan pigs in a blanket with a variety of sauces. I noticed the kids all looking at the tray, but no one dared to touch it. They were all so fascinated by the pumpkin face that they did not want to disturb it. After some convincing, they quickly grabbed pieces of fruit.
🧊 Storing And ♨️ Reheating
Refrigeration: I assemble this tray close to serving time for the freshest appearance. When I have leftover fruit, I keep it in separate containers in the fridge for 2-3 days.
Freezing: I do not recommend freezing and thawing assembled fruit trays. Instead, I separate the leftover fruit and store it in freezer-safe bags in the freezer for up to 3 months. I reuse them in smoothies.
Reheating: This tray is served cold, so there is no reheating necessary.
❓Recipe FAQs
How can I stop the clementine wedges from sliding around the platter?
I pat away any excess moisture on the clementines before arranging them and place the segments close together so they support one another. I also prefer using a platter with a flat surface. If you have a clean silicone mat that you can place on the tray before assembly, I recommend using that for extra structural support.
What is the best way to transport the fruit tray to a Halloween party?
I find it easiest to transport the washed and prepared fruit in separate sealed containers, then assemble the pumpkin face at the destination. On the odd occasion when I do need to transport a completed tray, I use a flat tray with a dome lid or cover. I keep it level and store it in the refrigerator or in a cool area in the kitchen until serving.
How can I fill gaps in the pumpkin face when certain fruits are out of season?
I use dried cranberries, raisins, pumpkin seeds, or chopped nuts to fill the space when fresh grapes, blueberries, or strawberries are unavailable. You can also use dried peaches, dried mango strips, and goji berries if you want to add more variety. Smaller pieces work best for creating facial features, while seeds and chopped nuts can fill gaps between the clementines to add a bit of character to the pumpkin face. Be sure to keep any nut allergies in mind when serving to a group.

Love this plant based Holiday recipe? Please leave a 5-star rating 🌟 in the recipe below and/or a review in the comment section further down the page!
You can also FOLLOW ME on FACEBOOK, INSTAGRAM, and PINTEREST to see more delicious, healthy, family-friendly food, and if you have any questions, I’m here to help!
Halloween Fruit Tray
I make basic fruits instantly more festive with a Halloween fruit tray. I arrange clementines, strawberries, grapes, blueberries, and green apple slices into a jack-o'-lantern face that is the perfect healthy snack for Halloween parties. It takes just 10 minutes to make and will have everyone intrigued and reaching for fruit.
Servings: 12
Calories: 65kcal
Ingredients
- 12 clementines peeled and separated
- 1 cup red grapes washed and picked off the vine
- 1/4 cup blueberries
- 4 strawberries halved
- 4 slices granny smith apple
Instructions
- Peel clementines and separate them into wedges. Cover tray completely with wedges.
- Slice strawberries in half. Arrange into a smile.
- Place washed blueberries into the center. Arrange into a circle or triangle for the nose.
- Wash grapes. Arrange into two equal circles to make the eyes.
- Slice green apple into wedges. Arrange at the top to create the pumpkin stem.
Notes
- My #1 Secret Tip for this festive Halloween fruit tray recipe is to always arrange the clementine wedges into the pumpkin shape before adding any facial features. This gives me a clear area to work with, and I can adjust the overall outline before placing the small fruit pieces. I also leave a little room around the edges so the pumpkin shape stays recognizable.
- Dry the fruit: I pat the grapes, blueberries, and strawberries dry before arranging them. Excess water can make the platter slippery and cause the smaller pieces to shift.
- Choose similar-size grapes: I group grapes of similar size for the eyes so both sides look balanced. Larger grapes can be cut in half lengthwise for a flatter arrangement.
- Keep the strawberry smile in place: Arranging the strawberry halves close together with their cut sides facing down provides a little more security on the platter. When the pieces are slippery, I pat them dry again before positioning them.
- Cut the apple just before serving: I slice the Granny Smith apple near serving time to reduce browning. A little lemon juice brushed over the cut surfaces can also slow discoloration.
- Keep extra fruit nearby: I reserve a little of each fruit to refresh and refill empty areas as guests snack. This also lets me adjust the face if pieces move while the platter is being carried.
Nutrition
Calories: 65kcal | Carbohydrates: 17g | Protein: 1g | Fat: 1g | Saturated Fat: 1g | Sodium: 1mg | Potassium: 200mg | Fiber: 2g | Sugar: 13g | Vitamin A: 28IU | Vitamin C: 41mg | Calcium: 26mg | Iron: 1mg























Looks so good and its healthy and delicious! Perfect!
This is adorable and perfect for my party.
So excited for Halloween recipes. I love this idea! Bookmarked to make for Halloween 🙂
It’s so nice to have healthy choices at Halloween with all the candy around. This is such a cute idea. Saving for Halloween.
I am jealous to see such decorated platter with fruits. Looking so delicious, its been a long time since I made like that. with kids it is like a quick fix and finish it off. I loved it.