

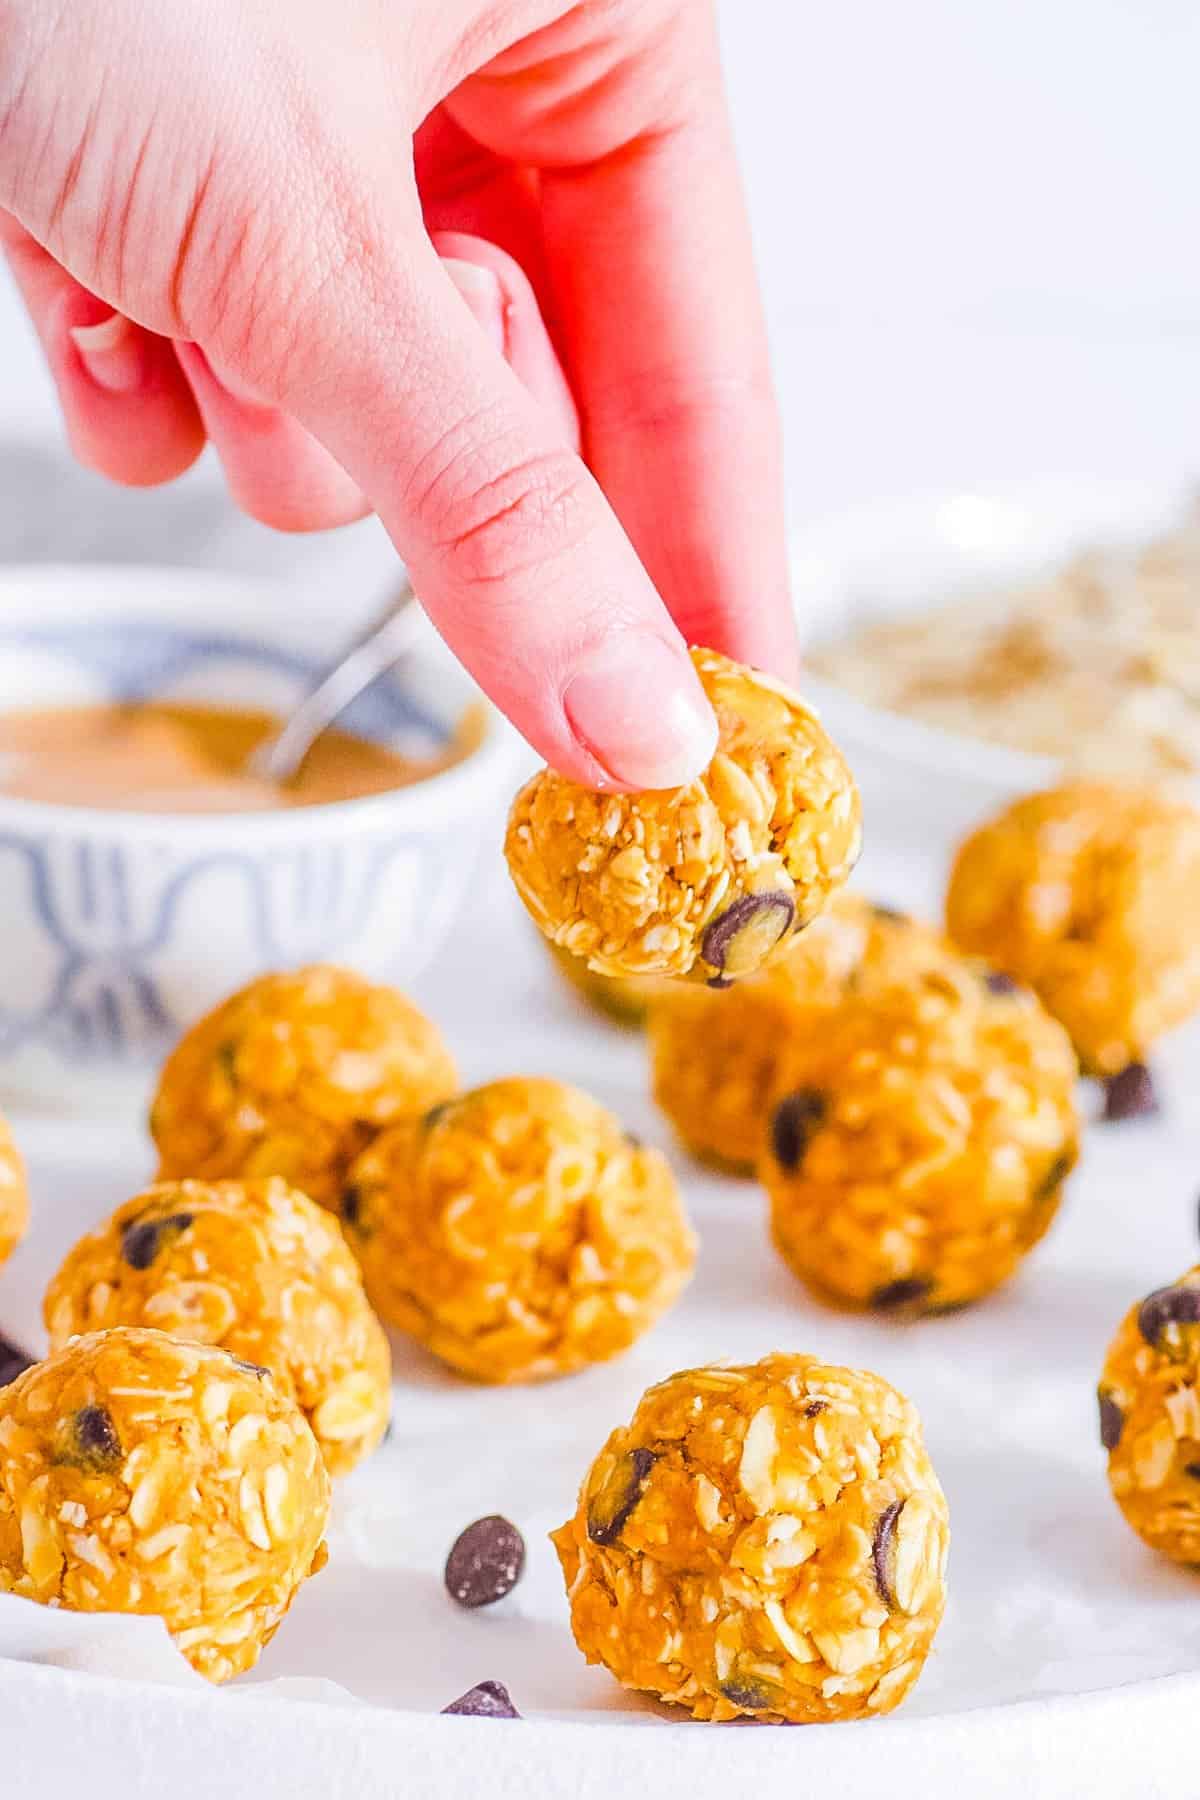
Healthy No-Bake Peanut Butter Bliss Balls
This post may contain affiliate links. As an Amazon Associate, I earn from qualifying purchases. Please read my disclosure.My no-bake, healthy peanut butter bliss balls are loaded with creamy peanut butter and chocolate flavor, making them a hit with both kids and adults alike. Enjoy these as an on-the-go breakfast, wholesome snack, or healthy dessert alternative! They’re also dairy-free, vegan, gluten-free, and low in sugar, making them ideal for a variety of dietary preferences.
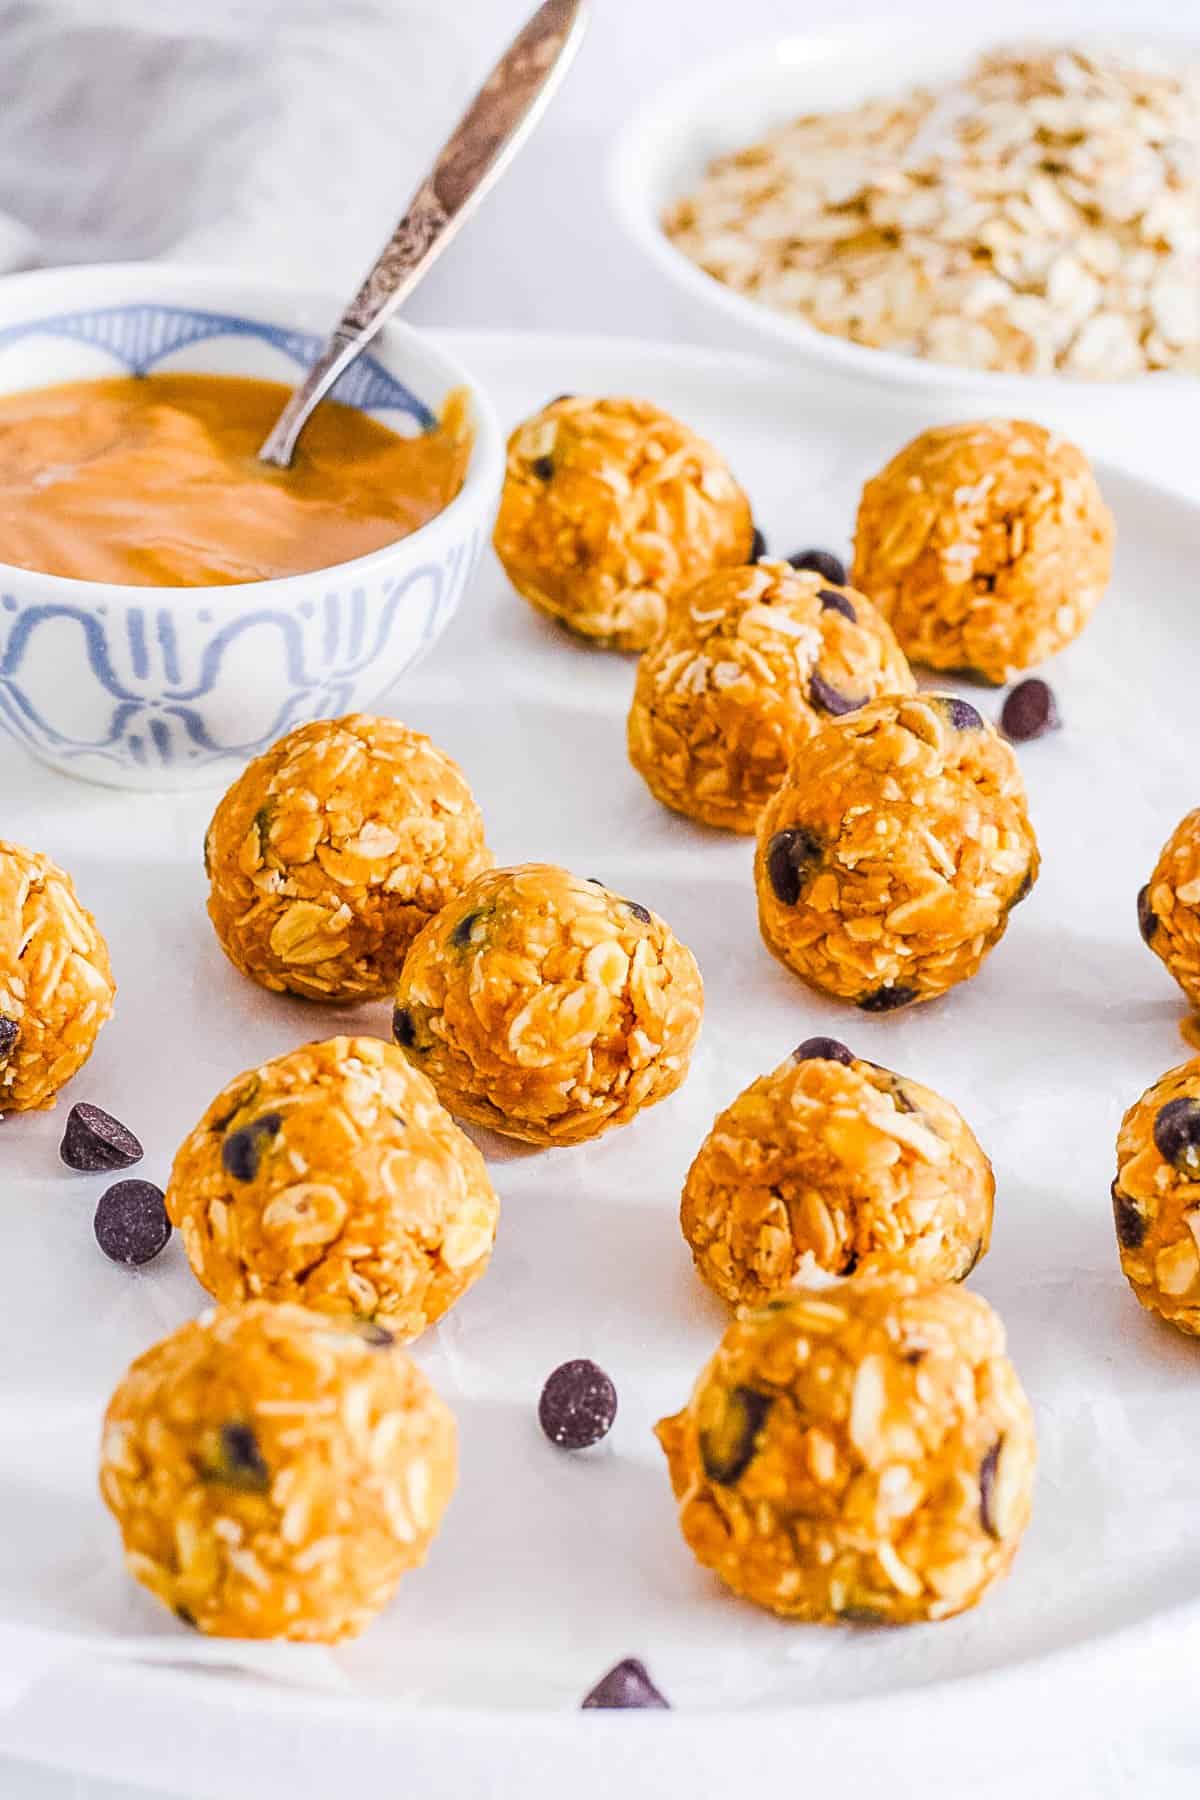
Indulge in my delicious no-bake peanut butter bliss balls, affectionately called “cookie dough bites” by my daughter. They taste like dessert, but are totally guilt-free and nutrient-rich! I love bliss ball recipes like this one because they come together quickly, and always satisfy my sweet tooth!
With only five simple ingredients and just ten minutes of prep time, bliss balls are a perfect option for busy days. I especially love making a huge batch at the beginning of the week, and enjoying them all week long for ultimate convenience. I find that they taste even better the next day, once they’ve had time to chill in the fridge for a while longer!
👩🏽🍳 Why I Love This Recipe
These protein balls with peanut butter are such a fun treat for any time of day! I really love how versatile they are – I’ll often use them as part of a quick breakfast, for packing in my kids’ lunches, or as a mid-afternoon snack.
Made with natural peanut butter, hearty oats, and a touch of pure maple syrup, I’ve crafted these bliss balls to be as healthy as possible. You won’t find any refined sugar here, even with these healthy swaps they still taste just like cookie dough. And each ball has only 90 calories and 3 grams of sugar!
I’ve also made sure that these wholesome ingredients can come together with minimal equipment required. No need to deal with your bulky food processor and spend all that extra time cleaning!
And my all time favorite thing about this recipe is that it’s a great way to involve kids in the kitchen. My kids have so much fun helping me out and adding in their own special twists.
Your family can also customize them in so many different ways, changing things up based on your preferences! I’ll share my favorite variations later in this post (like my peanut butter bliss balls with protein powder)!
Latest Recipe Video!
🥘 Ingredients
My easy peanut butter bliss balls recipe calls for just 5 nutritious ingredients, all easily found in your pantry or local grocery store. Here’s what you need:
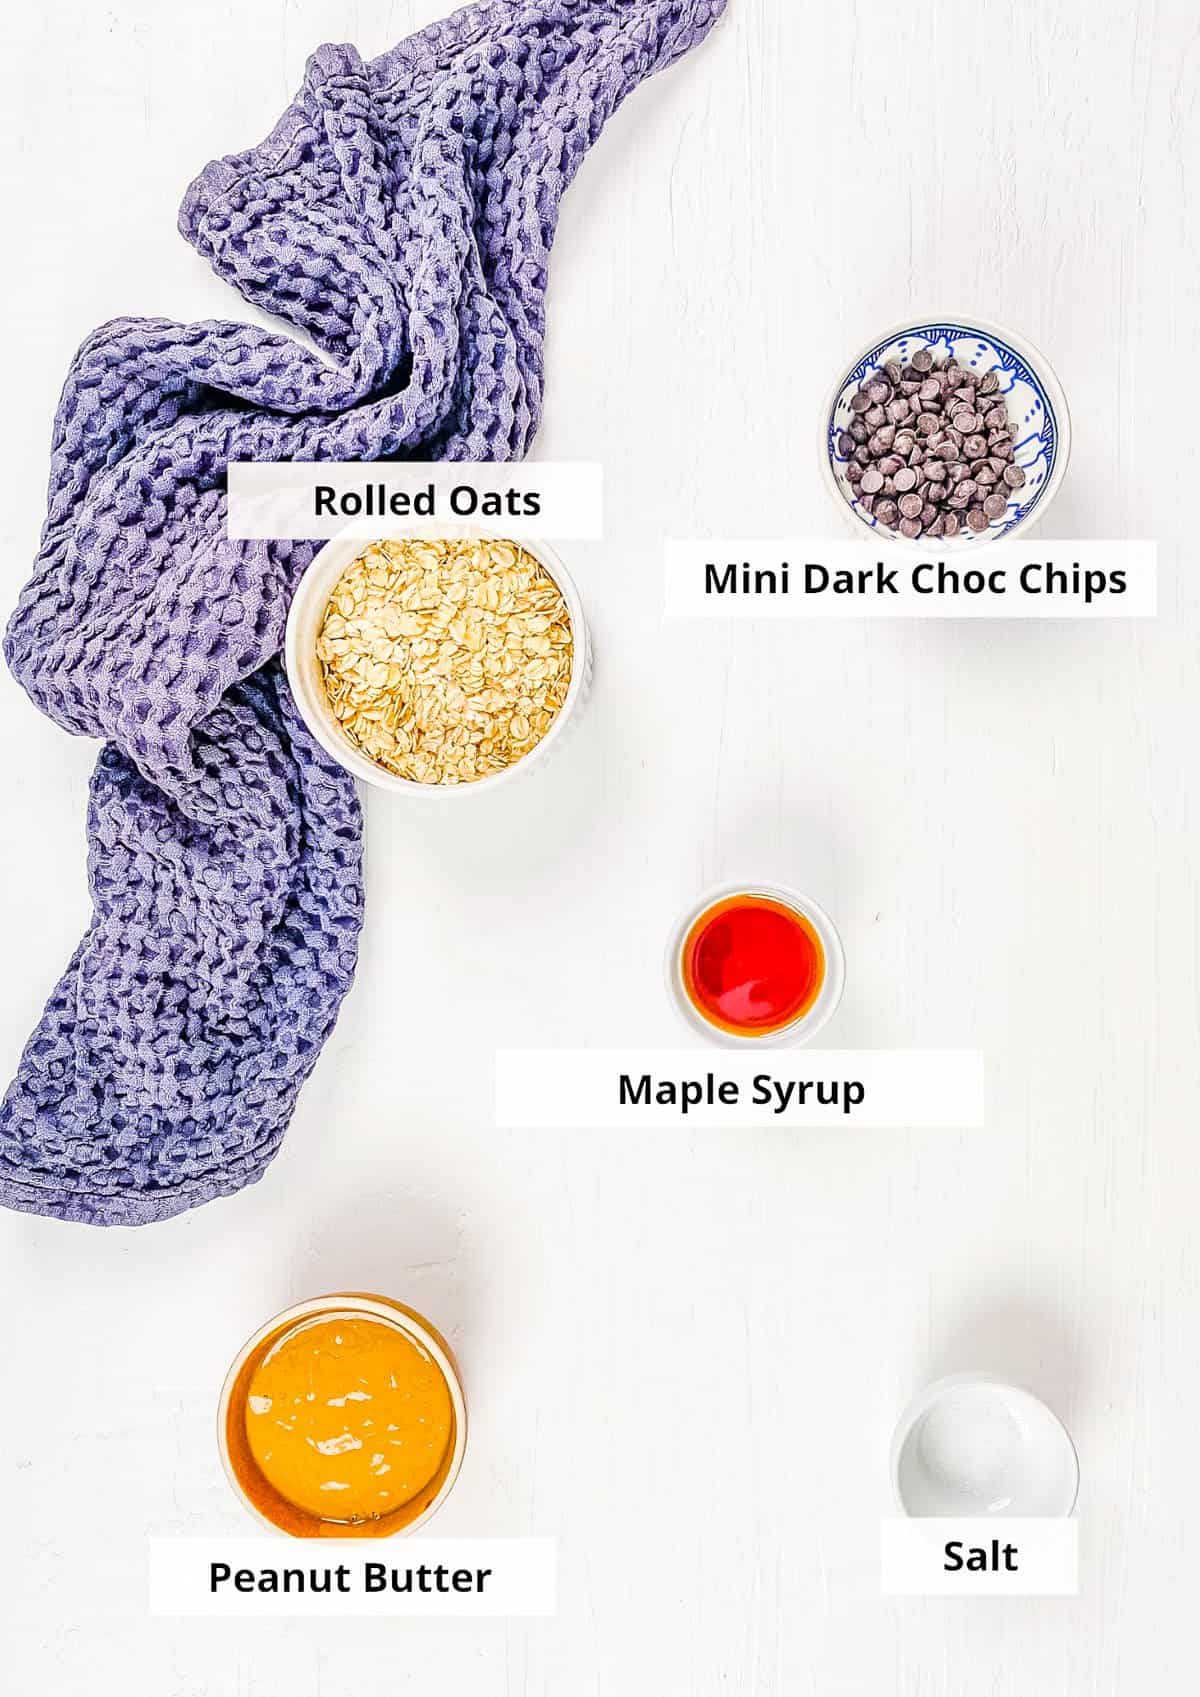
Oats: I’ve found that rolled oats work best for these kid-friendly bliss balls. I don’t recommend using oat flour or quick oats as it won’t have the same texture as whole oats, and won’t hold up as well.
Natural Peanut Butter: I use creamy peanut butter to bind all the ingredients together and add a boost of protein to these energy bites. If you don’t have peanut butter, try almond butter as a 1:1 substitute. Other nut butters (like cashew butter or a mixed nut butter) should also work in place of peanut butter, but the bites might have a slightly different consistency since some nuts create a thinner or runnier butter than others!
Dark Chocolate Chips: I prefer using dark chocolate chips for a healthier choice. These can be regular or mini chocolate chips. To keep this recipe vegan-friendly, I’ll use dairy-free chocolate chips. If you don’t need these to be vegan, then semisweet, white chocolate, or milk chocolate chips are all yummy options.
Maple Syrup: The only added sugar is natural maple syrup which gives the bliss balls a slightly sweet taste. If you don’t have maple syrup on hand, agave, raw honey, or vegan honey work.
Vanilla Extract: Pure vanilla extract brings out the richness of the chocolate. Sometimes I also add a pinch of salt to really enhance the sweetness. For a nutty flavor, try using almond extract.
🔪 How To Make Peanut Butter Bliss Balls
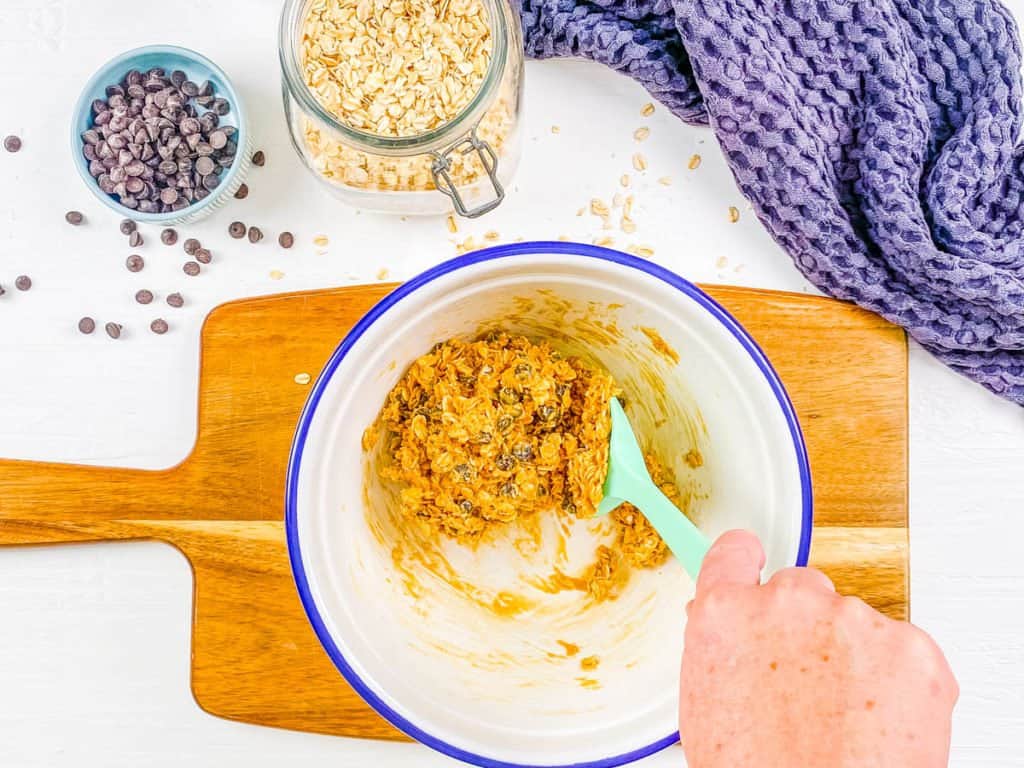
My vegan no bake peanut butter balls are so easy to make – they’re ready in just 3 simple steps. Let me show you how to make these healthy dessert balls:
Combine Ingredients: In a large bowl, using a wooden spoon, I start by stirring together the oats, peanut butter, chocolate chips, maple syrup, vanilla, and salt until combined.
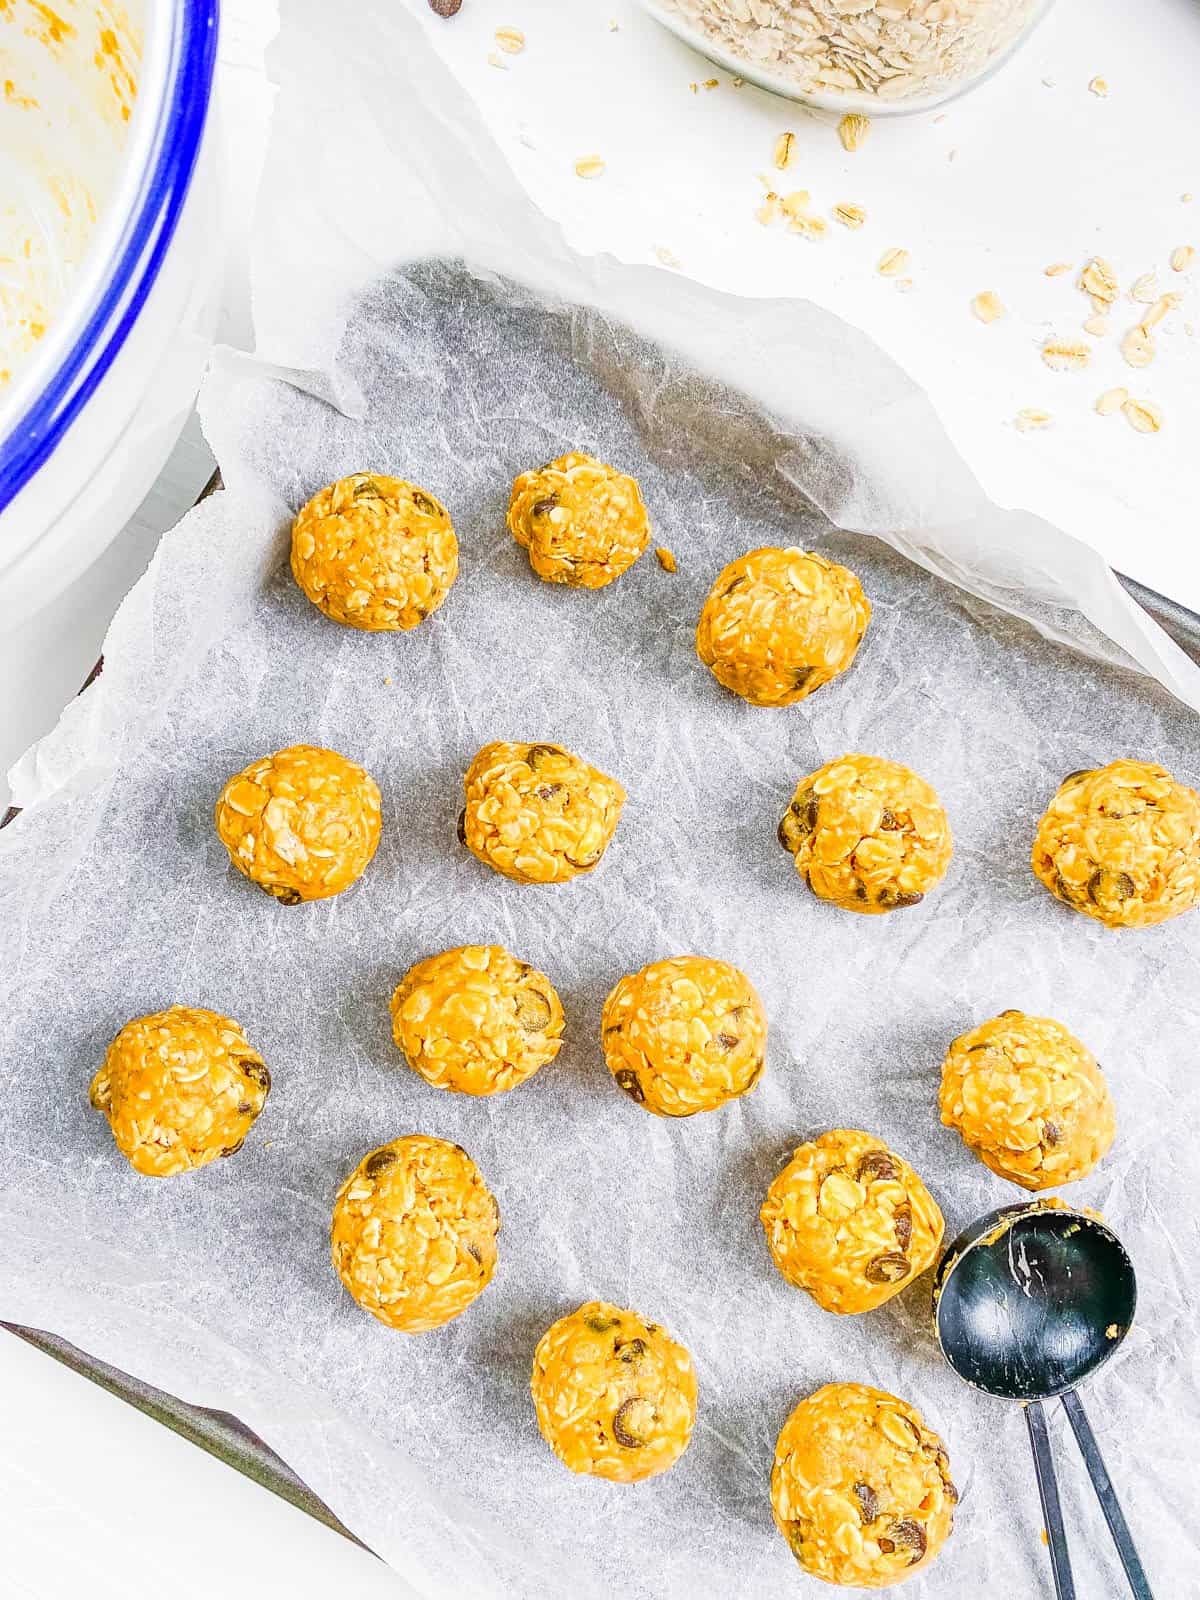
Form The Bliss Balls: Next, I line a baking sheet with parchment paper. Taking small handfuls of the mixture, I roll them into small balls 1-2 inches in size – about the size of a golf ball or ping pong ball. I prefer to use a cookie scoop to make this step extra easy. Place each ball onto the baking sheet.

Let The Balls Set: Once rolled, I refrigerate these peanut butter snack balls for 30 minutes or until solid.
💭 Expert Tips
My #1 Secret Tip for this recipe is to make sure you measure ingredients precisely, with the right ratio of wet to dry ingredients.
While there is a little wiggle room with these bliss balls due to them being a no-bake recipe, I recommend being precise with all measurements to ensure ensures that the mixture has the right consistency to hold together without being too sticky or crumbly.
The creamy peanut butter is critical as the binding ingredient for these bliss balls, and I find it to be especially important to measure correctly. Too much or too little will throw the whole recipe off, leading to a mixture that is either too wet and sticky or too dry and crumbly.
After trial and error, I have found that achieving this balance is important for forming perfect bliss balls that stay intact and have a great texture.
Other Tips To Keep In Mind:
- Use The Right Tools: I like to use a cookie scoop to get all of these no-bake bliss balls the same size and to help my hands stay mess free!
- Check The Oats: If you or someone in your family is gluten intolerant, be sure to check the packaging on your oats for gluten-free certification. Some oats can be at risk for contamination with gluten substances.
- Involve The Kiddos: My kids love to help out in the kitchen, and this no-bake recipe is perfect for kids of all ages! They can learn how to measure out ingredients, combine ingredients, and roll the mixture into perfect ball shapes!
- Adjust For Moisture: If the dough seems too wet to mold into balls, consider adding a tablespoon or two of oat flour or almond flour. This will help to firm the mixture up so that it holds its shape and doesn’t stick to your hands.
- Bliss Balls For Kids: If you want to make these as toddler peanut butter balls I recommend reducing or omitting the sugar! You might also want to cut them into smaller bites when serving.
📖 Variations
I’ve perfected a few easy swaps and add-ins for when I’m looking to switch up the taste or texture a bit with these healthy kid-friendly bliss balls. There is something for any occasion! Here are my favorite variations:
Peanut Butter Protein Balls: If you want to turn these peanut butter protein bliss balls, consider adding a scoop of vegan vanilla protein powder to the batter before mixing it. You can use up to 2 scoops of protein powder, depending on the flavor of the protein powder you use. Sometimes I also add 1 tablespoon of ground chia seeds, flax seed, or hemp seeds for an extra boost of protein and healthy fats.
Chocolate Bliss Balls With Peanut Butter: For a double serving of chocolate, add a tablespoon of cacao or cocoa powder to the batter before mixing. I love the rich and indulgent flavor that this gives this recipe! I serve this as a healthy kids dessert often!
Peanut Butter Date Bliss Balls: For a sweeter flavor, I like to add a ¼ cup of Medjool dates, soaked and drained. I use a food processor when adding dates so that they are completely incorporated with the peanut butter and oats.
Sugar-Free Bliss Balls: If you want to make these no-bake peanut butter balls truly sugar-free, you can omit the maple syrup and use sugar-free chocolate. I think they still taste pretty good thanks to the natural sweetness from the vanilla and chocolate chips! If you are making these peanut butter balls for toddlers, this is a good option.
Mix-Ins: Add your favorite mix-ins to give these peanut butter energy balls some texture. I find that crushed walnuts, pecans, peanuts, sunflower seeds, and cacao nibs work really well in this recipe. My other favorites are dried fruit like cranberries, raisins, dried apricots, and shredded coconut. I also love adding spices like a pinch of sea salt, cinnamon powder, nutmeg, or pumpkin pie spice into the mixture. When making these as toddler protein balls, be mindful of the size of the nuts and dried fruit.
🍽 Serving Suggestions
While I love these healthy bliss balls with peanut butter on their own for an easy grab-and-go snack or healthy dessert, it can be so fun to get creative with other ways to serve these! Try some of these ideas:
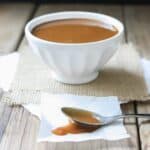
Toppings: For a decadent dessert I love to drizzle chocolate sauce or caramel sauce (like the one on this no-bake salted caramel cheesecake) over these no bake snacks!
Ice Cream: My kids love to mix these no bake peanut butter dessert balls into silken tofu ice cream for a delicious treat.
Drinks: Energy balls can be found at a lot of coffee shops nowadays, so it only feels right to create those coffee shop vibes at home! I have been loving these balls with my oatmilk honey latte or iced ube latte! You can also do a creamy mixed berry smoothie alongside these protein balls for kids as an afternoon snack.
With Other Energy Bites: Make a spread of energy bites and serve these alongside my vegan protein balls, peanut butter date balls, and these vegan chocolate truffles! I love this idea for parties and special occasions!
🫙 Storage Instructions
Room Temperature: I store these dairy free peanut butter balls in an airtight container at room temperature for up to 3 days.
To Refrigerate: After placing in an airtight container or resealable plastic bag, I’ll store these in the fridge for maximum freshness. They’ll be good for about one week!
Freezer: I don’t recommend storing these vegan energy balls in the freezer as they won’t taste as good when defrosted.
❓Recipe FAQs
What type of peanut butter is best to use?
The best type of peanut butter to use is natural peanut butter with no added sugars, oils, or preservatives. I recommend looking for a brand that has just one ingredient listed: peanuts. You can also use a brand that has peanuts and salt listed as the only two ingredients.
How can I adjust the recipe if the mixture is too dry?
There are two ways I’d recommend adjusting this recipe if your mixture is too dry: 1) Add more peanut butter – it’ll help bind the ingredients and add moisture. 2) Add a little bit of coconut oil, maple syrup, or even a touch of applesauce – these ingredients will add moisture and flavor to your peanut butter oat balls!
🍪 More Sweet Snacks & Delicious Recipes!

Love this plant based dessert recipe? Please leave a 5-star rating 🌟 in the recipe below and/or a review in the comments section further down the page!
You can also FOLLOW ME on FACEBOOK, INSTAGRAM, and PINTEREST to see more delicious, healthy, family-friendly food, and if you have any questions, I’m here to help!
📋 Recipe Card
🎥 Watch How to Make It

Healthy No-Bake Peanut Butter Bliss Balls
My healthy, easy no bake peanut butter bliss balls are loaded with creamy peanut butter and chocolate flavor, making them a hit with both kids and adults alike. Enjoy these as an on-the-go breakfast, wholesome snack, or healthy dessert alternative! They’re also dairy-free, vegan, gluten-free, and low in sugar, making them ideal for a variety of dietary preferences.
Servings: 16 balls
Calories: 93kcal
Ingredients
- 1 cup rolled oats or quick oats
- ½ cup creamy peanut butter or any nut butter will work!
- ¼ cup mini dark chocolate chips
- 1 tbsp maple syrup increase to 2 tbsp if you want it to be sweeter
- ¼ tsp vanilla extract
- pinch of sea salt
- 1 scoop vegan vanilla protein powder optional
Instructions
- In a large bowl, using a wooden spoon, stir together the oats, peanut butter, chocolate chips, maple syrup, vanilla, salt (and protein powder, if using) until combined.
- Line a baking sheet with parchment paper.
- Taking small handfuls of the mixture, roll them into small balls 1-2 inches in size. Or you can use a cookie scoop. Place them onto the baking sheet.
- Refrigerate the bites for 30 minutes or until solid. Store in an air-tight container in the fridge (they will last at least 1 week, and likely 2!)
Notes
- Use The Right Tools: Use a cookie scoop to get all of the balls the same size.
- Check The Oats: If you or someone in your family is gluten intolerant, be sure to use gluten-free oats.
- Involve The Kiddos: This is such a great no bake recipe for kids to make – get them in the kitchen!
- Adjust For Moisture: If the dough seems too wet to mold into balls, consider adding a tablespoon or two of almond flour.
- Sugar Free: If you want to make these truly sugar-free, you can omit the maple syrup, and they will still taste pretty good.
- Peanut-Free: Use your favorite alternative nut butter or seed-based butter.
- Nutritional information includes protein powder. Note: for even more protein, use 1 scoop of vegan vanilla protein powder and 1 scoop of peanut butter protein powder.
Nutrition
Serving: 1ball | Calories: 93kcal | Carbohydrates: 8g | Protein: 4g | Fat: 5g | Saturated Fat: 2g | Polyunsaturated Fat: 1g | Monounsaturated Fat: 2g | Cholesterol: 4mg | Sodium: 43mg | Potassium: 92mg | Fiber: 1g | Sugar: 3g


Can you add banana?
Hi Shannon! You can add dried banana but I wouldn’t recommend adding fresh/wet banana – it’ll change the consistency of these balls and reduce their shelf life. Hope that helps!
This recipe was very easy to make with small kids. Loved it!
Yay! So happy to hear that Elena! 🙂
This is the week’s best snack, it took me no time to make it filling and perfectly sweet! It also kept so well till the end of the week.
Great to hear, thanks for letting me know Seema!
They’re so easy to make and taste incredible. The combination of peanut butter and oats is just perfect. I love that they’re a guilt-free snack that satisfies my sweet tooth!
Thanks so much Gianne!