

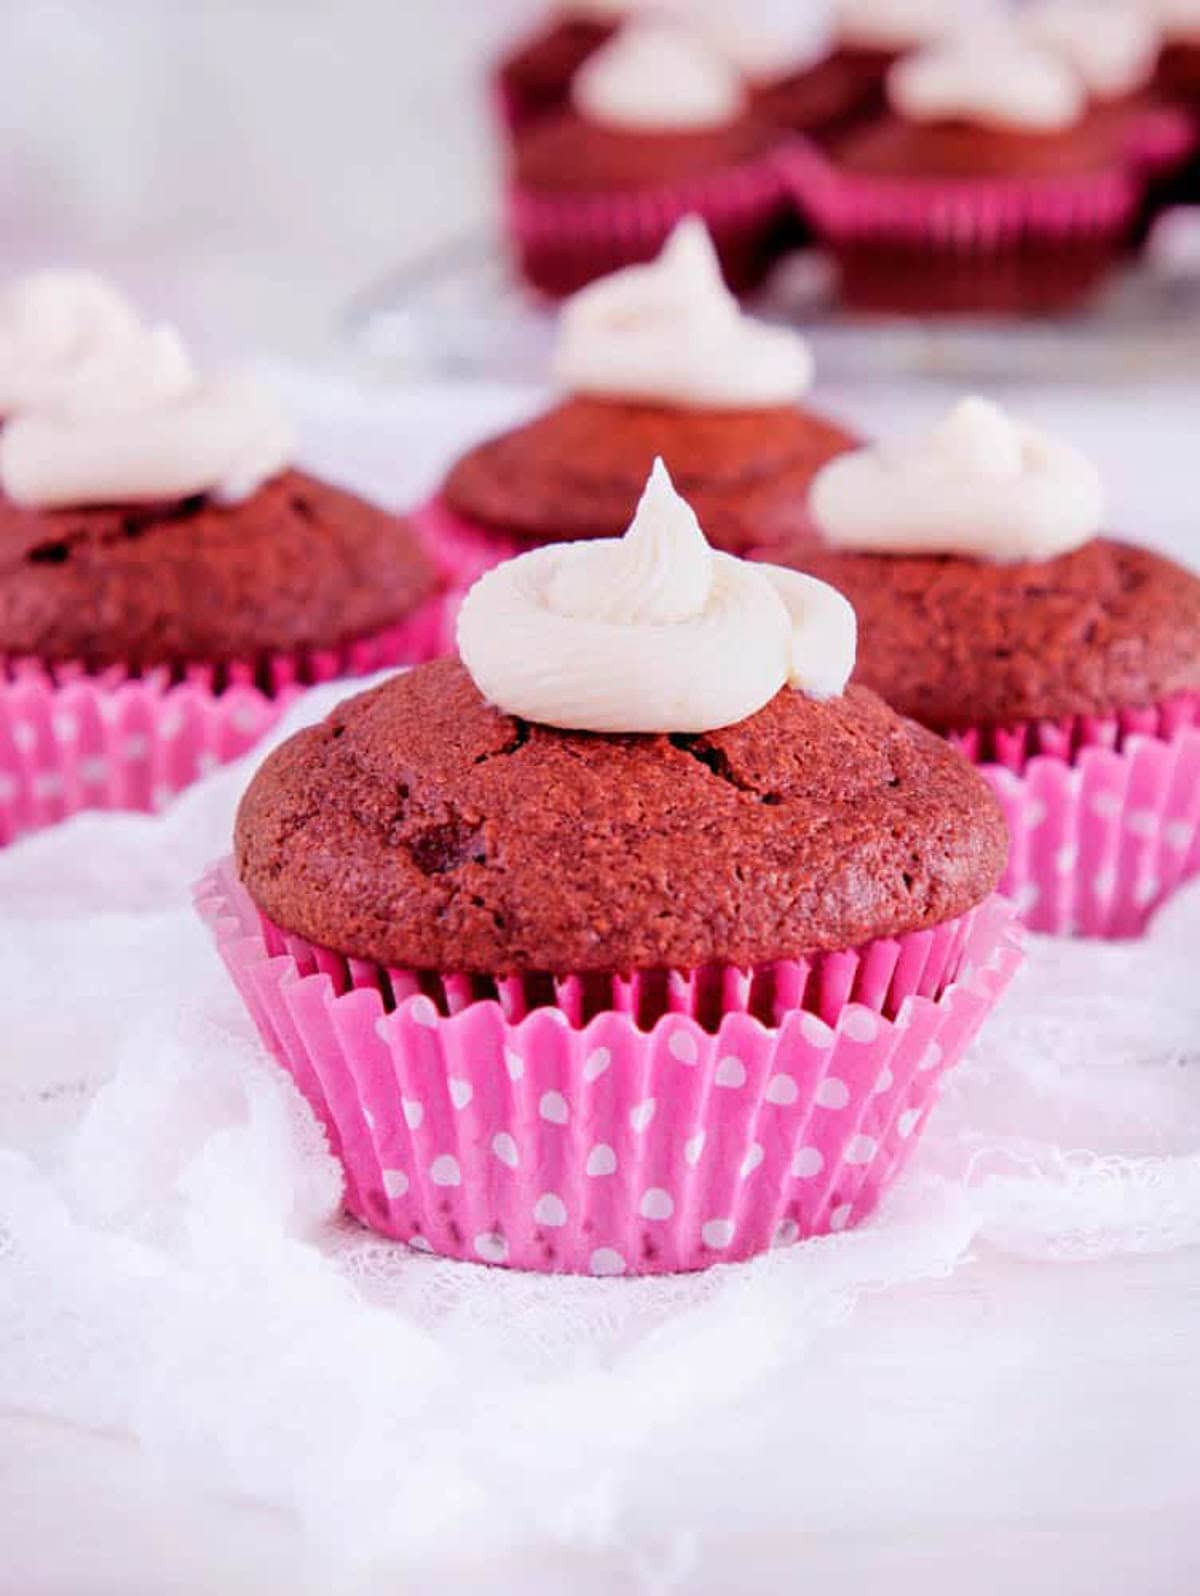
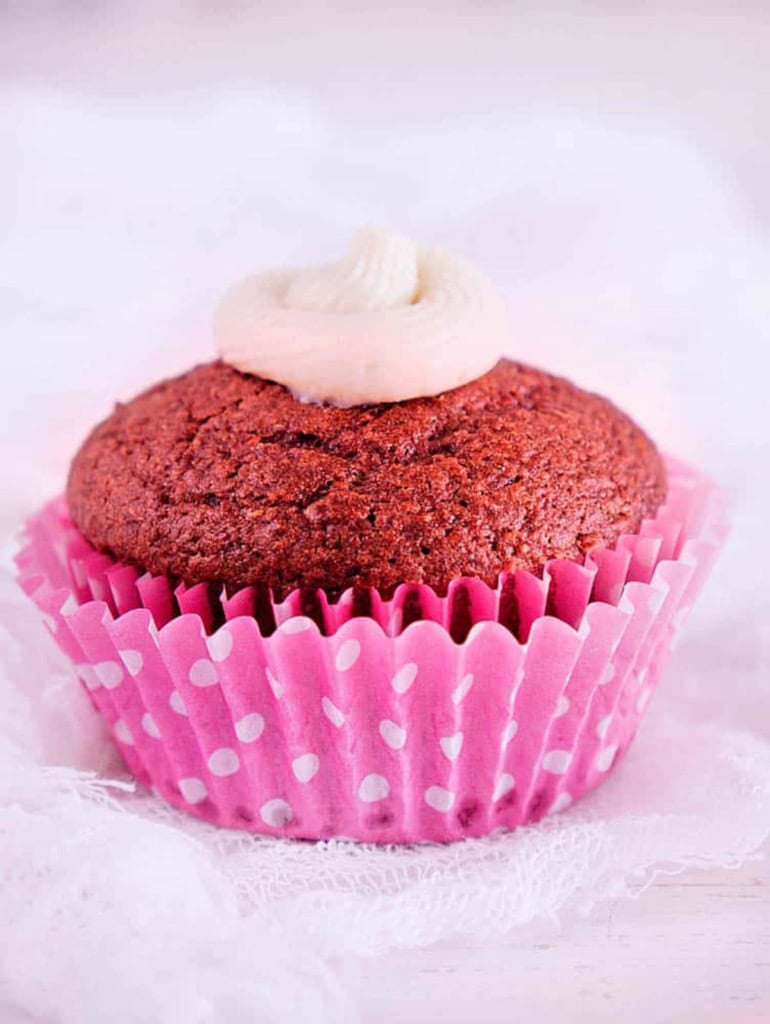
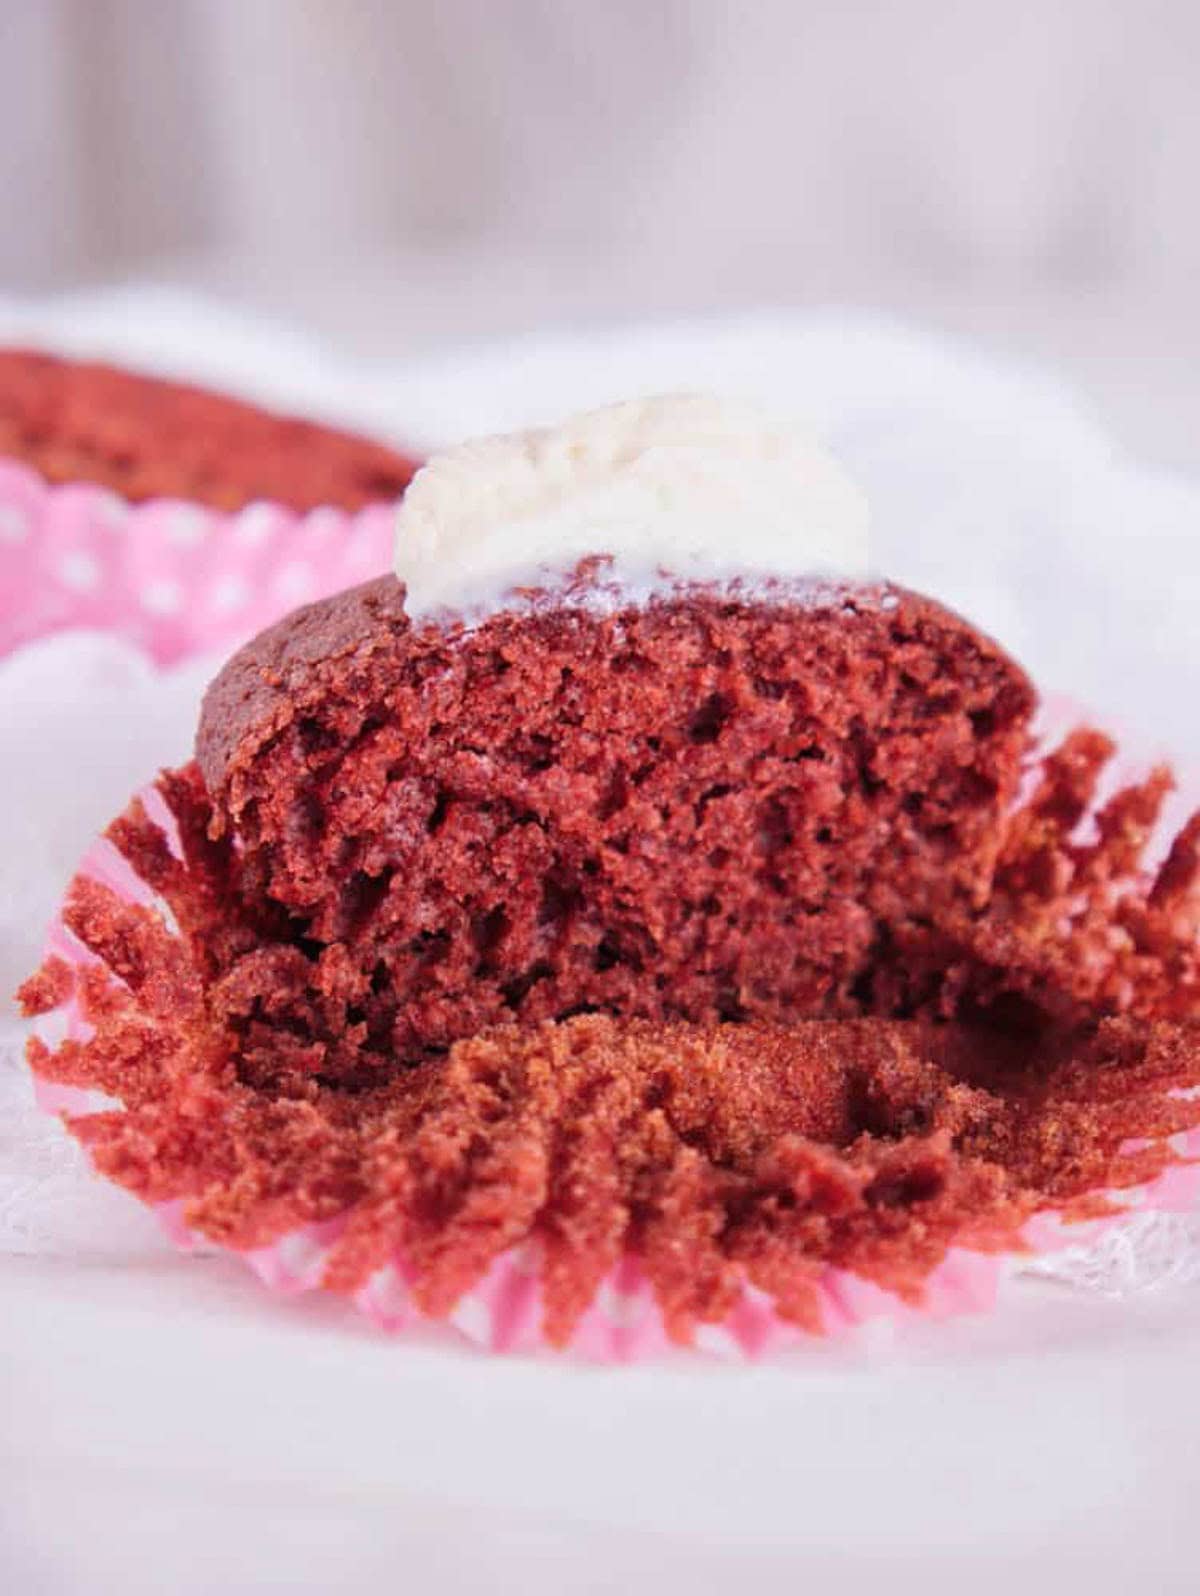
Healthy Red Velvet Cupcakes (Natural Food Coloring!)
This post may contain affiliate links. As an Amazon Associate, I earn from qualifying purchases. Please read my disclosure.These healthy red velvet cupcakes use natural food coloring instead of artificial dyes and come in at under 200 calories per cupcake with cream cheese frosting. I bake them for special occasions when I want something festive that won’t derail my healthy eating goals. They’re ready in 45 minutes and taste just as rich as the bakery version!
I started making these cupcakes after my husband brought home red velvet cupcakes from a bakery for Valentine’s Day. They were gorgeous and tasted great, but when I flipped the container over and read the ingredients, I saw red food dye number 40 listed. I knew Red 40 has been linked to hyperactivity in kids and even has warning labels in Europe, so I decided to create a version I could feel good about serving my family.
The solution took some testing to get right. I experimented with different ratios of ingredients until I found the combination that created a moist texture and tender crumb. Swapping artificial dye for natural red food coloring made from plants was the easiest change.
These cupcakes have become my go-to for special occasions. I made them for my daughter’s birthday party, and none of the kids or parents could tell they were healthier than regular cupcakes. My husband was skeptical at first but changed his mind after one bite!
👩🏽🍳 Why I Love This Recipe
My recipe works well because each swap serves a purpose without sacrificing texture or taste. The whole wheat pastry flour adds fiber and nutrition but stays light enough that the cupcakes don’t feel dense or heavy. The applesauce replaces half the oil, cutting calories while keeping the crumb moist. Using one whole egg plus two egg whites instead of three whole eggs reduces fat without making the texture dry.
I also appreciate how, despite my healthier swaps, the cupcakes remain fluffy and light thanks to how the buttermilk and vinegar interact with the baking soda to create lift and tenderness.
The reaction happens quickly, so I mix the batter in three stages, alternating wet and dry ingredients to keep everything well incorporated. I like that the natural red food coloring gives a deep burgundy shade instead of bright fire-engine red, which actually looks more elegant and sophisticated, and avoids artificial dyes!
I love that these cupcakes clock in at under 200 calories including the cream cheese frosting. Each cupcake feels indulgent but won’t spike blood sugar or leave me feeling sluggish afterward. It’s a dessert I can serve my family without guilt.
Finally, I love how they are festive enough for Valentine’s Day or Christmas but simple enough that I can make them whenever I want a healthy treat!
🥘 Ingredients
Here are the ingredients I use for these lightened-up red velvet cupcakes:
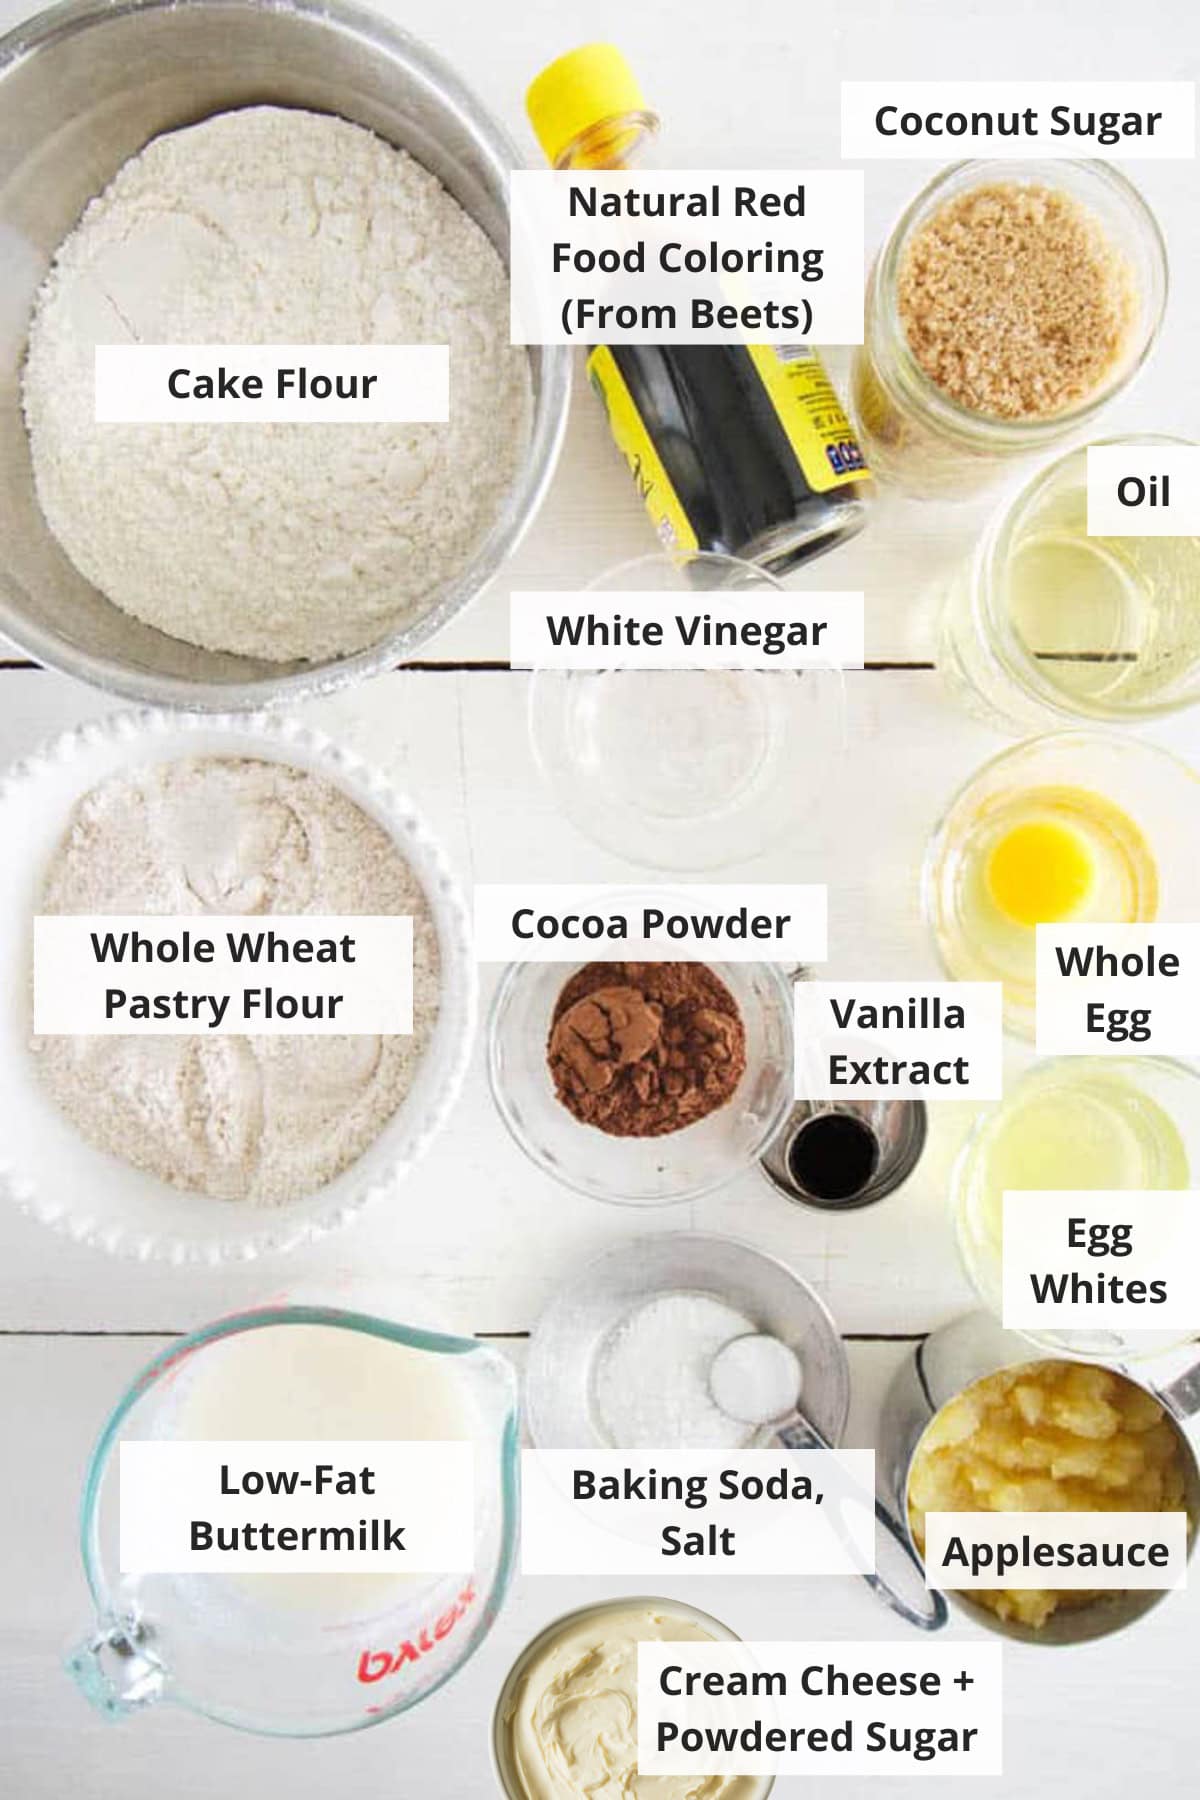
Cake Flour: I use cake flour for a tender crumb. I sift it first, then spoon it into my measuring cup and level it off with a knife for accuracy.
Whole Wheat Pastry Flour: I use whole wheat pastry flour to add fiber without making the cupcakes dense. It has a lower protein content than regular whole wheat flour, which keeps the texture light.
Unsweetened Cocoa Powder: I use Dutch-process cocoa powder for a mild chocolate flavor. It’s what gives red velvet its subtle cocoa taste without making it taste like chocolate cake.
Coconut Sugar and Salt: I use coconut sugar because it’s less processed and has a lower glycemic index than white sugar. It adds a subtle caramel flavor too. I use salt to enhance all the flavors and balance the sweetness.
Oil: I use either avocado, olive or canola oil because they are all neutral in flavor and keeps the cupcakes moist without adding any strong taste.
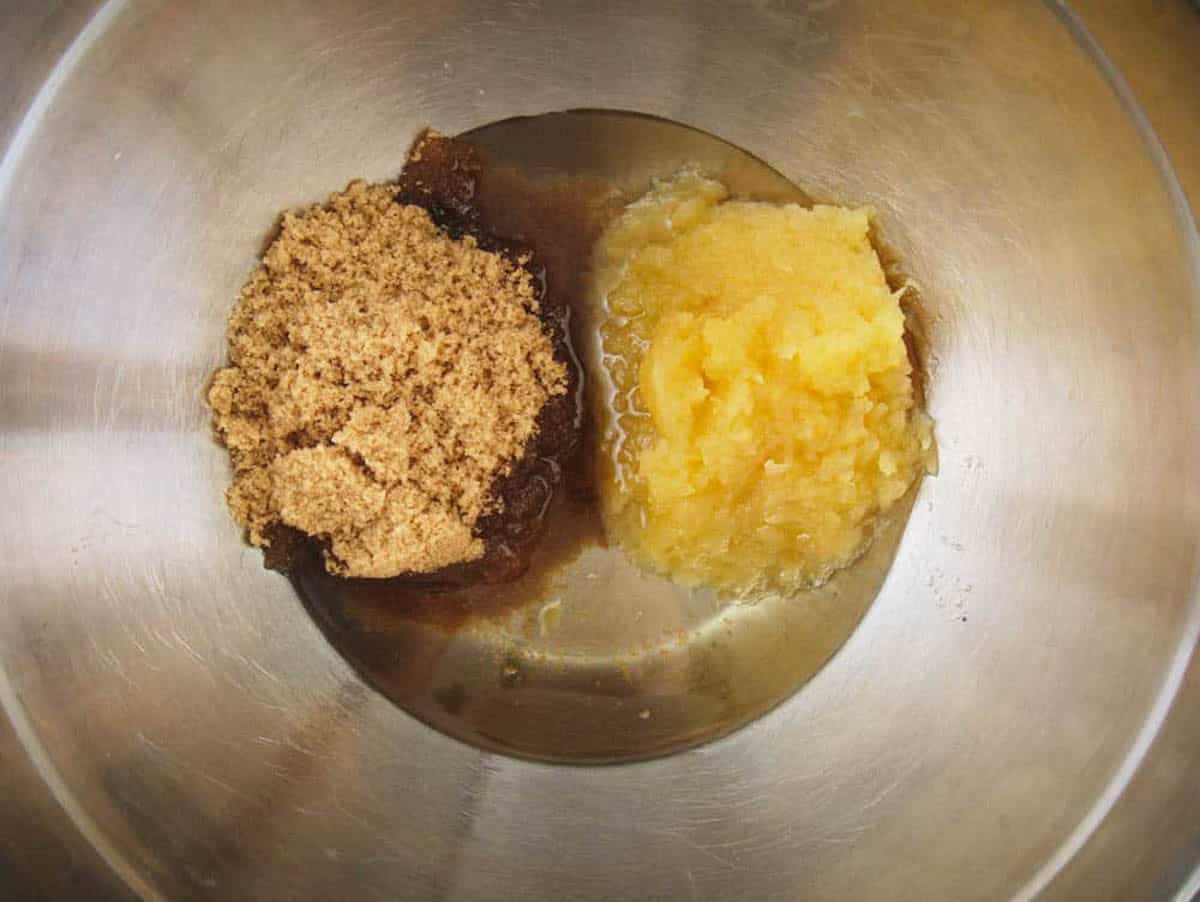
Unsweetened Applesauce: I use applesauce to replace half the oil. It keeps the cupcakes moist and tender while cutting calories.
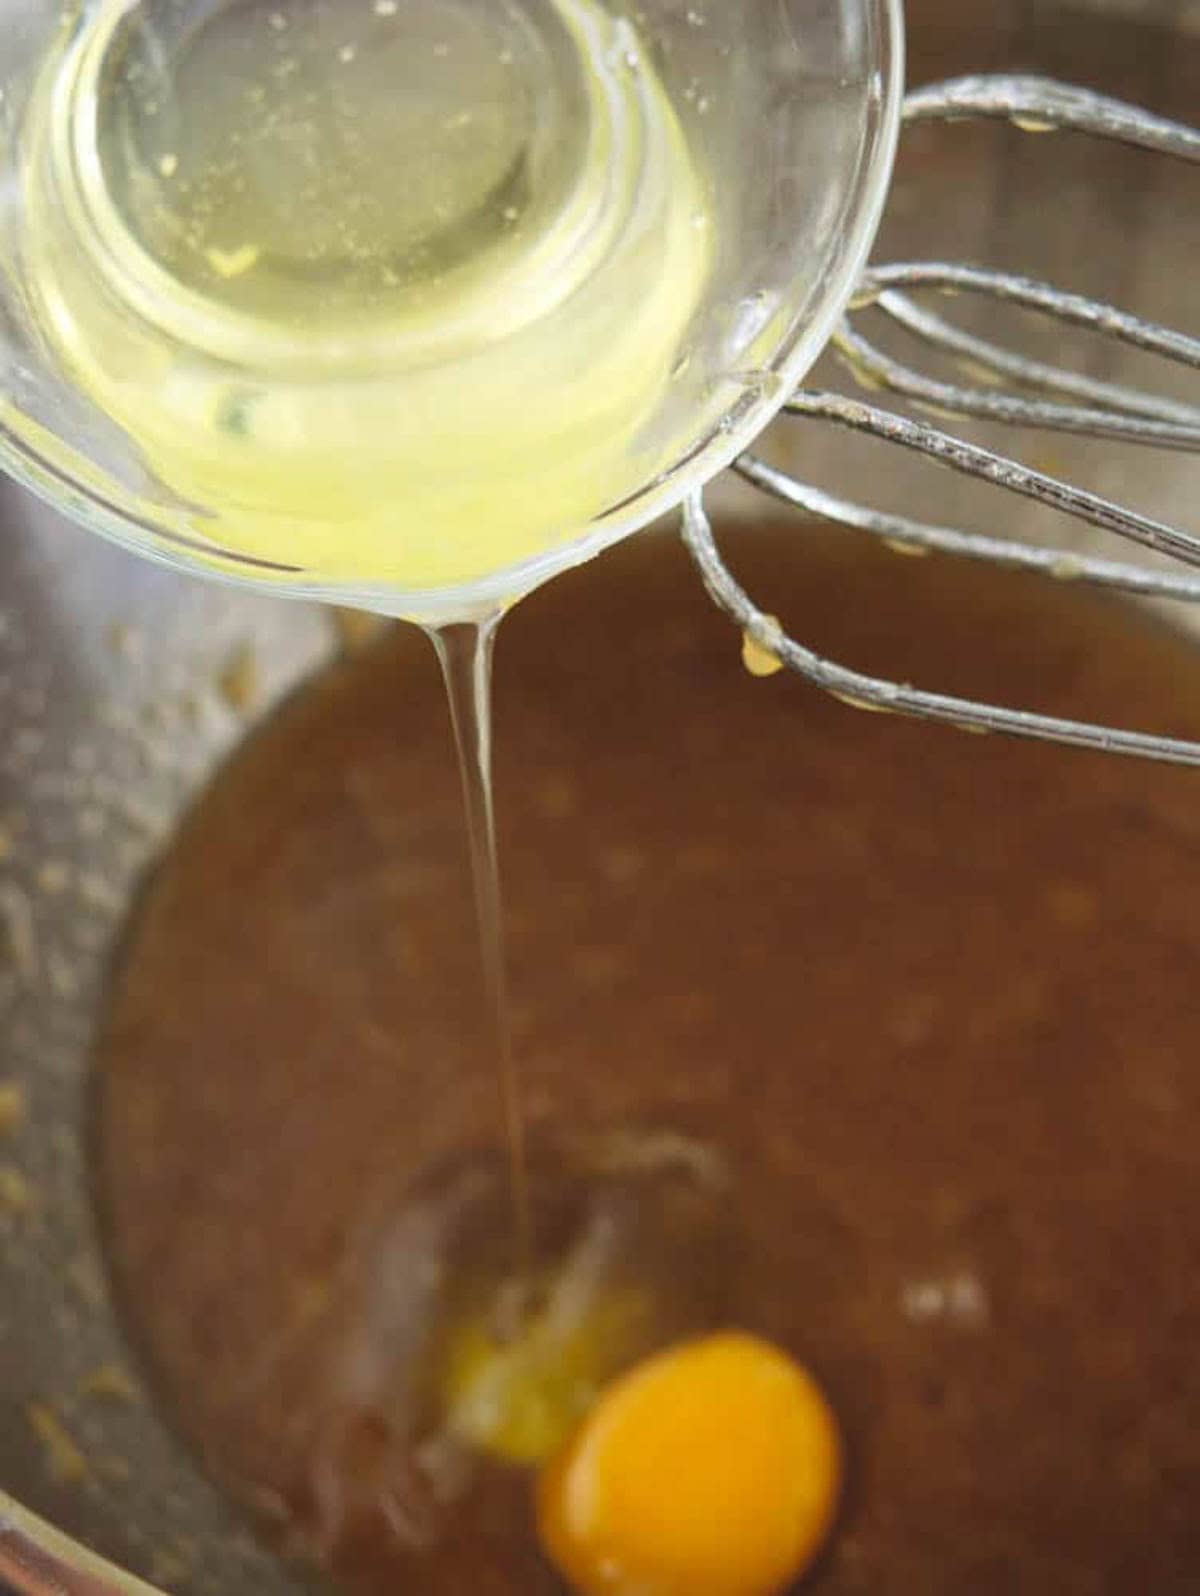
Large Egg and Egg Whites: I use one whole egg plus two egg whites. This combination gives structure without adding too much fat.
Natural Red Food Coloring: I use natural red food coloring made from plants (beets, actually!) instead of artificial dyes. It creates a deeper burgundy color rather than bright red.
Vanilla Extract: I use vanilla extract for depth and to enhance the other flavors.
Low-Fat Buttermilk, Baking Soda and Distilled White Vinegar: I use these three ingredients in combination because the acidity from the buttermilk and vinegar reacts with the baking soda to create carbon dioxide bubbles that make the cupcakes light and fluffy. The buttermilk also adds tanginess that balances the sweetness, and the baking soda acts as a leavening agent to help the cupcakes rise.
Low-Fat Cream Cheese and Powdered Sugar: I use a combination of these two ingredients to create the frosting. The low-fat cream cheese gives that classic tangy cream cheese flavor without as many calories as full-fat, and the powdered sugar provides sweetness.
Substitutions
Cake Flour Substitute: I have used all-purpose flour (1 1/2 cups minus 3 tablespoons) plus 3 tablespoons cornstarch as a 1:1 replacement for the cake flour.
Whole Wheat Pastry Flour Substitute: All-purpose flour as a 1:1 substitution works well here.
Coconut Sugar Substitute: I can use light brown sugar or white granulated sugar (1 cup) as a 1:1 replacement.
Buttermilk Substitute: If you don’t have buttermilk, I recommend making homemade buttermilk by mixing 1 cup milk with 1 tablespoon white vinegar or lemon juice and letting it sit for 5 minutes.
Egg Substitute: I use three flax eggs (3 tablespoons ground flaxseed mixed with 9 tablespoons water, let sit 5 minutes) for an egg-free version, but I have noticed the egg-free version is more dense.
🔪 How To Make
These cupcakes are surprisingly easy to make once you have all your ingredients prepped! Here’s how I make them step by step:
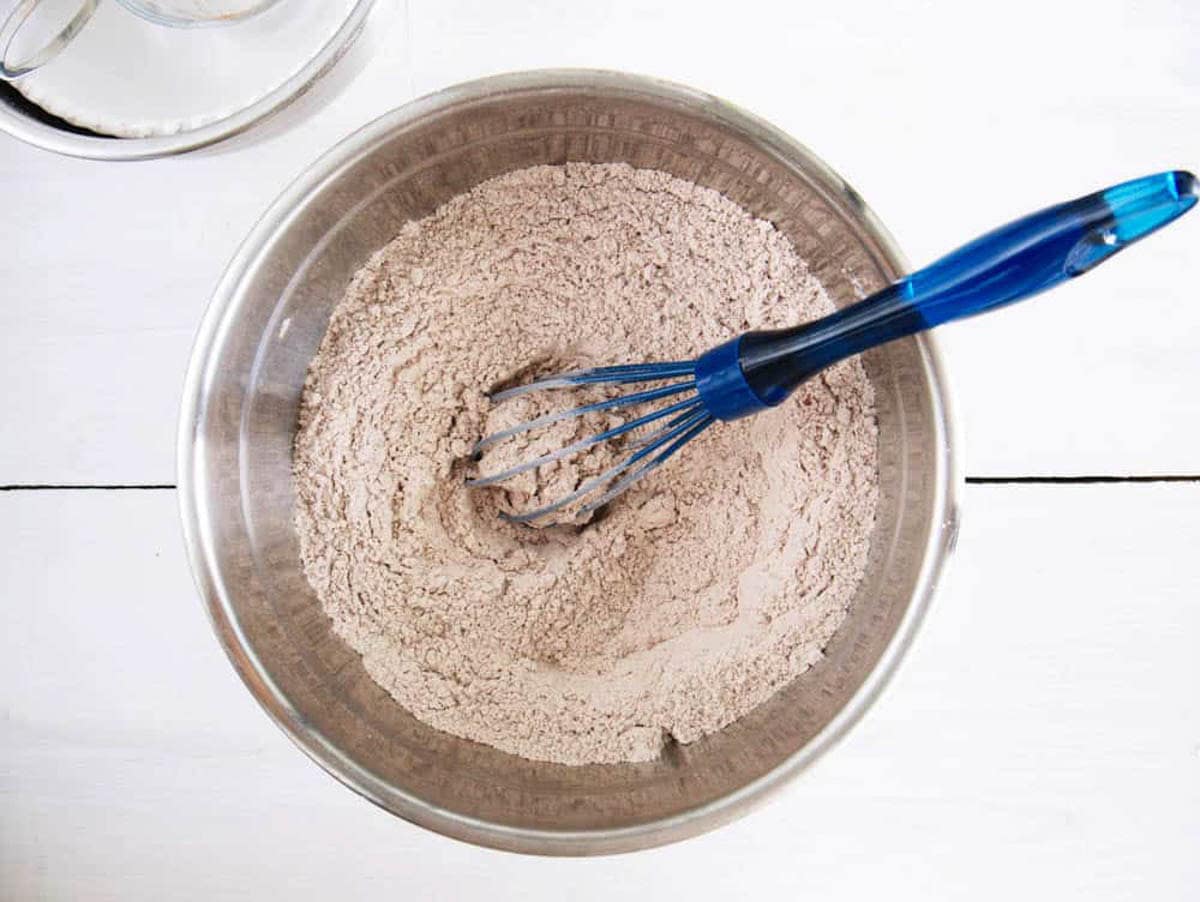
Preheat and Prep: I preheat the oven to 350 degrees and line cupcake tins with liners. Then I whisk together the cake flour, whole wheat pastry flour, cocoa powder, and salt in a large bowl.
Mix Wet Ingredients: In another large mixing bowl, I beat the coconut sugar, applesauce, and oil until combined.
Add Eggs and Coloring: I add the whole egg and egg whites one at a time, beating until each is incorporated and scraping down the sides of the bowl as needed. Then I mix in the natural red food coloring and vanilla.
Alternate Wet and Dry Ingredients: I add the flour mixture in three batches, alternating with two additions of buttermilk (a half cup each time), and whisking well after each addition.

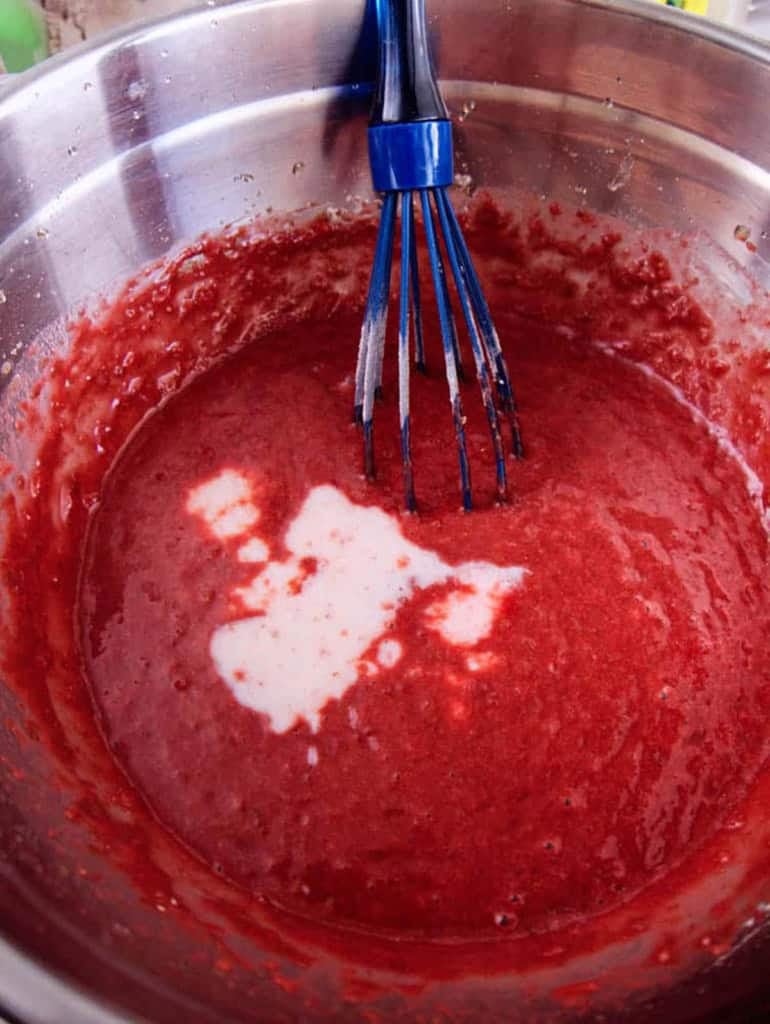
Add Baking Soda Mixture: I stir together the baking soda and vinegar in a small bowl. It will foam up. I add this mixture to the batter and mix until combined, about 10 seconds.
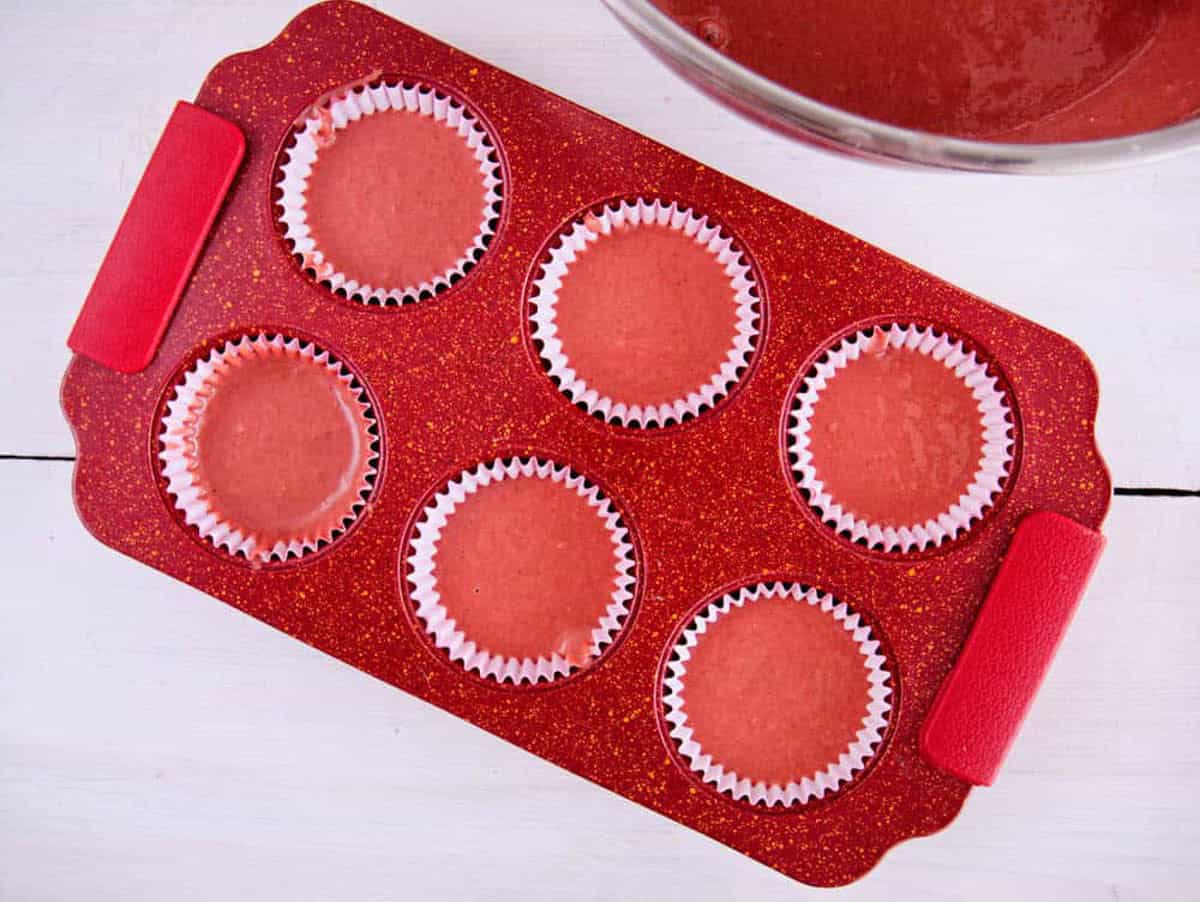
Fill and Bake: I divide the batter evenly among the lined cups, filling each three-quarters full.
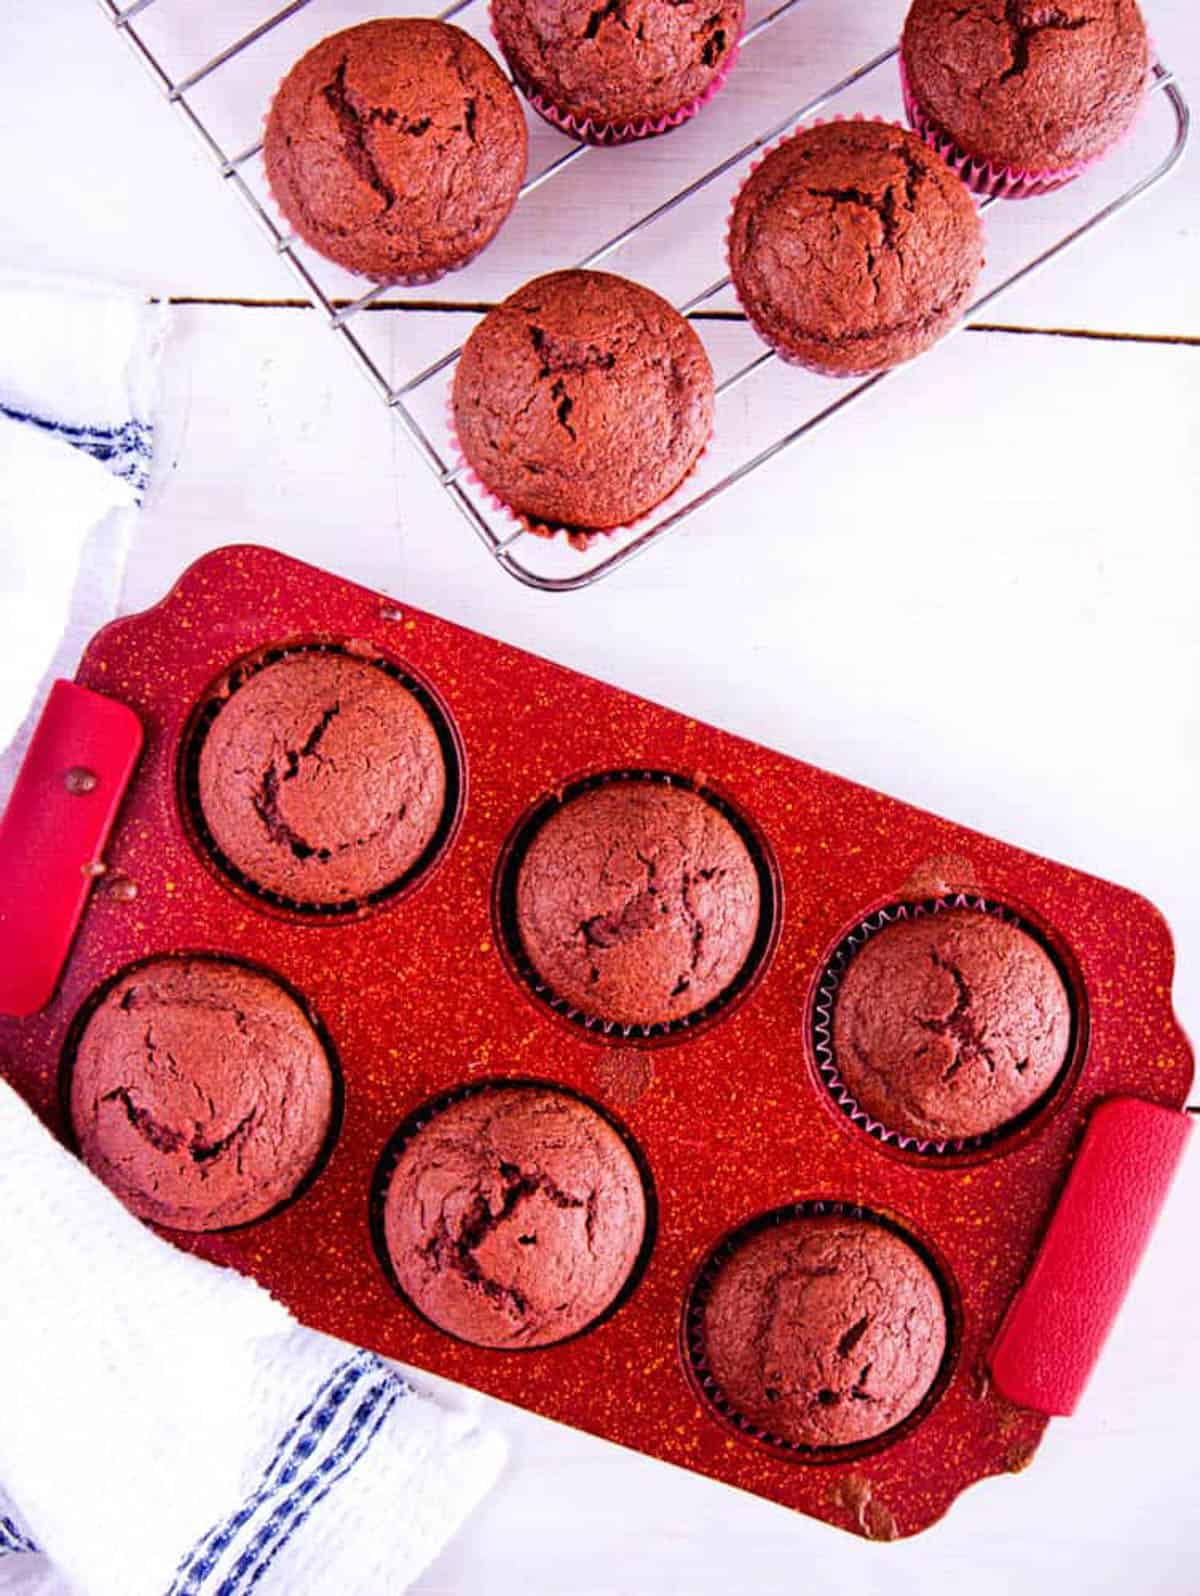
Finish and Cool: I bake for 20 minutes, rotating the tins halfway through, until a toothpick inserted in the centers comes out clean.
Make Frosting: While the cupcakes cool, I mix the frosting ingredients together in a bowl. I use a hand mixer to speed it up.

Frost and Serve: Once the cupcakes are completely cool, I frost them with the low-fat cream cheese frosting and serve immediately!
💭 Expert Tips
My #1 Secret Tip for this recipe is to sift the cake flour before measuring it. I sift the flour first, then spoon it into my measuring cup and level it off with a knife. This prevents me from packing too much flour into the cup, which would make the cupcakes dense.
Other Tips To Keep In Mind:
- Mix Wet and Dry Separately: I always mix the wet and dry ingredients in separate bowls before combining them. This ensures even distribution of the leavening agents and prevents lumps.
- Don’t Overfill Liners: I fill each cupcake liner only three-quarters full. Overfilling causes the batter to overflow and creates messy tops.
- Sift Dry Ingredients: After whisking the dry ingredients together, I sift them to remove any lumps. This creates a smoother batter and lighter texture.
- Fully Preheat Oven: I make sure my oven is fully preheated to 350 degrees before putting the cupcakes in. This ensures even baking and proper rise.
- Cool Completely Before Frosting: I let the cupcakes cool completely on a wire rack before frosting them. Frosting warm cupcakes causes the cream cheese frosting to melt and slide off.
📖 Variations
These healthy red velvet cupcakes are easy to adapt based on my preferences or dietary needs of anyone I’m serving them to! Here are some the variations I make the most often:
Lower Sugar: I reduce the coconut sugar to 1/2 cup in the cupcakes and use only 1/2 cup powdered sugar in the frosting for an even lighter version.
Chocolate Cream Cheese Frosting: I mix 2 tablespoons cocoa powder into the cream cheese frosting for a chocolate twist.
Mini Cupcakes: I use a mini cupcake pan and bake for 12-15 minutes instead of 20 minutes for bite-sized treats.
🍽 Serving Suggestions
I serve these cupcakes at room temperature for the best texture and flavor. They’re perfect for holidays, special occasions, or birthday parties. I love to pair them with a warm drink like my healthy hot chocolate, or beetroot latte (in keeping with the red/pink theme!) For a more indulgent dessert, these taste great with my caramel nice cream!
🧊 Storage Directions
Storing: I store the frosted cupcakes in an airtight container in the refrigerator for up to 4 days. I bring them to room temperature before serving, or I will warm them in the microwave for 10 seconds if needed.
Freezing: I freeze unfrosted cupcakes for up to 3 months. I wrap each cupcake individually in plastic wrap and place them in a freezer bag. I thaw them at room temperature and frost them fresh.
Reheating: I don’t typically reheat these cupcakes since they’re best at room temperature. If I want them slightly warm, I microwave for 10 seconds, but I only do this before adding the frosting.
❓Recipe FAQs
Why did my cupcakes turn out dense or dry?
Overmixing the batter develops too much gluten, which makes cupcakes dense. Using too much flour also causes dryness. I measure flour by sifting first, then spooning it into the measuring cup and leveling it off. I mix just until the ingredients are combined.
Why didn’t my cupcakes rise properly?
Old baking soda loses its leavening power over time. I recommend checking the expiration date and testing it by mixing a small amount with vinegar. If it doesn’t foam vigorously, I would replace it. Not fully preheating the oven also prevents proper rise.
Can I use regular red food coloring instead of natural?
Yes, regular red food coloring works if natural isn’t available. I use about 1 ounce of liquid red food coloring for a brighter red color. The cupcakes will taste the same either way.

Love this healthy dessert recipe? Please leave a 5-star rating 🌟 in the recipe below and/or a review in the comment section further down the page!
You can also FOLLOW ME on FACEBOOK, INSTAGRAM, and PINTEREST to see more delicious, healthy, family-friendly food, and if you have any questions, I’m here to help!
📋 Recipe Card

Healthy Red Velvet Cupcakes
My healthy red velvet cupcakes use natural food coloring instead of artificial dyes and come in at under 200 calories per cupcake with cream cheese frosting. I make them with whole wheat pastry flour, applesauce, and low-fat buttermilk for a moist texture without all the oil found in traditional recipes. They're ready in 45 minutes and taste just as rich as the bakery version.
Servings: 24 cupcakes
Calories: 190kcal
Ingredients
For The Cupcakes
- 1½ cups cake flour sifted
- 1 cup whole-wheat pastry flour sifted
- 2 tbsp unsweetened Dutch-process cocoa powder
- 1 tsp salt
- 1 cup coconut sugar
- ¾ cup oil canola, avocado, or olive oil
- ¾ cup unsweetened applesauce
- 1 large egg
- 2 large egg whites
- ½ tsp natural red food coloring
- 1 tsp vanilla extract
- 1 cup low-fat buttermilk
- 1½ tsp baking soda
- 2 tsp distilled white vinegar
For The Frosting
- 8 oz low-fat cream cheese
- 1 cup powdered sugar
- 1 tsp vanilla extract
Instructions
- Preheat oven to 350 degrees. Line cupcake tins with liners.
- In a large bowl, whisk together flours, cocoa and salt.
- In another large mixing bowl, beat sugar, applesauce and oil until combined. Add eggs and egg whites, one at a time, beating until each is incorporated, scraping down sides of bowl as needed. Mix in food coloring and vanilla.
- Add flour mixture in three batches, alternating with two additions of buttermilk (a half a cup each time), and whisking well after each.
- Stir together the baking soda and vinegar in a small bowl (it will foam); add mixture to the batter, and mix until combined, about 10 seconds.
- Divide batter evenly among lined cups, filling each three-quarters full. Bake, rotating tins halfway through, until a toothpick inserted in centers comes out clean, about 20 minutes. Mix frosting ingredients together in a bowl (you can use a beater to speed it up).
- Let cupcakes cool completely, then frost with low-fat cream cheese frosting.
Notes
Top tips for making Healthier Red Velvet Cupcakes
- Mix the wet and dry ingredients separately – don’t skip this process!
- Make sure you don’t overfill the cupcake liners, otherwise the cupcakes will overflow.
- When measuring your cake flour, sift the flour first, and then spoon it into your measuring cup. Then level it off with the back of a knife.
- Once you have whisked together the dry ingredients, sift them to ensure there are no lumps.
- Make sure the oven is fully pre-heated before you put the cupcakes in
- When the cakes are baked, an inserted toothpick should come out clean
Nutrition
Serving: 1cupcake | Calories: 190kcal | Carbohydrates: 25.2g | Protein: 3.3g | Fat: 9g | Saturated Fat: 1.8g | Sodium: 145.1mg | Fiber: 1.2g | Sugar: 14.5g


AMAZING !!!! I tried this with low expectation because other recipes have come out so dense, but noo these were fluffy and light. Taste like the real thing.
Yay!! I’m so so happy to hear that Mora! 🙂 Thanks for letting me know!
Absolutely delicious! And super easy to make! I highly recommend this for anyone that loves red velvet! If you like coconut flakes , I recommend adding some to your frosting!
Yay! So happy to hear that Cheyenne! Love the idea of adding coconut flakes to the frosting too!
Sounds like something I would really love.
Hooray!! This is definitely a favorite in our house too!
I just found a great recipe to add into my holiday menu! Can’t wait to try my hands on this!
Yay!! I’m sure you will love this recipe!
Awwwn these are so pretty! My family will totally dive in into it!
Hehe I’m sure they will Kara!