

Chilaquiles Rojos with Black Beans
This post may contain affiliate links. As an Amazon Associate, I earn from qualifying purchases. Please read my disclosure.Large weekend brunches were made for my chilaquiles rojos with black beans. It is delicious, impressive, and only takes 45 minutes to make! I layer my beans with corn tortillas, smoky tomato sauce, and melted cheese, and bake it into a substantial Mexican-inspired casserole that is traditionally served for breakfast, but works any time of the day.

Chilaquiles rojos with black beans are my plant-based take on a classic Mexican breakfast. Traditionally, it is served with an egg, but I use black beans for a plant-based protein. It is built around tortillas simmered in red chili sauce, and the baking keeps the bold flavors. For another wholesome and hearty Mexican breakfast, try my healthy sweet potato breakfast hash. It is nutritious and sumptuous with all the authentic flavors.
I first made chilaquiles rojos with black beans after trying them at a restaurant. Initially, I kept it plant-based and omitted the fried eggs and shredded chicken. But I knew I had to include protein somehow. Then I decided to use my leftover vegan refried beans, and it was amazing! I felt significantly more satisfied after eating it. Since then, I have switched to black beans for more texture and fewer calories.
👩🏽🍳 Why I Love This Recipe
As a health coach and a mom, there is nothing better than a meal that is quick, easy, and combines comfort with solid nutrition. This chilaquiles rojos with black beans does it all. Black beans provide protein, fiber, antioxidants, and magnesium while aiding in blood sugar management, heart health, and cholesterol. I add in the tomatoes and peppers for their bright color and flavor, resulting in a cohesive and authentic meal that aligns with a plant-based lifestyle.
The layers work together thanks to the ingredients, the way they are cooked, and the various textures they bring when combined. I bake the casserole, which allows the corn tortillas to absorb the rich tomato sauce, softening them but retaining a bit of structure. The vegetables and beans are cooked quickly in the skillet before baking, which releases their flavors and keeps the texture fresh and bright.
I had made this dish a few times before I even had a look at its history, which changed the way I approached it entirely. Chilaquiles rojos are rooted in pre-Hispanic history and were invented to give stale tortillas new life with the help of sauces. After learning this, I was no longer confined to freezing leftover tortillas; instead, I allowed them to get a little stale. For tradition! Now my kids tell me to make extra tortillas so that there are guaranteed leftovers, which means guaranteed chilaquiles rojos with black beans!
🥘 Ingredients
I use simple pantry staples and fresh vegetables to build flavorful chilaquiles rojos with black beans. This is exactly what I use:

Tomato sauce: I use canned tomato sauce, which gives the base the perfect consistency and richness, and allows the chili spices to shine through.
Vegetable broth: I use this in place of the traditional chicken broth. This allows me to thin out the sauce slightly, while building on the savory flavor.
Chili powders: For this dish, I use a mix of classic, ancho, and chipotle chili powder. Together, these provide a complex, smoky, warm Mexican flavor with a gentle heat.
Seasoning: I use garlic powder, onion powder, ground cumin, salt, and dried oregano for a balanced, aromatic, and earthy flavor.
Olive oil: My vegetables are cooked in olive oil, allowing them to soften and develop their flavors.
Filling: I use black beans, peppers, corn, onions, and diced tomatoes to create a filling that has fresh flavors, natural sweetness, plant-based protein, and a bit of acidity.
Corn tortillas: I cut corn tortillas into pieces and layer them through the casserole, allowing them to soak up the sauce as the dish bakes.
Shredded cheese: Sprinkling shredded cheese throughout the layers provides an additional creamy, melty texture. I also use shredded vegan cheese if needed.
Topping: I use diced fresh tomatoes and sliced green onions as a fresh topping, which I scatter over after it has baked.
🔪 How To Make
These chilaquiles rojos with black beans are built with intentionally layered flavors and cooking methods. This is the step-by-step process I use:
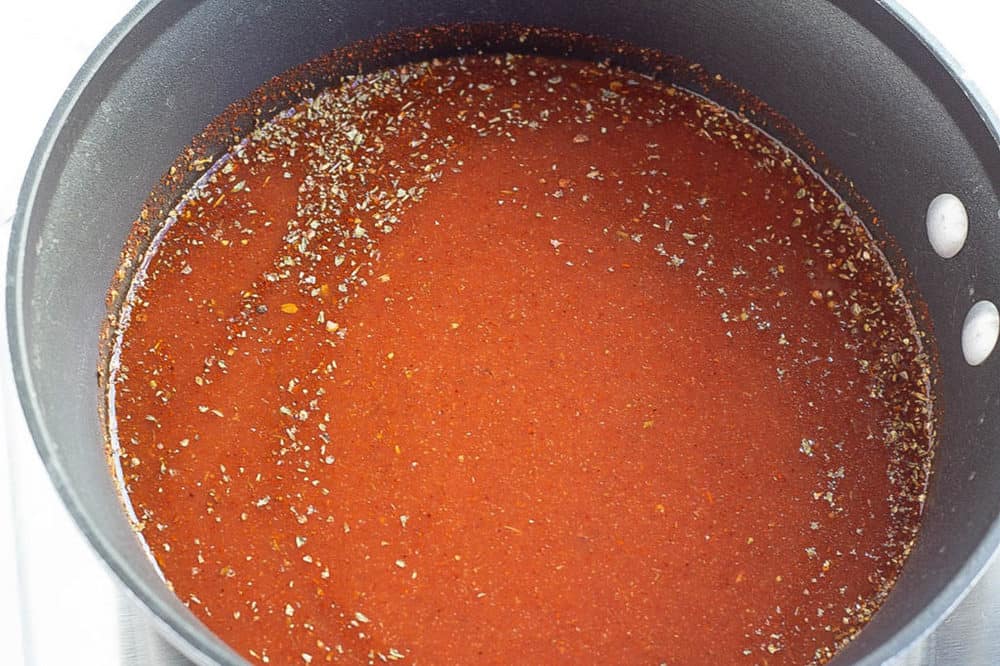
Make the sauce: First, I preheat my oven to 350F. Then I combine the tomato sauce, vegetable broth, chili powders, garlic powder, onion powder, and oregano. I whisk the mixture over a medium heat, then reduce the heat so my sauce simmers gently.
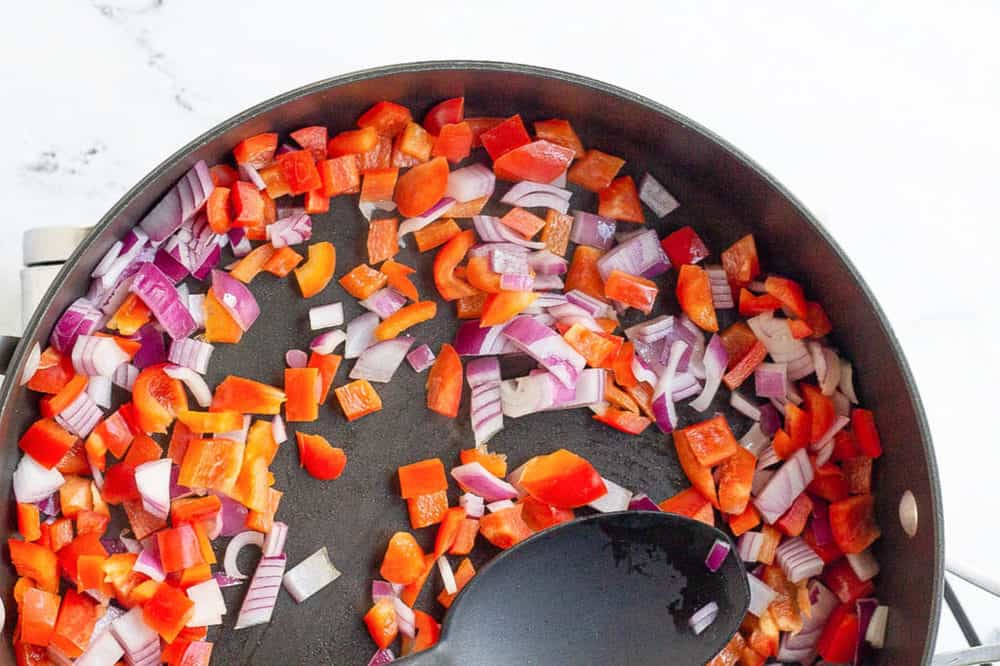
Cook onions and peppers: I heat olive oil in a large skillet and cook the onions and bell pepper until they soften and begin to brown.
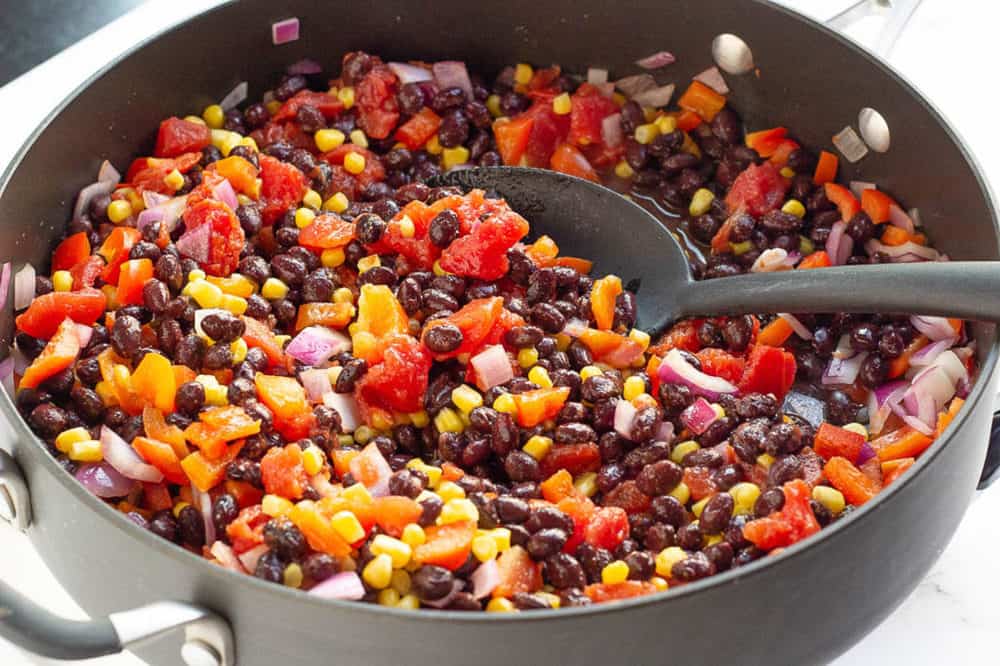
Add the rest of the filling: Next, I stir the black beans, tomatoes, corn, cumin, and salt into the onions and peppers. I cook for a few minutes until everything is heated through.
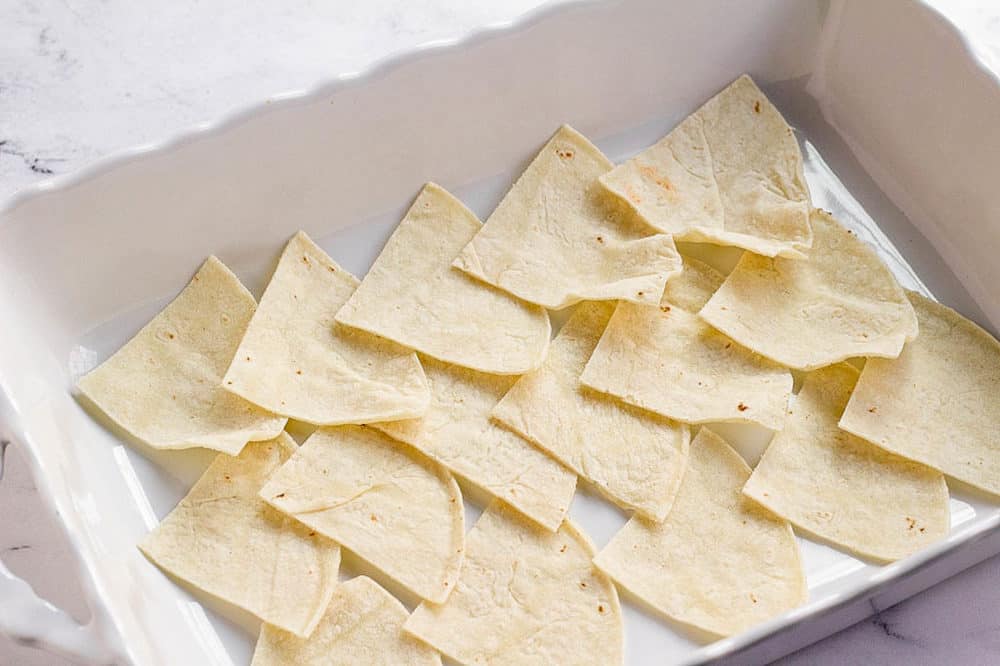
Scatter tortilla pieces: I scatter half of my tortilla pieces into the bottom of my baking dish.
Top with veg and sauce: Then I add a layer of 1/2 of my vegetables, sauce, and cheese. I repeat the layers with my remaining tortillas, sauce, filling, and cheese.
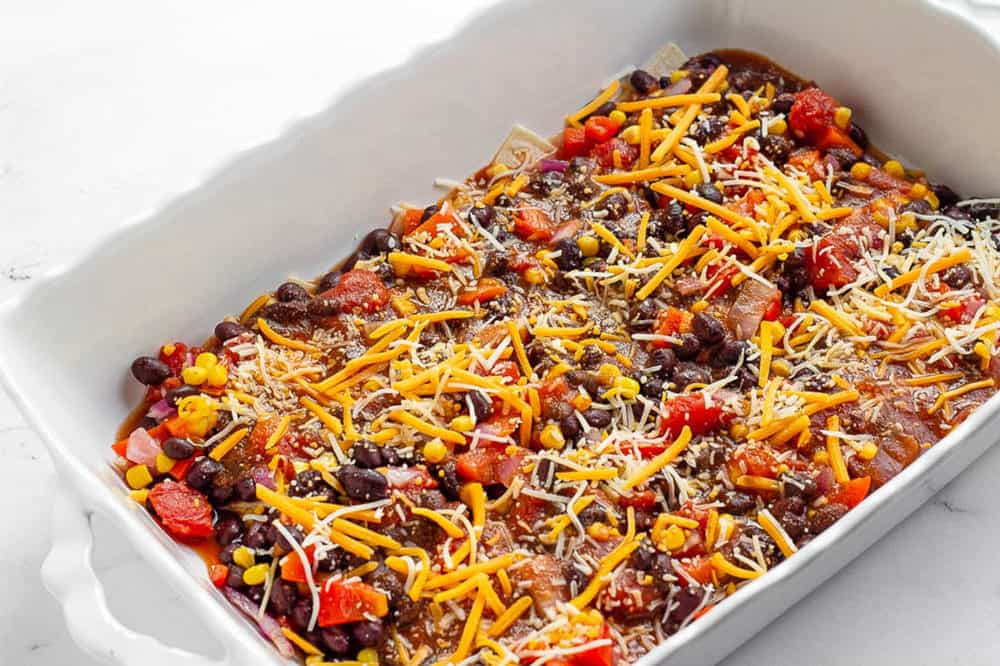
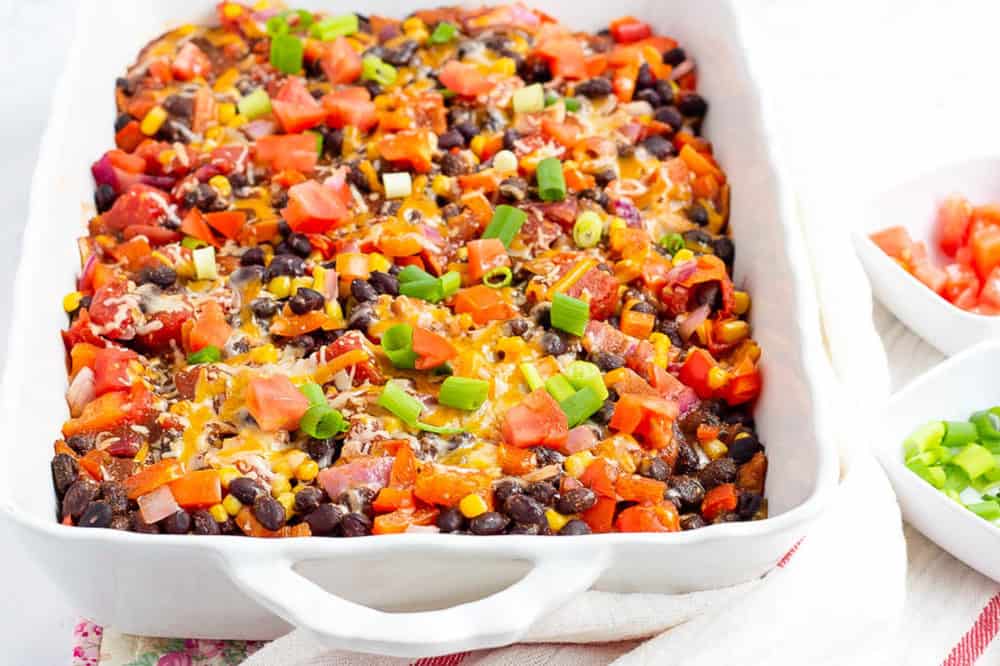
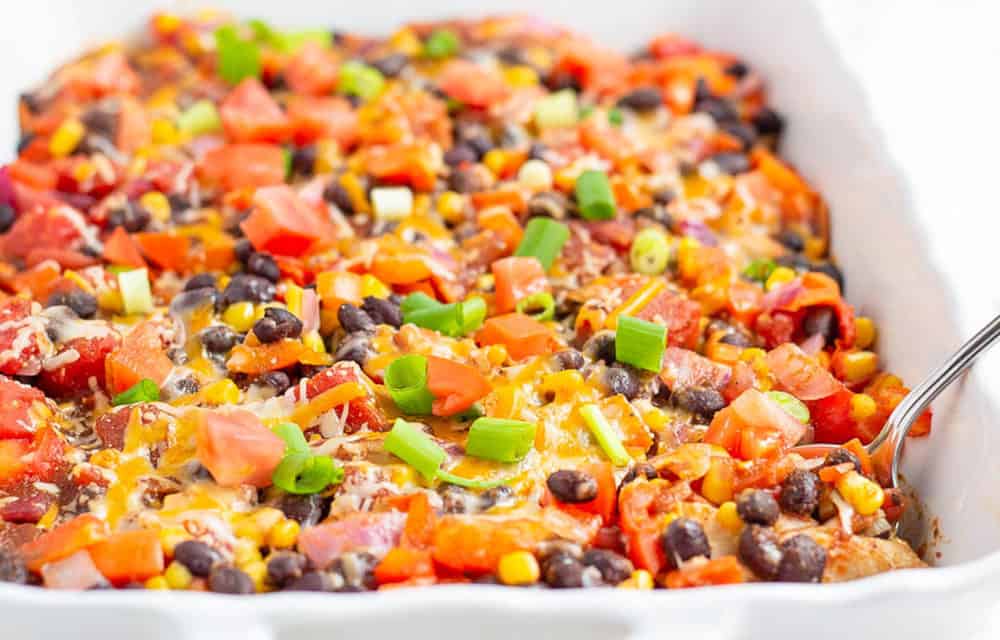
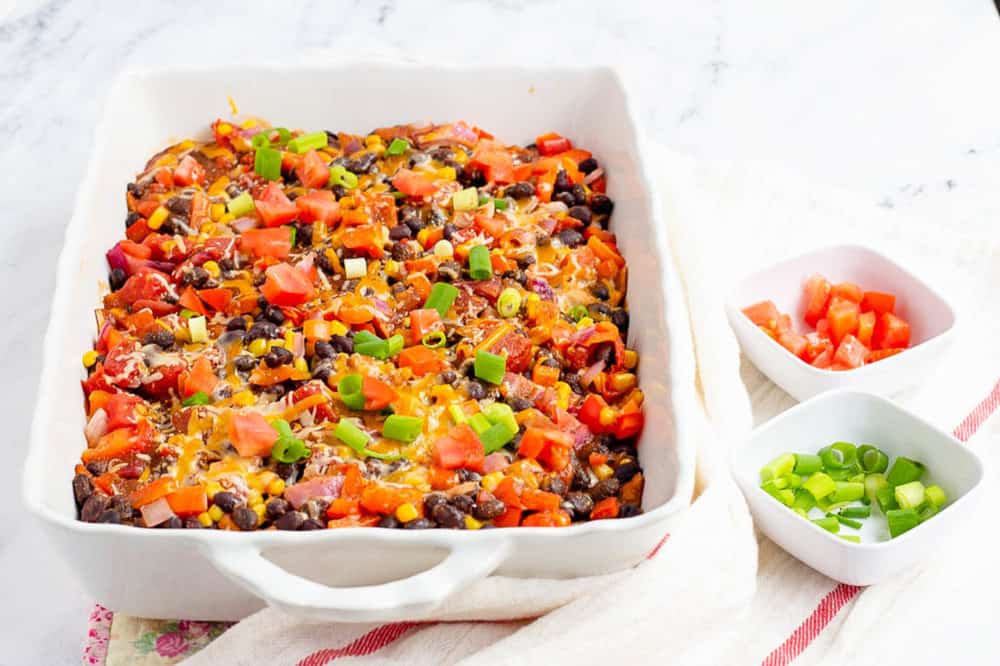
Bake: I cover the dish with foil and bake until heated through. Then I removed the foil near the end, and allowed the cheese to melt and the edges to bubble. Lastly, I sprinkle over my chopped tomato and sliced green onion before serving.
💭 Expert Tips
My #1 Secret Tip for this chilaquiles rojos with black beans recipe is to lightly toast the tortillas or use slightly stale tortillas. I do this to prevent the tortillas from becoming overly soft and mushy during baking, and it gives the dish a more traditional finish and texture.
Other Tips To Keep In Mind:
- Simmer sauce: I allow my red sauce to simmer for several minutes to intensify flavors and cook off any excess moisture.
- Keep cuts similar: My onions, bell peppers, and tomatoes are chopped into similar-sized pieces, ensuring balanced distribution.
- Layer carefully: I make sure to spread the sauce layer across each layer, allowing every tortilla piece to soak up the rich tomato sauce.
- Cover for the initial bake: By using foil, I ensure that the casserole heats through, allowing the tortillas to soften, without drying out the top layer.
- Allow to rest: I let my casseroles rest for a few minutes. This gives the layers a chance to settle, which makes slicing and serving cleaner.
📖 Variations
These are the variations that I have experimented with, loved, and made on repeat. Try some of these out for yourself:
Spinach boost: I stir in 2 cups of fresh baby spinach into the vegetable mixture, just before layering. This gives my dish additional vitamins and nutrients. I make this on weekends if I know my kids have a busy day ahead.
Egg topping: If I am not following a strictly vegan menu, I serve each portion with 1 fried or poached egg on top. All the men in my family love an over-easy egg with this dish; the runny yolk mixes into the sauce for a rich finish.
Added heat: I saute 1 diced jalapeno with the onion and bell pepper to bring extra heat into the casserole. This is a great way to subtly and naturally boost your metabolism. But my husband just loves it for the extra spicy kick.
🍽 Serving Suggestions
When I serve my chilaquiles rojos with black beans at a brunch, I like pairing them with toppings that elevate the authentic flavors and add another dimension to the textures. I recommend trying it with my vegan queso fresco for a creamy and tangy topping. A spoonful of my pineapple pico de gallo, for a playful take on a traditional accompaniment.
When I make this for just my kids and husband, I like to do a bit more to turn this into a full-on Mexican spread that is light but still satisfying. Last week was unseasonably hot, and I decided to offset the warmth and heat of this dish with cold glasses of my vegan horchata and bowls of my fresh Mexican fruit salad. This was an ideal and balanced lunch, and I will definitely make it again.
🧊 Storing And ♨️ Reheating
Refrigeration: I store cooled chilaquiles in an airtight container in the refrigerator for up to 4 days.
Freezing: I place portions in a freezer-safe container and freeze for up to 3 months.
Reheating: If frozen, I make sure to thaw in the refrigerator overnight, before reheating. To reheatI either warm individual portions in the microwave until hot or I place the entire casserole in a 350F oven for 10-15 minutes until heated through.
❓Recipe FAQs
Which tortillas work best for chilaquiles rojos?
Corn tortillas work best, since they have the flavor and structure that traditional chilaquiles rely on. I cut my tortillas into wedges before toasting and assembling them, making sure my bottom layer is covered properly.
Can I use ketchup or tomato puree if I cannot find canned tomato sauce?
I do not recommend using ketchup as it is far too sweet and contains vinegar, which would change the flavor a lot. Tomato puree is thicker and more concentrated than tomato sauce. Instead, I recommend using a can of whole or diced, peeled tomatoes and blending them until smooth. I would also add a few extra minutes to allow the sauce to reduce and thicken on the stove.
Could I make chilaquiles rojos with black beans on the stovetop?
Yes, you can! While I love the oven method, for balanced cooking and melting, I have made it on the stovetop in a large deep skillet. I layered my tortilla wedges, veggies mixture, sauce, and cheese in the pan, covered with a lid, and cooked on a low heat for 8-10 minutes. Always spray the bottom of the pan with a light cooking oil for a crispier bottom layer.
🌮 More Healthy Mexican Inspired Recipes!

Love this plant based mexican recipe? Please leave a 5-star rating 🌟 in the recipe below and/or a review in the comment section further down the page!
You can also FOLLOW ME on FACEBOOK, INSTAGRAM, and PINTEREST to see more delicious, healthy, family-friendly food, and if you have any questions, I’m here to help!
🎥 Watch How to Make It

Chilaquiles Rojos with Black Beans
Large weekend brunches were made for my chilaquiles rojos with black beans. It is delicious, impressive, and only takes 45 minutes to make! I layer my beans with corn tortillas, smoky tomato sauce, and melted cheese, and bake it into a substantial Mexican-inspired casserole that is traditionally served for breakfast, but works any time of the day.
Servings: 10 servings
Calories: 253.6kcal
Ingredients
- ½ tbsp olive oil
- 1 medium red onion diced
- 3 red, yellow or orange bell pepper diced
- 2 15oz cans of black beans, rinsed
- 1 14oz can of diced tomatoes
- 1½ cups corn frozen (thawed) or fresh
- 1 tsp ground cumin
- ½ tsp salt
- 10-12 corn tortillas quartered
- 1¼ cups shredded Cheddar cheese or a Mexican cheese blend
- 1 15oz can tomato sauce 1 can
- 1½ cups vegetable broth
- 1 tbsp chili powder
- 1 tsp ancho chili powder
- ½ tsp chipotle chili powder use less for a less spicy sauce
- 1 tsp garlic powder
- 1 tsp onion powder
- 1 tsp dried oregano
- Diced tomato and green onion for topping
Instructions
- Preheat oven to 400°F. Lightly coat a 9-by-13-inch baking dish with cooking spray. Meanwhile, make the sauce: combine the tomato sauce, vegetable broth, chili powders (all 3 of them), garlic powder, onion powder, and dried oregano in a medium sauce pan over medium heat. Whisk to combine, then turn the heat down to low and let simmer.
- Heat olive oil in a large nonstick skillet over medium-high heat. Add onion and bell pepper and cook, stirring often, until starting to brown, about 5 minutes.
- Stir in beans, tomatoes, corn, cumin and salt and cook, stirring occasionally, until the vegetables are heated through, about 3 minutes.
- Scatter half the tortilla pieces in the casserole dish.
- Top with half the vegetable mixture, then half the sauce, and then half the cheese.
- Repeat with one more layer of tortillas, vegetables, sauce and cheese.
- Cover the casserole with foil and bake for 15 minutes. Remove the foil and continue baking until the casserole is bubbling around the edges and the cheese is melted, about 10 minutes more.
- Top with diced tomatoes and green onion.
Notes
- My #1 Secret Tip for this chilaquiles rojos with black beans recipe is to lightly toast the tortillas or use slightly stale tortillas. I do this to prevent the tortillas from becoming overly soft and mushy during baking, and it gives the dish a more traditional finish and texture.
- Simmer sauce: I allow my red sauce to simmer for several minutes to intensify flavors and cook off any excess moisture.
- Keep cuts similar: My onions, bell peppers, and tomatoes are chopped into similar-sized pieces, ensuring balanced distribution.
- Layer carefully: I make sure to spread the sauce layer across each layer, allowing every tortilla piece to soak up the rich tomato sauce.
- Cover for the initial bake: By using foil, I ensure that the casserole heats through, allowing the tortillas to soften, without drying out the top layer.
- Allow to rest: I let my casseroles rest for a few minutes. This gives the layers a chance to settle, which makes slicing and serving cleaner.
Nutrition
Calories: 253.6kcal | Carbohydrates: 38.9g | Protein: 11.4g | Fat: 6.8g | Saturated Fat: 3.4g | Cholesterol: 12.5mg | Sodium: 515mg | Potassium: 606.5mg | Fiber: 8.6g | Sugar: 4.4g


This is my kind of hearty comfort food. I can’t wait to try it.
Yay! I’m sure you’ll love this recipe Dannii!
I am loving how easy this recipe is! Thanks for this recipe.
Thanks so much Priya! So glad you liked it!
Love your suggestion of adding more spice. I am definitely going to try this with jalapenos added in, thanks for the suggestion! This looks like the ultimate comfort food 🙂
Yes!! It really is! I’m sure you will love this recipe Cathleen!
This recipe was absolutely scrumptious exactly as written. Leftovers? What leftovers?!
Haha!! That is awesome! So happy to hear that Rick!! This is definitely a favorite in our house too!
A friend of ours gave this dish to us after we had our daughter, nearly two years ago. This is easily our daughter’s favorite recipe and a sure-fire way to get her to gobble up her veggies. Thank you for creating such an easy and crowd pleasing recipe! (And, it freezes and reheats really well for a quick weeknight meal!)
Awww thank you so much Elaine!! This is one of my daughter’s favorite recipes too (and I totally agree with you about how it’s great for freezing!) I’m so glad it’s working well for your family! 🙂
I’ve made this a couple of times and we all love it. The only change I do (cause I’m lazy), is to saute the onions and peppers and then throw everything else for the sauce into the same pot, and just layer the tortillas, sauce and cheese. One less layer and one less bowl/pot to wash. 🙂
That’s awesome – thanks for letting me know Kim! And glad combining everything into one pot worked for you! 🙂
This was crazy good, another recipe I’ll have to add to the regular rotation.
Awesome!! So glad to hear it Scott!