Homemade Sourdough Croissants
This post may contain affiliate links. As an Amazon Associate, I earn from qualifying purchases. Please read my disclosure.Crispy on the outside and light, buttery, and flaky inside, these Homemade Sourdough Croissants are my absolute favorite to bake. With just a handful of ingredients and a little patience, the results are so worth it. They’re perfect for weekend brunch, cozy mornings at home, or whenever I am craving something freshly baked and comforting.

If you’ve ever wondered whether you can make croissants with sourdough starter, the answer is absolutely yes! As someone who loves baking breads and pastries, I had to try it myself. I still love traditional croissants, but sourdough gives them a richer flavor and skips the need for commercial yeast, much like it does to my sourdough grilled cheese sandwich.
So I set out to create sourdough croissants that could rival the ones from the best bakeries. I won’t lie, the first time might feel a little intimidating, but they’re easier than you think. With just 2 hours of hands-on prep, 30 minutes of baking, and a little patience patience during rest times,, you’ll have warm, flaky croissants ready to enjoy.
👩🏽🍳 Why I Love This Recipe
For me, the perfect croissant has three must-haves: a rich, buttery taste, a crisp flaky exterior, and a soft, airy inside. I’m so happy to say that my sourdough butter croissant recipe delivers on all three, and then some! While these croissants may look fancy, they’re surprisingly easy and budget-friendly to make at home. The process does take a bit of time and patience, but it uses simple baking ingredients and straightforward steps. Plus, you can use either a store-bought sourdough starter or one you’ve made from scratch, whatever works best for you.
Plus, my sourdough croissant recipe skips the commercial yeast and relies entirely on natural fermentation. That means you not only get amazing flavor, but also some added health benefits. Sourdough is easier to digest, supports gut health, and is packed with more vitamins and minerals than your typical croissant.
And I have to say, one of my favorite things about these croissants is how versatile they are. I love enjoying them for breakfast with jam or cheese and a hot cup of coffee. Sometimes I turn them into indulgent French toast, and for lunch, I’ll swap in a croissant for sandwich bread or serve one with a big fresh salad.
I truly believe these are the best sourdough croissants you’ll ever make at home. They’re flaky, buttery, and have that perfect tangy flavor that makes every bite feel special. Give them a try, you’ll be hooked after the first one!
Latest Recipe Video!
🥘 Ingredients
What I love most about my sourdough croissants is that they only need a few basic pantry staples. With a little patience, anyone can make them right at home.
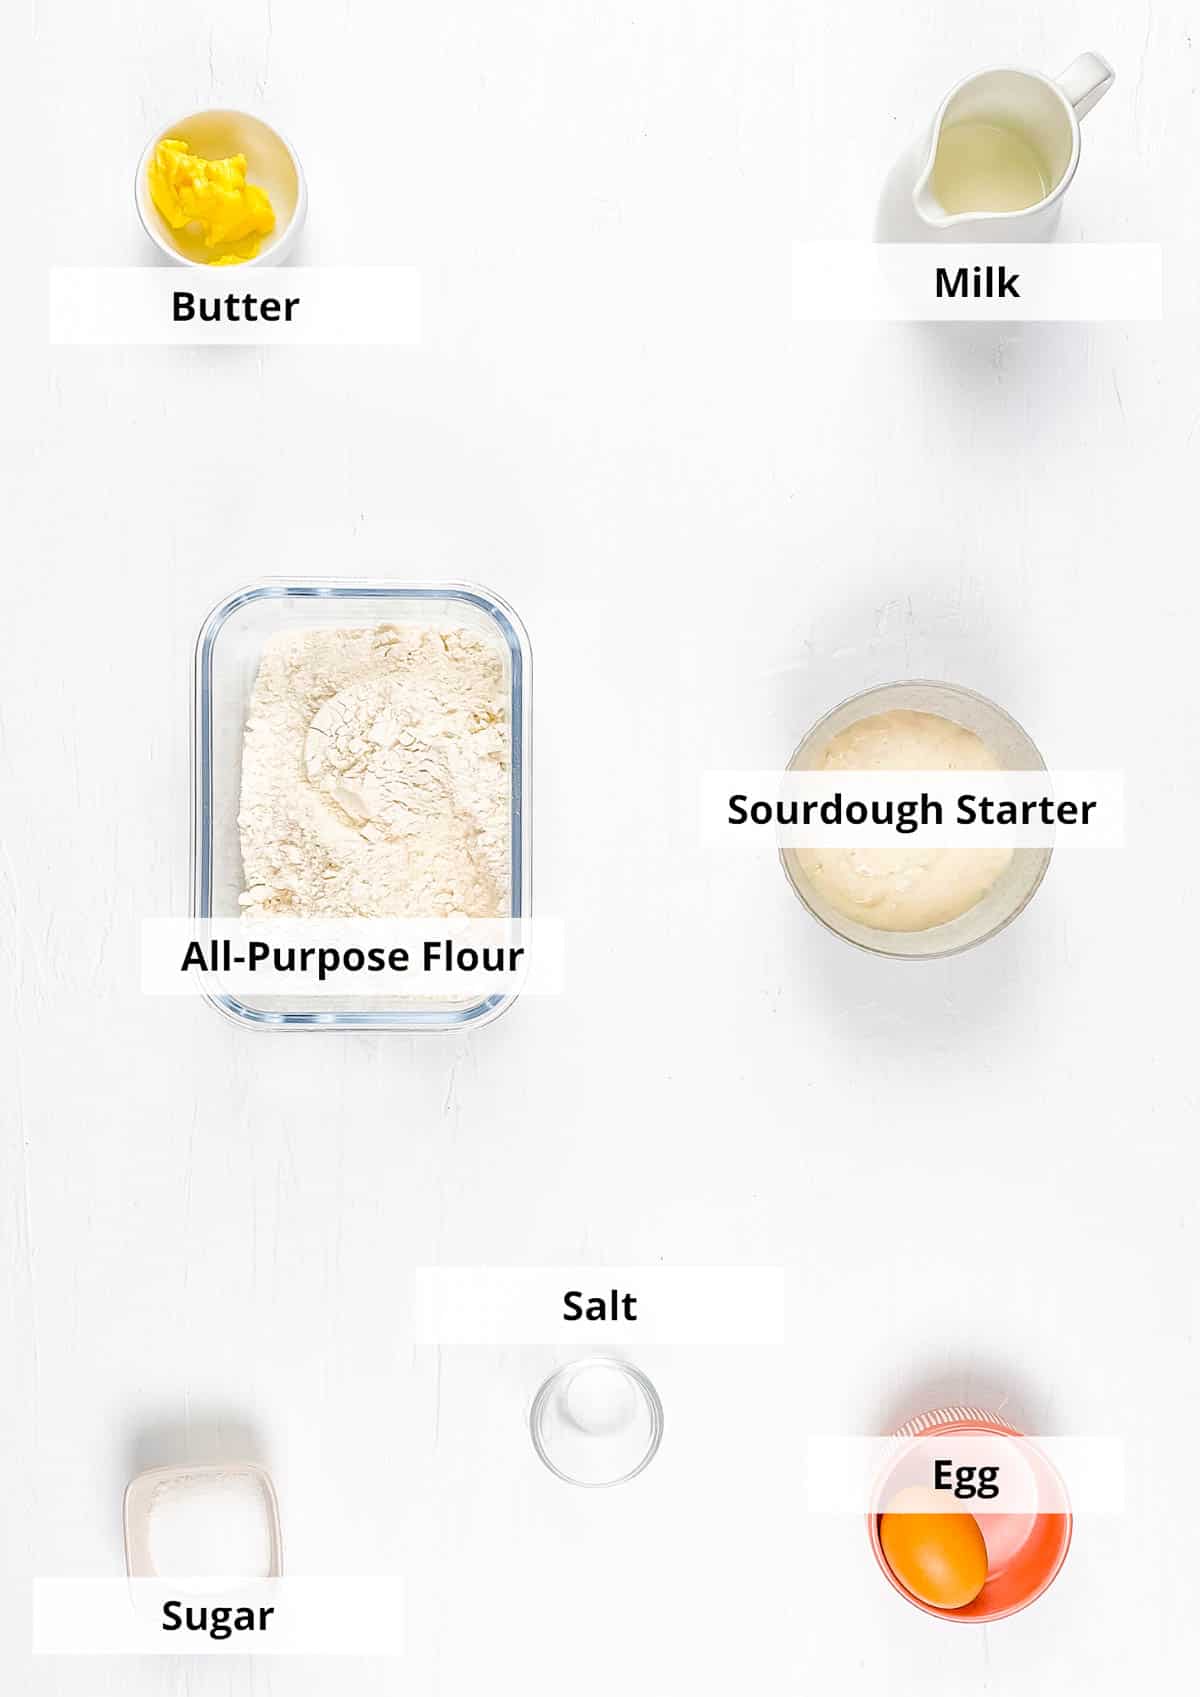
Active Starter: I always make sure my sourdough starter is super active before starting this recipe. It takes the place of yeast in traditional croissants, helping them rise beautifully while adding that signature tangy flavor I love, just like a good sourdough loaf!
All-Purpose Flour: My recipe calls for all-purpose flour which gives the croissants a fluffy and chewy texture. You can also use pastry flour for a more delicate croissant.
Salt & Sugar: These staple ingredients are very common in pastry and sweet bread recipes. The sugar adds the perfect touch of sweetness, while the salt enhances all the natural flavors of sourdough.
Milk: Milk adds more richness to the croissant, creating the perfect balance of softness and flakiness.
Unsalted Butter: Unsalted butter is essential in this recipe because it’s used both in the dough and for laminating. I use a whole block just for the folds, and that’s what creates those beautiful, flaky layers we all love in a perfect croissant.
Egg: I use one whole egg or just the yolk to make a simple egg wash. A quick brush over the croissants before baking gives them that gorgeous golden brown shine that makes them look straight from a bakery.
Pro tip: If you don’t want to make your own starter from scratch, just ask around, chances are someone you know has extra to share! And once you have it, you can use that same starter in other sourdough recipes like my buckwheat sourdough bread or this sourdough sandwich bread!
🔪 How To Make
I know the idea of making French pastry can feel a bit intimidating, but I’ve laid it all out in simple, manageable steps. With just a little practice and patience, you’ll be nailing bakery-style croissants in no time! Check out my video below to see how these croissants are made step-by-step.
Preparing The Dough
Knead The Dough: To begin, I put all dough ingredients into the bowl of a stand mixer with a dough whisk or dough hook attachment. Now, I knead the mixture until a soft, sticky dough has formed, scraping the sides of the bowl if needed. Then I remove the dough and shape into a ball.
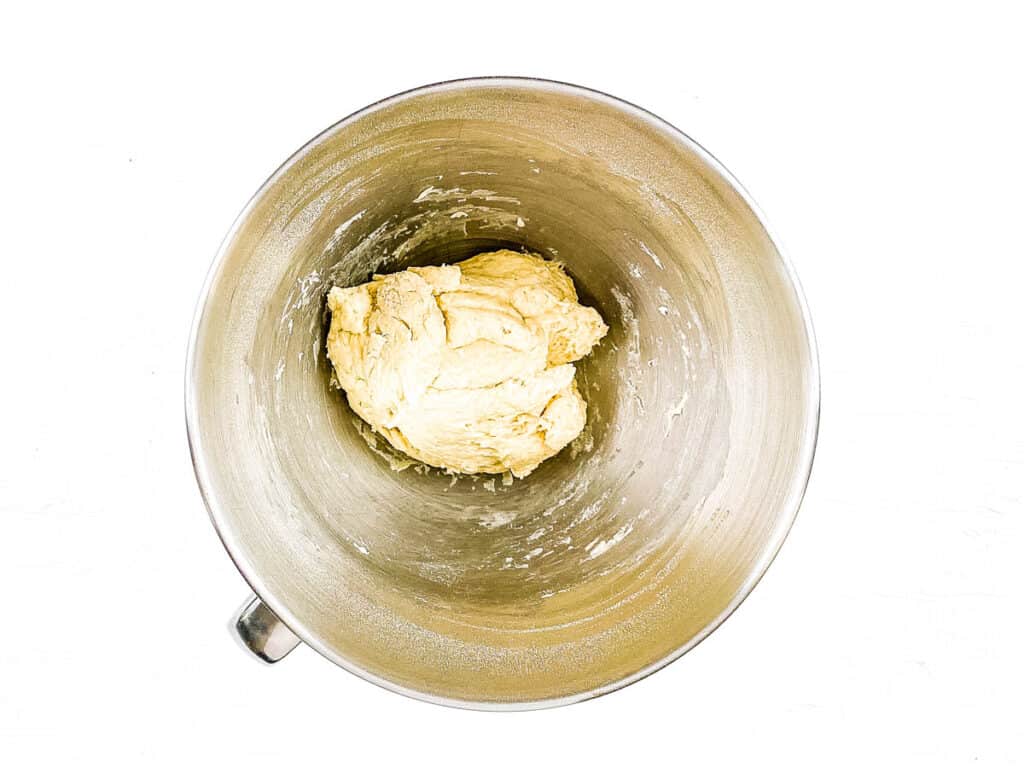
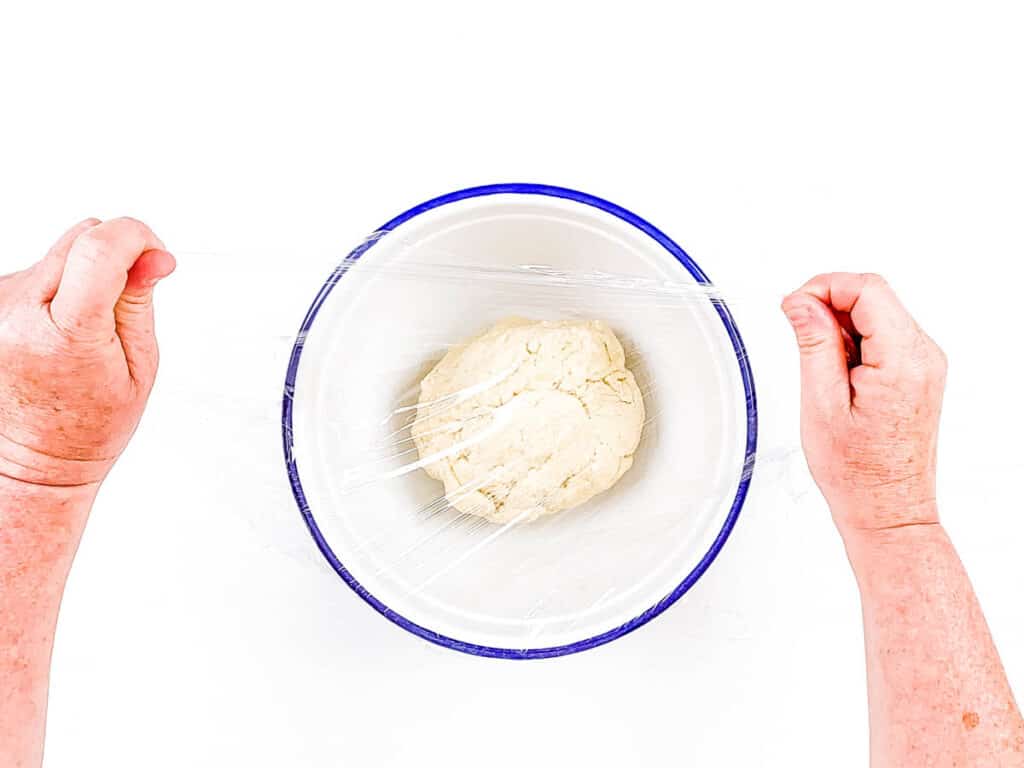
Rest For 1 Hour: Once made, I transfer the dough to a lightly greased bowl, cover with plastic wrap, and let it rest for 1 hour at room temperature.
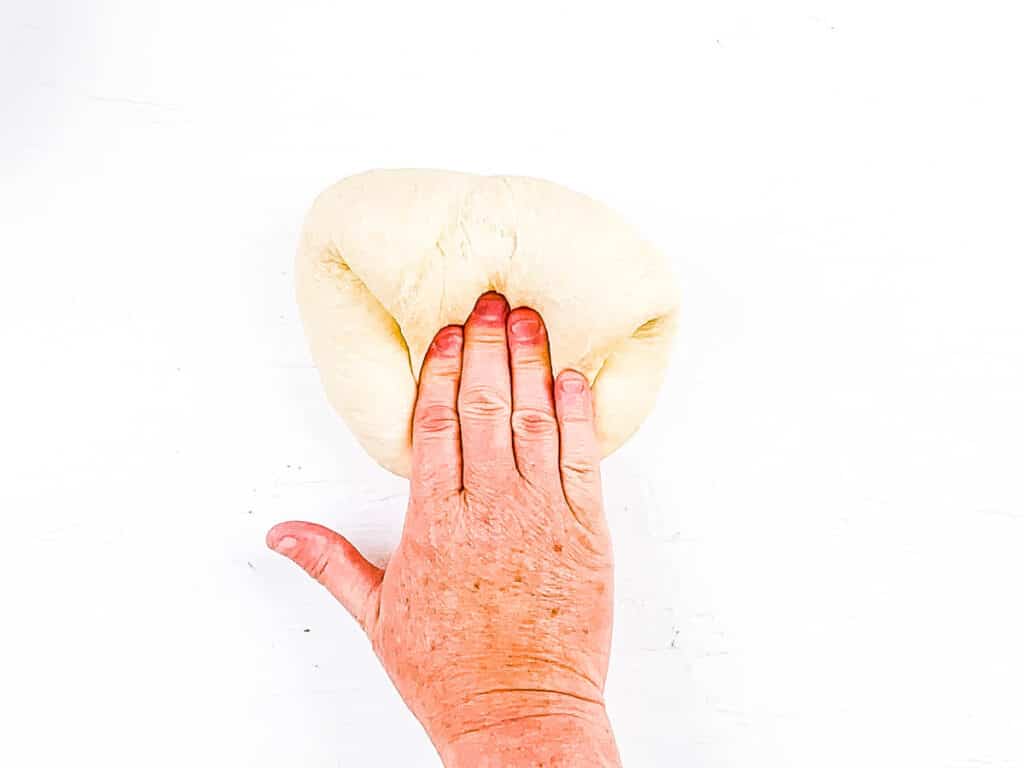
Fold The Dough: After an hour, I place the dough onto an unfloured surface and gently press it into a circle. Next, I take one edge and fold it over into the center, turn the dough a quarter turn, and repeat. Then I continue to fold the edges into the middle of the dough until I have worked every edge into the center. Now, I turn the dough over and repeat. I repeat this folding technique 2 more times. The dough will become very smooth.
Rest For 3 Hours, Then Chill Overnight: After folding, I return the dough to a lightly oiled bowl, cover it again, and allow the dough to rest at room temperature for another 3 hours. Then I transfer it to the fridge to rest overnight (approximately 12 hours). You can continue the recipe the following morning.
Laminating
Prepare Butter For Lamination: The next morning, I prepare the room-temperature butter for lamination. First, I place the softened butter block in the center of two sheets of parchment paper. Then, I fold the parchment paper to make a 5”x5” square in the center and fold the edges of the paper to cover the butter.
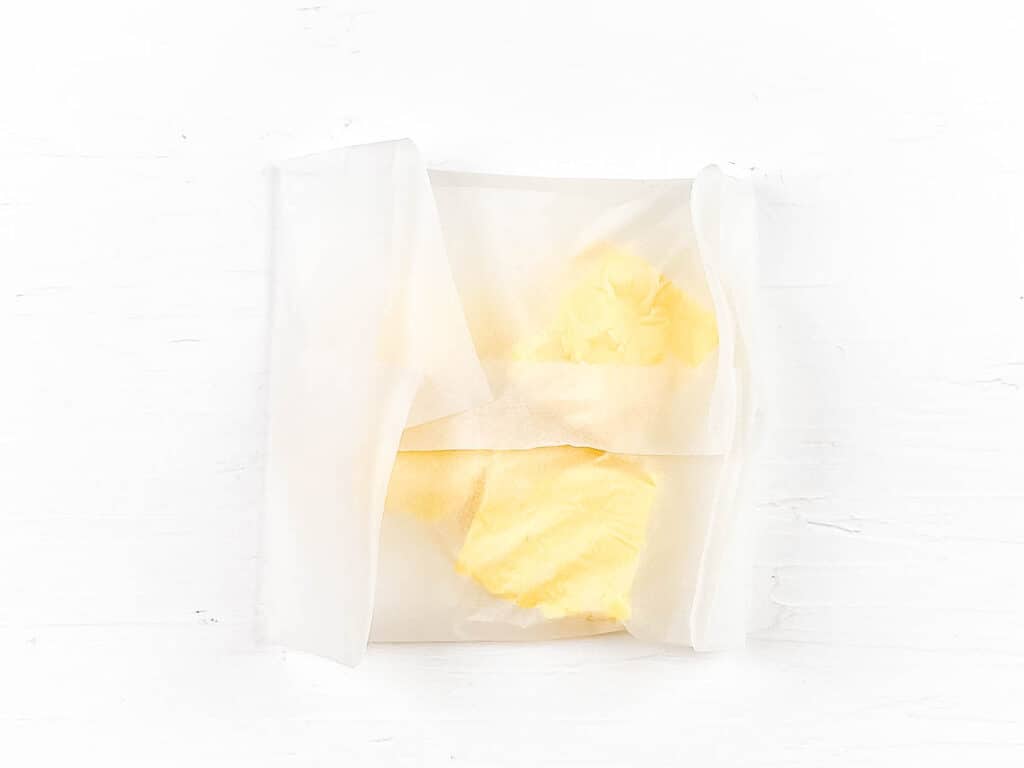
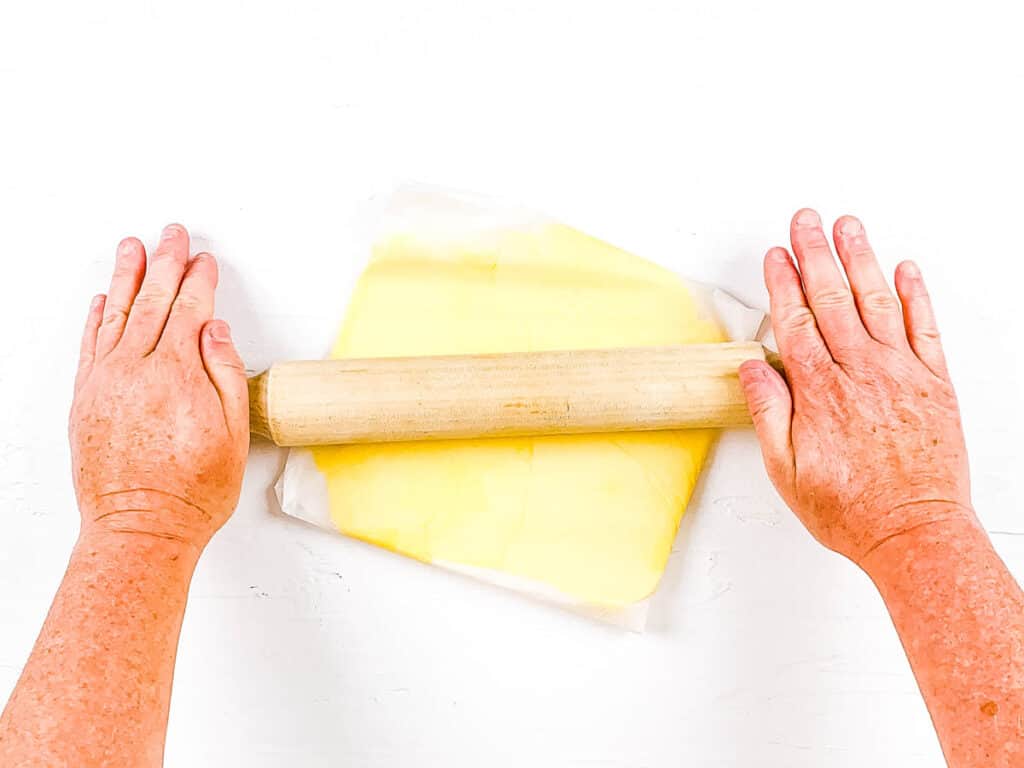
Flatten Butter: Using a rolling pin, I flatten the butter to form a square.
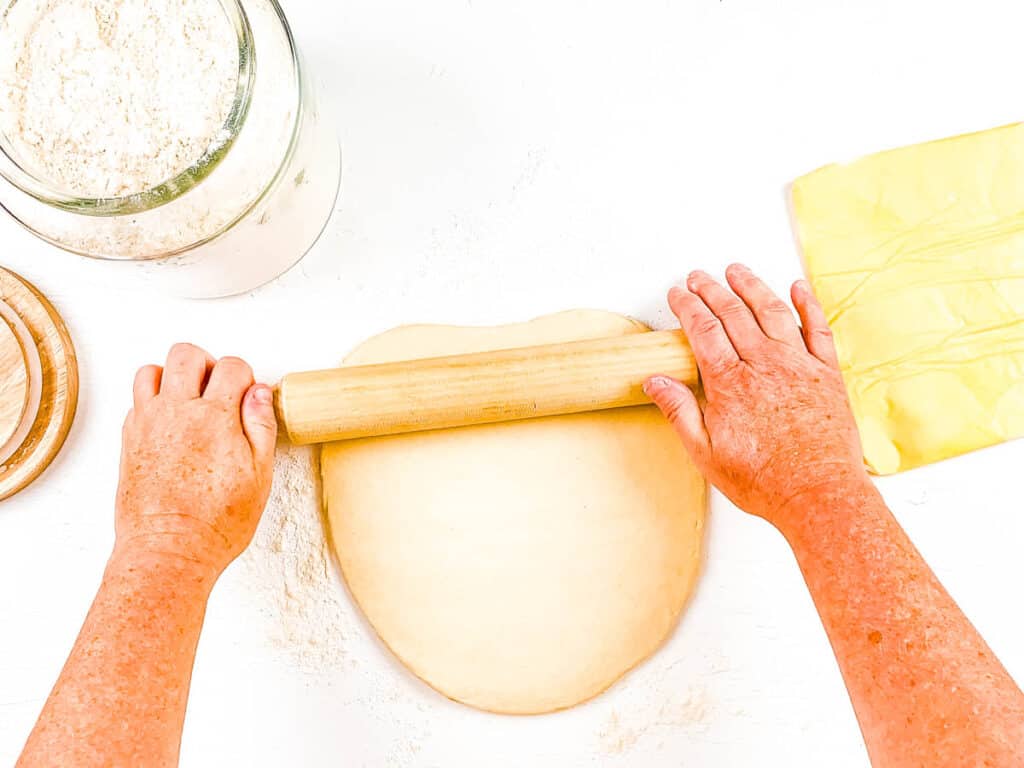
Roll The Dough: When the butter is ready, I remove the chilled dough from the fridge and allow it to come to room temperature. Then on a lightly floured surface roll the dough, making sure the surface is large enough to encase the butter square.
Enclose The Butter: I carefully unwrap the butter and place it into the center of the dough, removing the baking paper
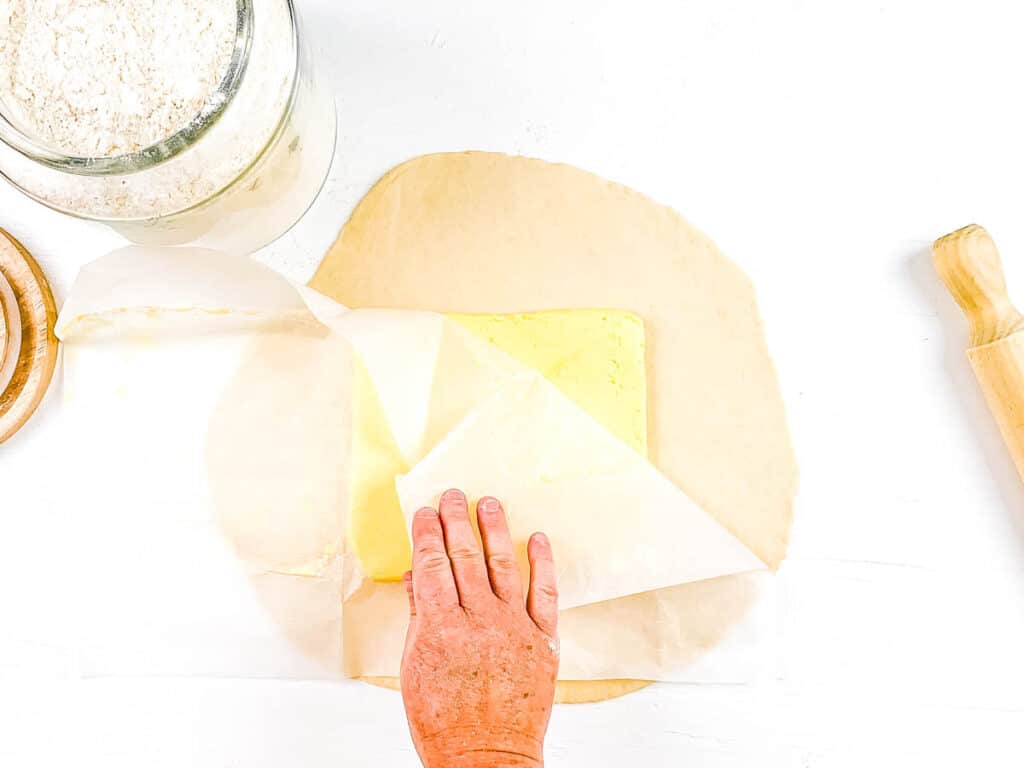
Fold The Corners: With the butter in place, I fold each corner of the dough over to enclose the butter. Then I press to seal the edges so no butter can escape.
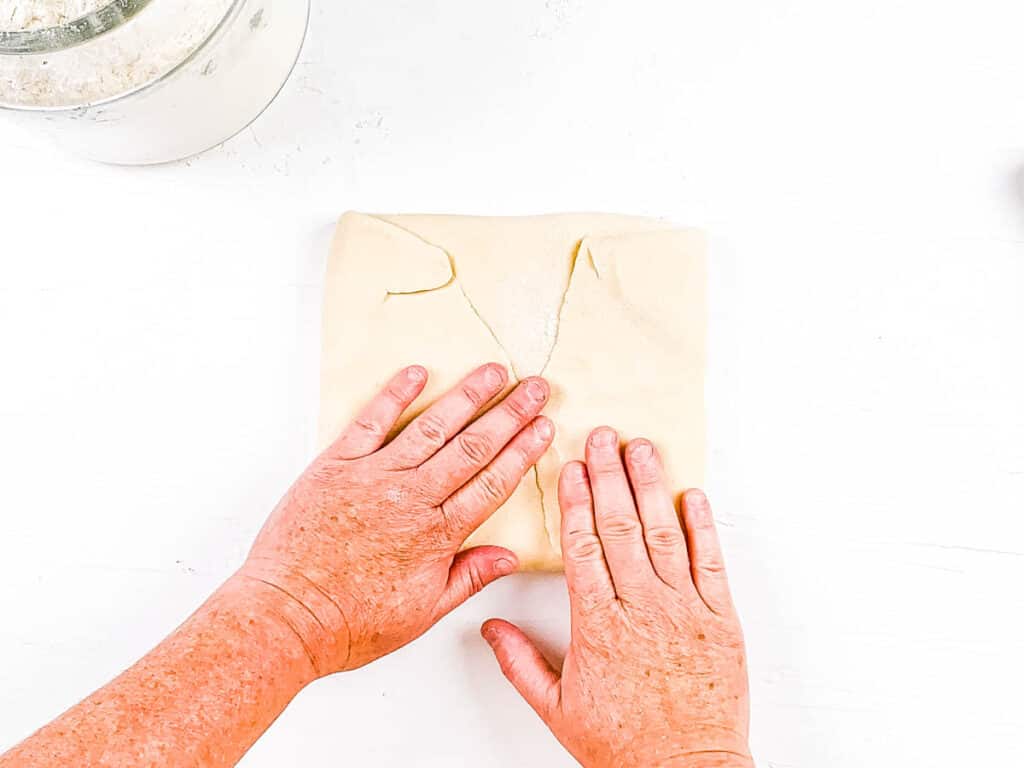
Roll Out The Dough: First, I turn the dough over. Then I roll it into a long rectangle, focusing more on length than width.
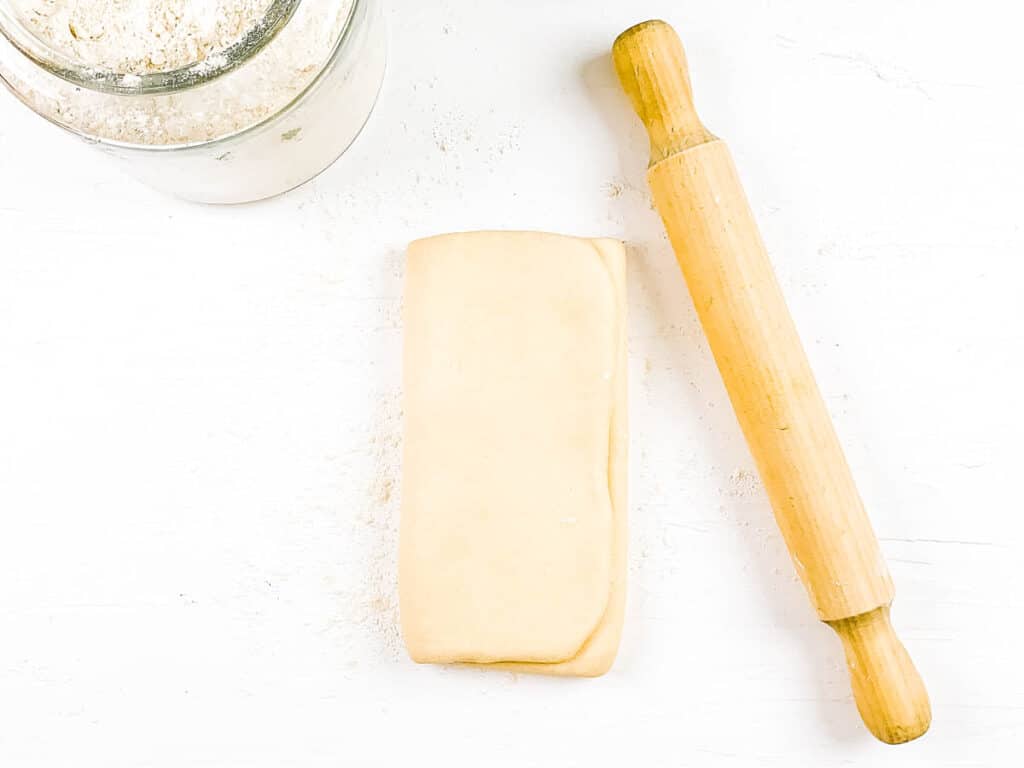
Fold And Cover: After rolling, I fold the dough into three equal parts by taking the top edge and folding it into the center and then covering it with the bottom third of the dough, like you’re folding a letter. Then I cover it in plastic wrap and chill it in the fridge for 30 minutes.
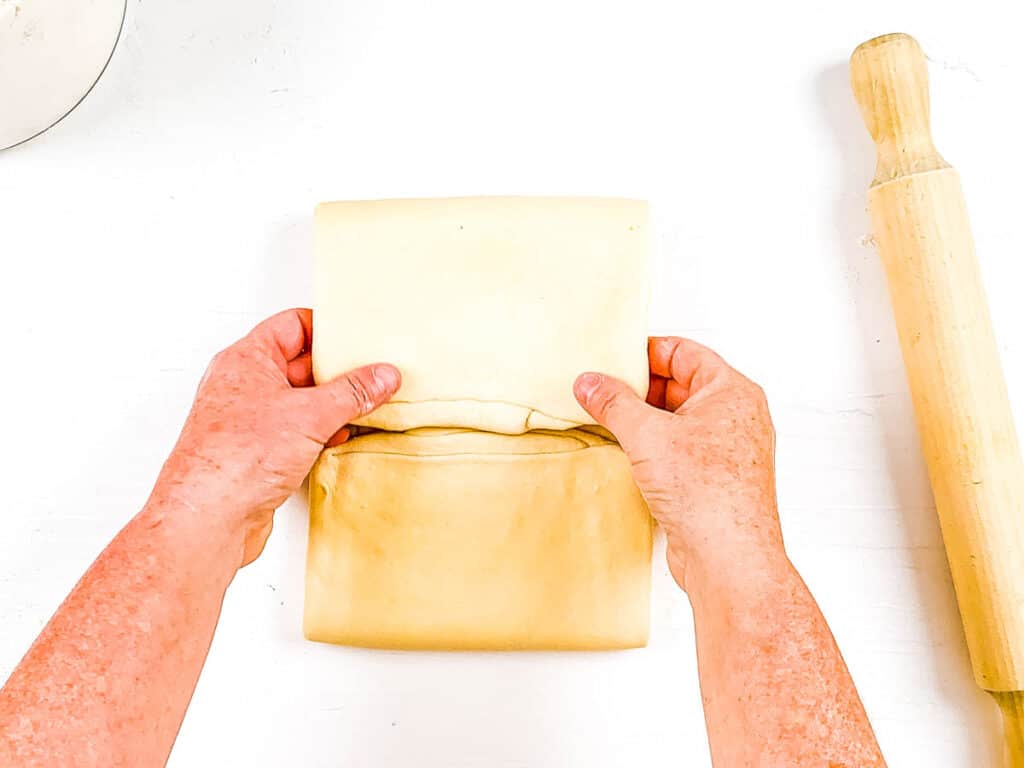
Roll And Fold Again: Once it’s chilled, I remove the plastic wrap and place the dough with the shortest edge facing me, and roll it into a 20”x6” rectangle. Next, I fold the bottom edge into the center, then fold the top edge into the center, and then finally fold the dough in half like you’re closing a book. Then I cover and let the dough rest in the fridge for 30 minutes.
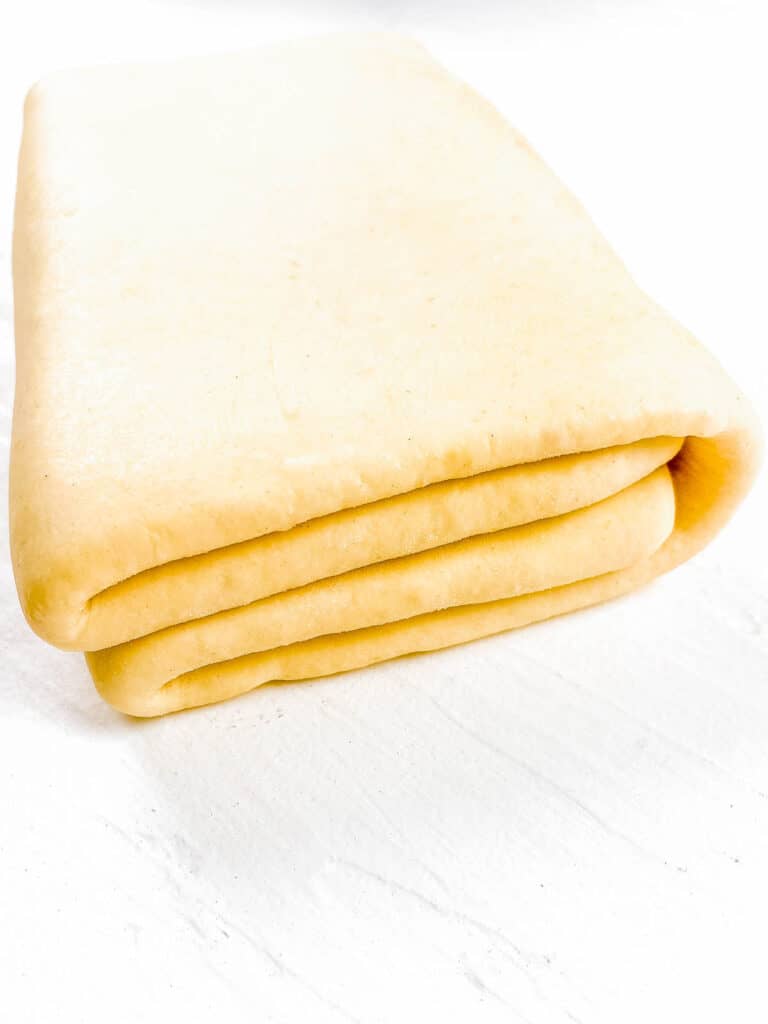
Repeat: I let the dough chill again, I repeat this rolling and folding process 2 more times, making sure to have the smallest edge facing me each time and to chill in between each roll. This repetition creates lots of flaky layers.
Shaping Croissants And Baking
Roll The Dough: After the cold dough has been rolled and folded 4 times, I roll the laminated dough one more time, on a lightly floured work surface, into a 16”x10” rectangle.
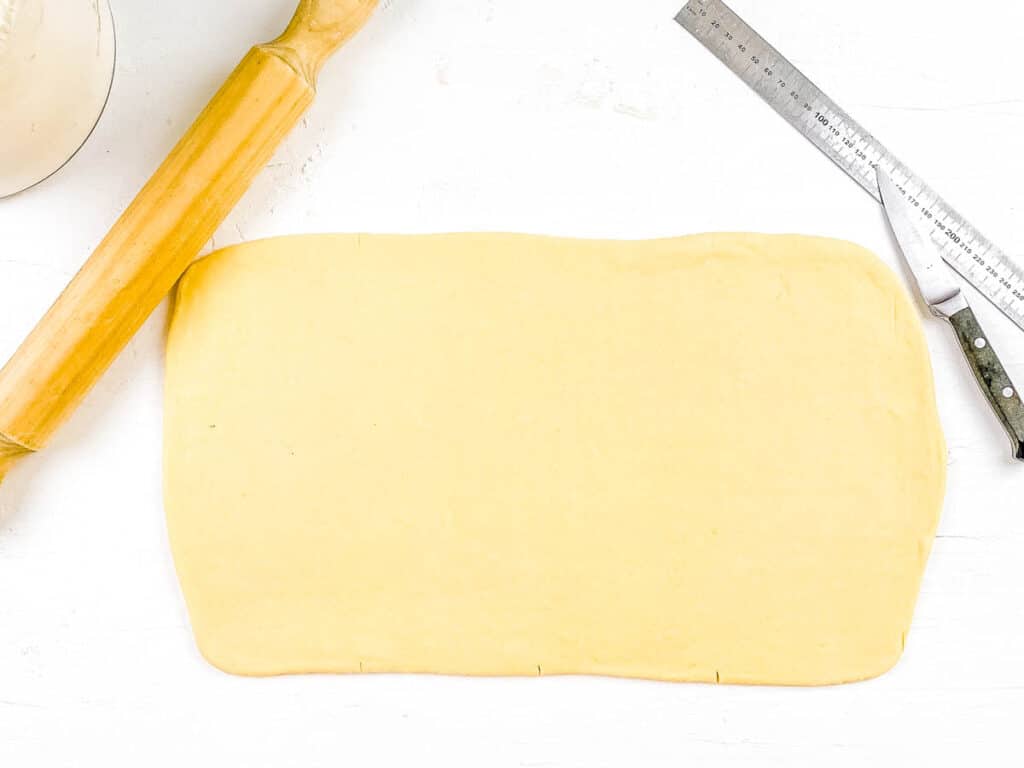
Measure, And Form Triangles: First, I measure and mark every 4” along the top and bottom of the dough and trim off the side edges for neater croissants. Next, using a pizza cutter or sharp knife I cut from the first mark on the bottom edge to the top left corner, forming a long triangle. Then I cut a straight line from the same mark on the bottom to the corresponding mark on the top forming a second triangle. I repeat this process at each mark along the dough until I have 8 dough triangles.
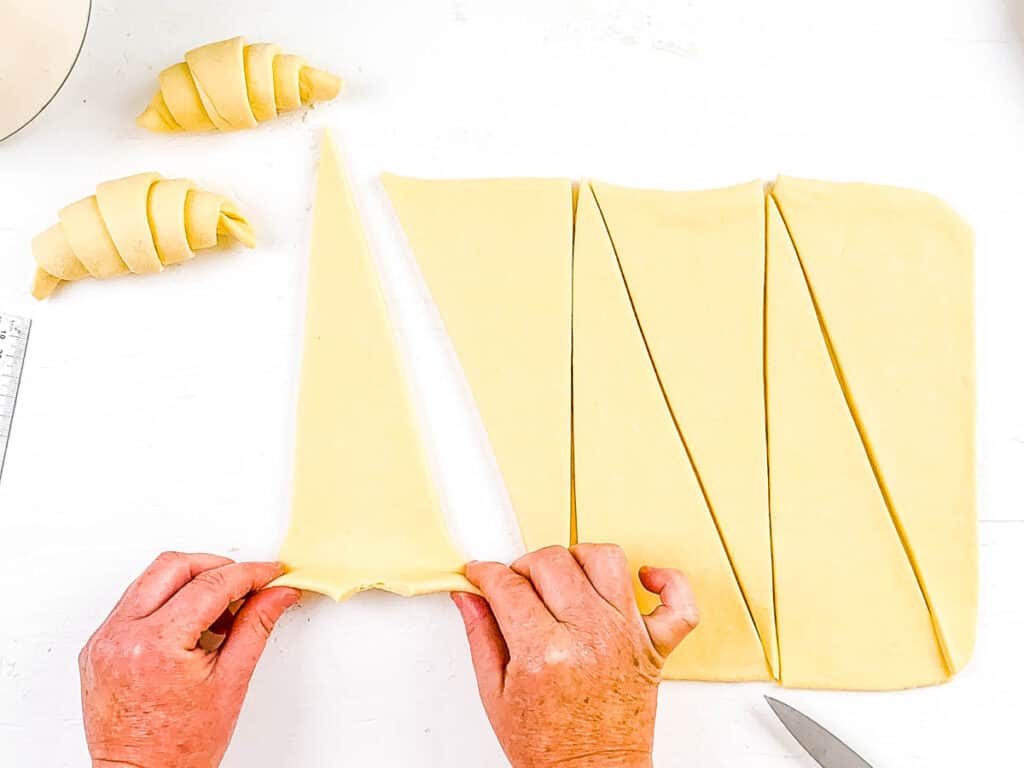
Shape The Croissants: To shape the sourdough crescent rolls, I make a small incision at the base of the triangle and gently stretch the dough outwards. Then I roll the dough tightly towards the tip of the triangle. I repeat this shaping technique until all 8 croissants have been shaped. You can also form a crescent shape.
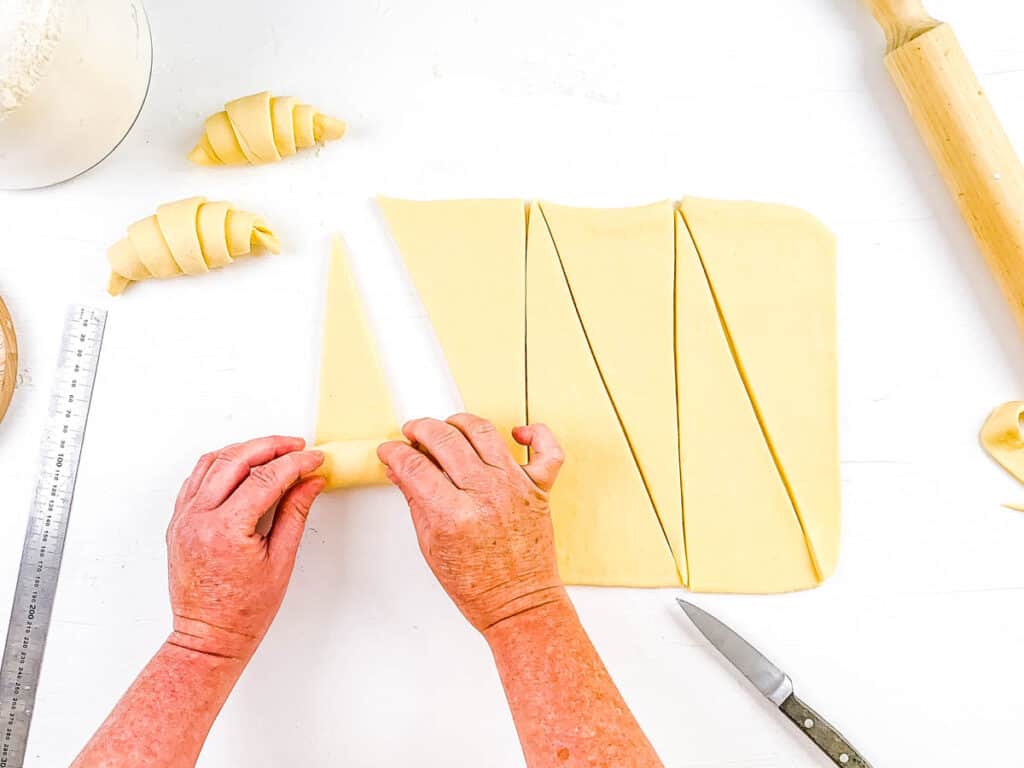
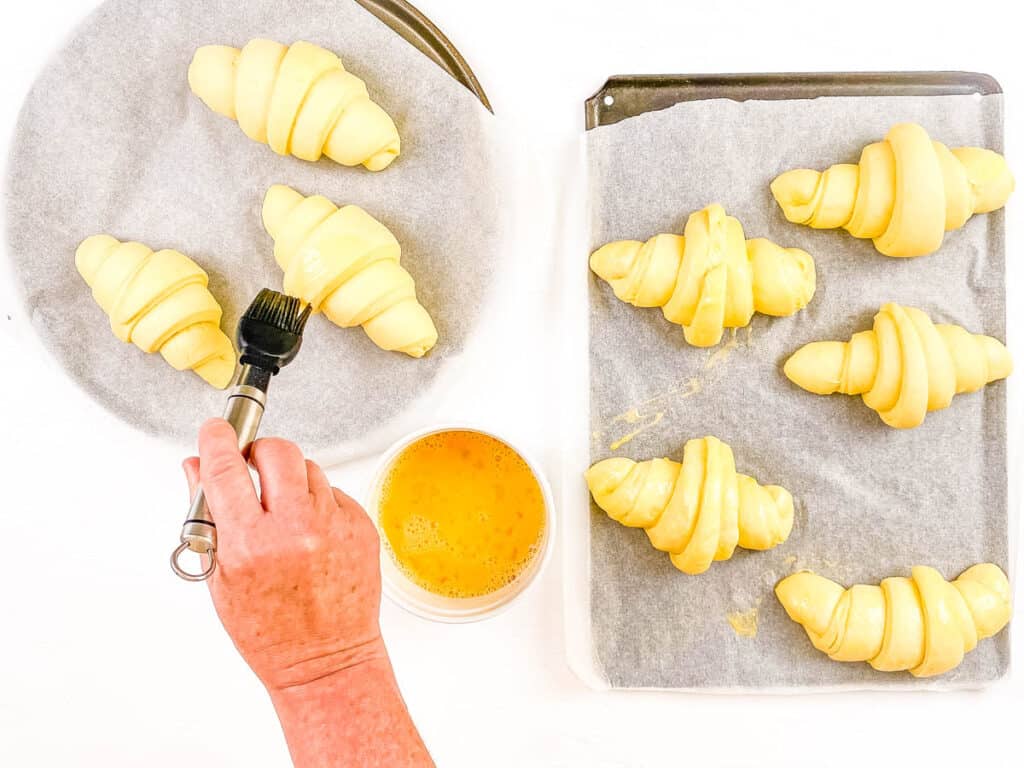
Proof For 3 Hours: Once shaped, I place croissants onto the prepared baking sheets allowing a lot of space for them to rise. Then I lightly cover the trays with plastic wrap and let them rest in a warm place to rise for 3 hours.

Let Them Double: The croissants will double from the original size and will be soft and jiggly when touched. You have the option to continue and bake them or place them in the fridge for 1 hour before baking. Chilling helps to retain the shape but is completely optional.

Preheat The Oven & Bake: When ready, I preheat my oven to 375 degrees Fahrenheit (190 degrees Celsius). Then I gently brush the tops of each croissant with egg wash and bake them in the preheated oven for 25-30 minutes until golden brown.
Cool: After baking, I remove them from the oven and allow to cool completely on the baking trays before serving.

Serve: I always find my sourdough croissants taste the best fresh out of the oven, ideally the same day they’re baked. That’s when they’re at their flakiest, lightest, and most irresistible!

💭 Expert Tips
My #1 Secret Tip for making my no-yeast sourdough croissants is to ensure your sourdough starter is very active before you begin. I always test mine by dropping a spoonful into a bowl of water – if it floats, it’s good to go. If it sinks, I feed it and give it more time. This step makes all the difference in how light and fluffy your croissants turn out!
Other Tips To Keep In Mind:
- Similar Consistency For Lamination: I always make sure the dough and butter have a similar, pliable consistency before I start laminating. I avoid using dough that’s too cold because it can tear when rolled out; it should be at room temperature. I also make sure the butter is soft and not cold, so it doesn’t shatter and ruin the layers during baking.
- Roll The Dough Tightly: When I roll the dough into croissant shapes, I make sure to roll it up nice and tight so it holds together well while baking.
- Keep Your Room Cool: It’s best to make these croissants in a room that isn’t too hot. If your room becomes warmer than 77 degrees Fahrenheit (25 degrees Celsius) you may find the butter starts to melt too quickly and won’t laminate correctly.
- Chill After Easy Roll And Fold: I always chill the dough after each roll and fold because it gives the butter time to firm up and keeps it from melting too soon. It also gives the dough a chance to rest, which helps prevent overworked gluten and keeps the pastry light and easy to roll.
- Make Smaller Croissants: This recipe makes 8 large croissants, however, if you’d prefer smaller croissants you can mark the dough every 2” which will produce 16 smaller croissants. The procedure for making them remains the same.
- Use High-Fat Butter: Using a European butter or high fat butter will add more flavor and make the lamination process easier.
🥐 Detailed Croissant Troubleshooting Tips
When making my recipe for the first time, you may run into some setbacks. These are my top troubleshooting tips to make sure you end up with the best croissants.
Croissant Dough That Is Too Sticky
If your croissant dough is too sticky, you may be using a butter that is too low in fat. You want to use butter that has a high fat content and low water content. For example, European butter has a fat content of 82% and is ideal for French pastry.
Additionally, your dough may be too warm. It is important to chill the dough in between each fold and roll, which will help it firm up and be easier to work with. If the dough is still too sticky, you may need to add 1 to 2 tbsp of flour.
Melting Butter? Let’s Fix It!
If your butter starts melting while working with the dough, immediately place the dough in the refrigerator for 15-20 minutes to firm up the butter. Ensure you are working quickly and in a cool environment to minimize the risk of the butter softening. Using a chilled surface, like a marble slab, can also help maintain the butter’s consistency.
Fixing Croissants That Are Not Airy
Your croissants will come out more bread-like and less airy if you are not mindful of the temperatures when making your dough. It is best to have both the dough and the butter at room temperature during the lamination process so that the dough does not tear and the butter does not shatter. Too warm of butter will cause the dough layers to stick together, and too cold of butter will break and leave you with an incohesive layer structure.
Dough That Won’t Roll Out
When rolling your dough, the gluten can get overworked and you’ll have stiff dough that is difficult to roll out and work with. You want to allow the dough time to rest and relax so that it does not get too tough. Cover with plastic and chill in the fridge for 30 minutes. When you take the dough out, it should be easier to roll out!
What To Do If Croissants Won’t Rise
If your croissants are not rising, it is likely that you did not proof the dough long enough. Next time, be sure to allow plenty of time for proofing. Proof the dough in between folds and overnight in the fridge. Your final proofing will be after the croissants are shaped, in which you want to give them at least 3 hours to double in size.
If you had set them in an area that is cooler to proof, you may need to find a better place. You can set them near a warm, sunny window or in a turned-off oven with the lights on. Monitor closely for optimal temperatures.
✔️ How To Make Sourdough Starter
Most croissants use commercial yeast, but my sourdough croissant recipe uses an active starter instead, adding delicious flavor and health benefits. While you can buy starter, making your own is a simple process that takes about five days.
Day 1: To begin, I measure out equal weights of flour and water, starting with 113 g of each. I add both to a large jar and stir well with a wooden spoon to ensure no excess flour remains unmixed. Then I cover the jar loosely and let it sit at room temperature overnight.
Day 2: The next day, I might start to see a bit of growth in my starter. I discard 113 g of the starter and feed the remaining starter with 113 g of fresh flour and 113 g of water. If my home is warm, I use cold water. Then I cover the jar again and let it rest for another 24 hours.
Day 3-5: By day 3, I keep 113 g of the sourdough starter and discard the rest. I then add 113 g of water and 113 g of flour. After mixing, I cover the jar and let it rest for 12 hours. I repeat this process every 12 hours on days 4 and 5. I know my starter is ready when it has risen and is very bubbly.
⏲️ Croissant Baking Timeline
Making my sourdough croissants is an easy process that requires some patience and attention to detail. I’ve broken down the steps into a simple timeline that outlines everything from making the dough to shaping the croissants and baking them to perfection. Feel free to modify the times to fit your schedule.
Day 1
| 3:00 PM | Make the dough, put it in a lightly oiled bowl, cover it with plastic wrap, and rest for 1 hour at room temperature. |
| 4:30 PM | Press the dough into a circle and perform the folding instructions 3 times. |
| 4:45 PM | Return the dough to a lightly oiled bowl, cover, and rest at room temperature for 3 hours. |
| 7:45 PM | Transfer the dough to the fridge to rest overnight (approximately 12 hours). |
Day 2
| 9:00 AM | Prepare the room-temperature butter for lamination. |
| 9:30 AM | Remove the dough from the fridge and follow the instructions to encase the butter in the dough. |
| 10:00 AM | Turn the dough over and roll into a 20”x6” rectangle. Fold the dough into thirds like a letter. Cover with plastic wrap and chill for 30 minutes. |
| 10:30 AM | Roll the dough with the shortest edge facing you into a 20”x6” rectangle. Fold the bottom edge into the center, then fold the top edge into the center and fold the dough in half like a book. Cover and chill for 30 minutes. |
| 11:00 AM | Repeat the rolling and folding process. Then chill for 30 minutes. |
| 11:30 AM | Once again, repeat the rolling and folding process and chill for 30 minutes. |
| 12:00 PM | Roll the dough one last time into a 16”x10” rectangle. Then cut and form the croissants by following the instructions of the recipe. |
| 12:30 PM | Cover the croissants on the baking sheet with plastic wrap and let them rise in a warm place for 3 hours. |
| 3:30 PM | Preheat oven to 375°F (190°C). Brush croissants with egg wash and bake for 25-30 minutes until golden. |
| 4:00 PM | Remove from the oven and cool completely on baking trays. Serve immediately. |
📖 Variations
This sourdough croissant recipe is one of my proudest baking wins, and I love how easy it is to get creative with it.
Chocolatey: Add a layer of chocolate when rolling your croissant dough for a delicious pain au chocolat! I highly recommend using my vegan Nutella!
Almond Croissants: Try these homemade croissants with added almond extract or a layer of almond paste. You can top them with some sliced almonds, as well.
Fruit-Filled: Spread a spoonful of your favorite fruit preserves (raspberry, apricot, or strawberry) on the dough before rolling up. Then proof and bake as usual.
Cinnamon Sugary: Before rolling, I brush the dough with melted butter and sprinkle with a cinnamon sugar mixture. My kids love this variation.
🍽 Serving Suggestions
Croissants are incredibly versatile and go well with a variety of dishes. Their buttery, flaky texture and tangy flavor make them a great addition to any meal. Here are some delicious ways I love to serve croissants:
With Breakfast: Enjoy plain or spread with butter and my strawberry chia seed jam for a classic breakfast served with coffee or tea. Pair with this egg white omelette and this breakfast fruit salad for a hearty start to your day.
For Brunch: I use as the base for this vegan French toast casserole or make traditional French toast by dipping croissant halves in an egg mixture and frying until golden brown. I serve with maple syrup and fresh berries.
As Sandwiches: Slice open and fill with a buttery garlic mixture, pinch of salt, and melted cheese for the ultimate savory treat. I use them as a bread replacement in a tasty sandwich like this kale and caramelized onion panini or vegan egg salad sandwich.
With Soups and Salads: Serve alongside a bowl of hot soup, such as this vegan tomato soup or this 4 ingredient potato soup, for a comforting meal. I also pair with a fresh salad, like this beetroot and feta salad, or simple mixed greens with vegan Italian dressing, for a balanced light lunch.
🧊 Storage Directions
Room Temperature: I store my croissants in an airtight container in a cool dry place for up to 2 days, if they even last that long! They go quickly in my house.
Freezer: It’s possible to freeze croissants either baked or unbaked. If freezing before baking, I follow the instructions until step 20. After the croissants have fully risen, I lightly cover the tray with cling film and place it in the freezer for at least 2 hours. Then I transfer the croissants to a ziplock plastic bag and freeze them for up to 2 months. If freezing baked croissants, I place them in a ziplock bag and freeze them for up to 2 months.
Baking and Reheating: To reheat frozen baked croissants, I place them directly in my oven, preheated to 375 degrees Fahrenheit (190 degrees Celsius), for about 10-12 minutes or until they are warmed through and crispy. For frozen unbaked croissants, I let them thaw at room temperature for about 30 minutes or until they’ve risen slightly. Then, I bake them for 20-25 minutes as directed in the recipe.
❓Recipe FAQs
The dough is done proofing when it has doubled in size and is slightly wobbly to the touch. You can perform the poke test: gently press your finger into the dough. If the indentation springs back slowly and only partially fills in, the dough is properly proofed. Over-proofed dough may collapse, while under-proofed dough will spring back quickly.
You can keep your dough in the fridge for 12 hours or overnight before beginning the laminating process. After each roll and fold step, chill the dough for 30 minutes.
The difference between sourdough croissants and sourdough discard croissants comes down to the type of sourdough starter used and how the dough is leavened. Traditional sourdough croissants like my recipe are made with an active sourdough starter, which means the dough is naturally leavened through a longer fermentation process. On the other hand, sourdough discard croissants use the portion of the starter that’s removed during feedings (the “discard”). Since discard isn’t active enough to rise the dough on its own, these croissants typically rely on yeast or baking powder for leavening.
No worries! You can knead the dough by hand. It just takes a little more effort, but it’s totally doable and worth it.

Love this Plant based breakfast recipe? Please leave a 5-star rating 🌟 in the recipe below and/or a review in the comments section further down the page!
You can also FOLLOW ME on FACEBOOK, INSTAGRAM, and PINTEREST to see more delicious, healthy, family-friendly food, and if you have any questions, I’m here to help!
📋 Recipe Card
🎥 Watch How to Make It
Homemade Sourdough Croissants
Ingredients
Dough Ingredients
- ½ cup active sourdough starter
- 1 ⅔ cup all-purpose flour
- ½ tsp salt
- 2 ½ tbsp sugar
- ½ cup milk
- 2 ½ tbsp butter room temperature
Butter Block For Lamination
- 8 oz butter softened
Glaze
- 1 egg whisked
Equipment
Instructions
Preparing The Dough
- Add all dough ingredients into the bowl of a stand mixer and knead until a soft, sticky dough has formed.
- Remove the dough and shape into a ball.
- Transfer the dough to a lightly oiled bowl, cover with plastic wrap and rest for 1 hour at room temperature.
- After the hour, place the dough onto a bench and gently press it into a circle. Take one edge and fold it over into the center, turn the dough a quarter turn and repeat. Continue to fold the edges into the centre until you have worked every edge into the center. Turn the dough over and repeat.
- Repeat this folding technique 2 more times. The dough will now become very smooth.
- Return the dough to a lightly oiled bowl. Cover and allow the dough to rest at room temperature for another 3 hours.
- Transfer to the fridge to rest overnight (approximately 12 hours).
Laminating
- The next morning prepare the room temperature butter for lamination.
- Place the softened butter in the center of a sheet of baking paper. Fold the baking paper to make a 5”x5” square in the center. Fold the edges of the paper to cover the butter.
- Using a rolling pin, flatten the butter to form a square.
- Remove the dough from the fridge and allow it to come to room temperature.
- Roll the dough on a lightly floured bench large enough to encase the butter square.
- Unwrap the butter and place it into the center of the dough, removing the baking paper.
- Fold the edges of the dough over to enclose the butter, press to seal the edges so no butter can escape.
- Turn the dough over and roll into a 20”x6” rectangle, focusing more on length than width.
- Fold the dough into thirds by taking the top edge and folding into the center and then covering it with the bottom third of dough, like you’re folding a letter.
- Cover in plastic wrap and chill in the fridge for 30 minutes.
- Remove the plastic wrap, place the dough with the shortest edge facing you and roll into a 20”x6” rectangle. Fold the bottom edge into the center, next fold the top edge into the center and then fold the dough in half like you’re closing a book.
- Cover and rest in the fridge for 30 minutes.
- Repeat this rolling and folding process 2 more times, making sure to have the smallest edge facing you each time and to chill in between each roll.
Shaping Croissants And Baking
- After the dough has been rolled and folded 4 times roll the dough one more time, on a lightly floured bench, into a 16”x10” rectangle.
- Measure and mark every 4” along the top and bottom edges of the dough, trim off the side edges for neater croissants.
- Using a pizza cutter or sharp knife cut from the first mark on the bottom edge to the top left corner, forming a long triangle. Next cut a straight line from the same mark on the bottom to the corresponding mark on the top forming a second triangle. Repeat this process at each mark along the dough until you have 8 dough triangles.
- To shape the croissants make a small incision at the bass of the triangle and gently stretch the dough outwards. Roll the dough tightly towards the tip of the triangle.
- Repeat this shaping technique until all 8 croissants have been shaped.
- Place the croissants onto the prepared baking trays allowing a lot of space for the croissants to rise.
- Lightly cover the trays with plastic wrap and rest them in a warm place to rise for 3 hours, the croissants will double in size and will be soft and jiggly when touched. You have the option to continue and cook them or place them in the fridge for 1 hour before baking. Chilling helps to retain the shape but is completely optional.
- Preheat the oven to 375 degrees F / 190 C. Line 2 trays with baking paper and set aside.
- Gently brush the tops of each croissant with the whisked egg and bake in the preheated oven for 25-30 minutes until golden.
- Remove from the oven and allow to cool completely on the baking trays before serving. These croissants are best served immediately, on the day they're made.
Notes
- My #1 Secret Tip for making my no-yeast sourdough croissants is to ensure your sourdough starter is very active before you begin. I always test mine by dropping a spoonful into a bowl of water – if it floats, it’s good to go. If it sinks, I feed it and give it more time. This step makes all the difference in how light and fluffy your croissants turn out!
- Similar Consistency For Lamination: I always make sure the dough and butter have a similar, pliable consistency before I start laminating. I avoid using dough that’s too cold because it can tear when rolled out; it should be at room temperature. I also make sure the butter is soft and not cold, so it doesn’t shatter and ruin the layers during baking.
- Roll The Dough Tightly: When I roll the dough into croissant shapes, I make sure to roll it up nice and tight so it holds together well while baking.
- Keep Your Room Cool: It’s best to make these croissants in a room that isn’t too hot. If your room becomes warmer than 77 degrees Fahrenheit (25 degrees Celsius) you may find the butter starts to melt too quickly and won’t laminate correctly.
- Chill After Easy Roll And Fold: I always chill the dough after each roll and fold because it gives the butter time to firm up and keeps it from melting too soon. It also gives the dough a chance to rest, which helps prevent overworked gluten and keeps the pastry light and easy to roll.
- Make Smaller Croissants: This recipe makes 8 large croissants, however, if you’d prefer smaller croissants you can mark the dough every 2” which will produce 16 smaller croissants. The procedure for making them remains the same.
- Use High-Fat Butter: Using a European butter or high fat butter will add more flavor and make the lamination process easier.




Hi, 8 oz (230gr) of butter for lamination for (208 gr of flour), is it too much? Thank you
Hi Donald! I have tested this recipe multiple times and the 8oz of butter is what has worked for me!
Why 113g to establish a starter? Not 110g or 115g, or any other amount in equal proportions? What is special about 113g, in particular?
Hi Brigette! The standard measurement of 3/4 of a cup in grams is 113g – that’s why it’s 113 and not 110 or 115. Hope that helps!
These are beautiful. I’ve not ever made croissants because they seem too daunting. But with your photos and time charts I might just give these a go!
Yes! They really are easier than you might think! I hope you love them when you try them!
I never would have thought of using sourdough starter for croissants but these came out so fluffy and perfect!
Awesome! So happy to hear that Kim!
I haven’t met a croissant I didn’t like and I’m really excited to make these!
Thanks Chenee! I know you’ll love this recipe!
I love a flaky croissant with a cup of coffee and this one was amazing! Love the flaky layers and the buttery texture. Such a perfect treat!
Thanks so much Vicky!! 🙂
This was such a unique and unexpected recipe that does not disappoint! Turned out light, fluffy and delicious; easily, a new favorite recipe!
So glad you liked it Sara!
OMG…
Today is Sunday, January 21, 2024, and I started baking sourdough about five months ago, along with many other things that can be made from sourdough and I just pulled these croissants, from this exact recipe, out of my oven and I am literally in shock that they taste better than any croissant from a store or a café I have ever tried.
SO BUTTERY AND FLAKY!
I didn’t have to leave this review because I usually never do but if you’re unsure, you should really try it because this is absolutely the best I’ve ever had!
Thank you to whoever put this recipe out there.
Oh wow! Your comment totally made my day Shaneen!! I’m so so happy to hear that you loved this recipe – I tested it quite a few times to get it just right! 🙂
These croissants were a huge hit in my home. Wow! They came out really fluffy. Liked your tips about sourdough starter.
Thanks so much Rachna! So glad you liked this recipe!
Thanks for this recipe! My whole family is going to love it!
Can’t wait to hear how it turns out for you Lily! 🙂
I have a bunch of sourdough starter in my fridge and now I know exactly what to do with it! Can’t wait to make these croissants, they look absolutely lovely.
Yes!! You will love this recipe Natalie! 🙂
Super fluffy, a hit even when baking with the kiddos.
Thank you so much Sarah! 🙂
I have officially been spoiled! Those were the best croissants ever! I no longer want any others. Thank you for this awesome recipe!
Aw yay! I’m so happy to hear that Ned!