

Roasted Butternut Squash
This post may contain affiliate links. As an Amazon Associate, I earn from qualifying purchases. Please read my disclosure.You really can’t beat my caramelized Roasted Butternut Squash. I love scooping it right onto a plate as a side, but I’ve definitely caught myself eating it straight with a spoon. I roast it in the oven with just oil, seasonings, and coconut sugar, and it’s ready in under an hour.
What I love about butternut squash is that it’s a super versatile vegetable that takes on a variety of sweet and savory spices, like paprika, cinnamon, garlic, maple syrup, or soy sauce, giving me plenty of serving options. I like to scoop out the squash and make this semi-sweet butternut squash and chickpea curry or these savory butternut squash quesadillas.
You already know I’m all about simple recipes I can just pop in the oven without doing a bunch of chopping or standing at the stove. With this easy roasted butternut squash, there’s barely any prep. I let the oven do all the work, and it always comes out soft, caramelized, and ready to serve.
👩🏽🍳 Why I Love This Recipe
Butternut squash is one of my favorite vegetables. I know, it’s a strange choice, but it has so many uses and ways to cook it. You can bake it, grill it, smoke it, boil it, then chop it into cubes and throw it in salads, scoop it and blend it into soups, or use the flesh for curries and stews. The options are endless!
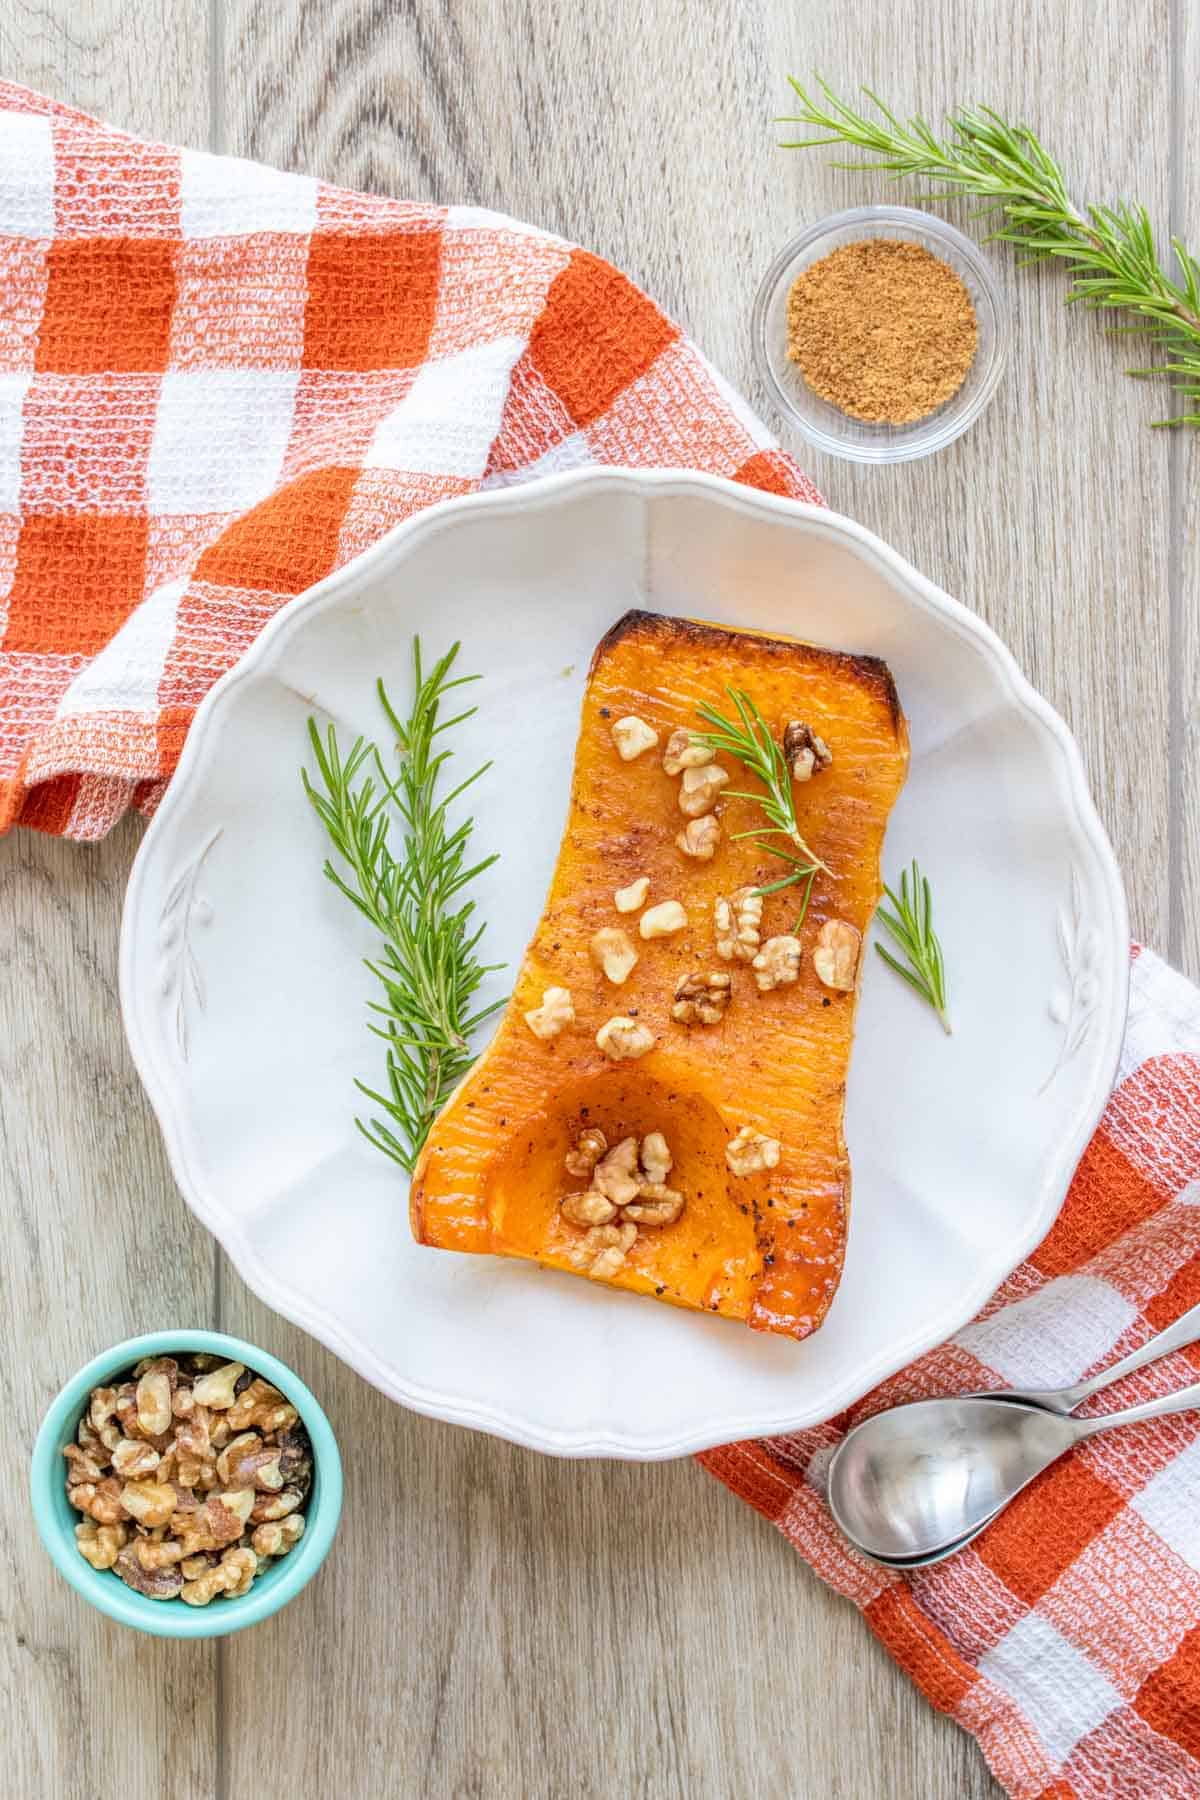
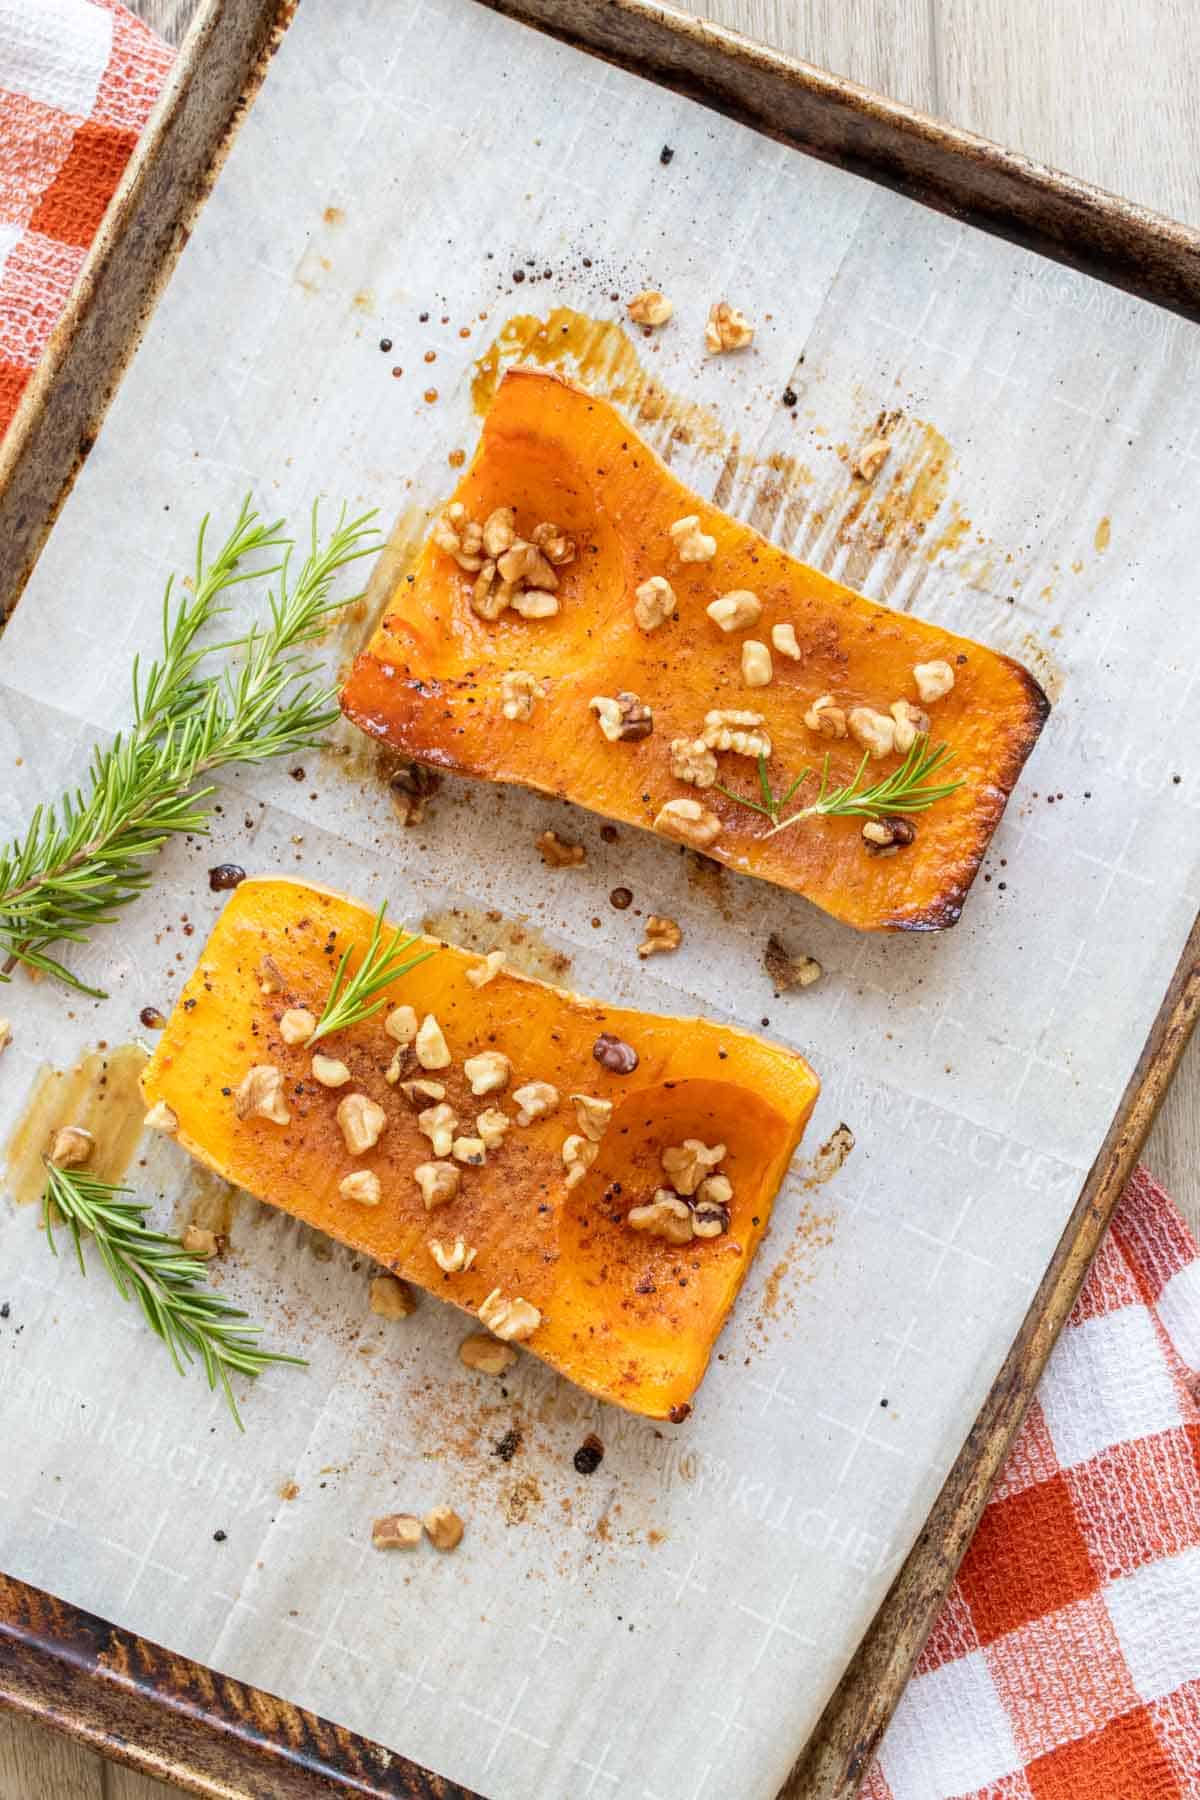
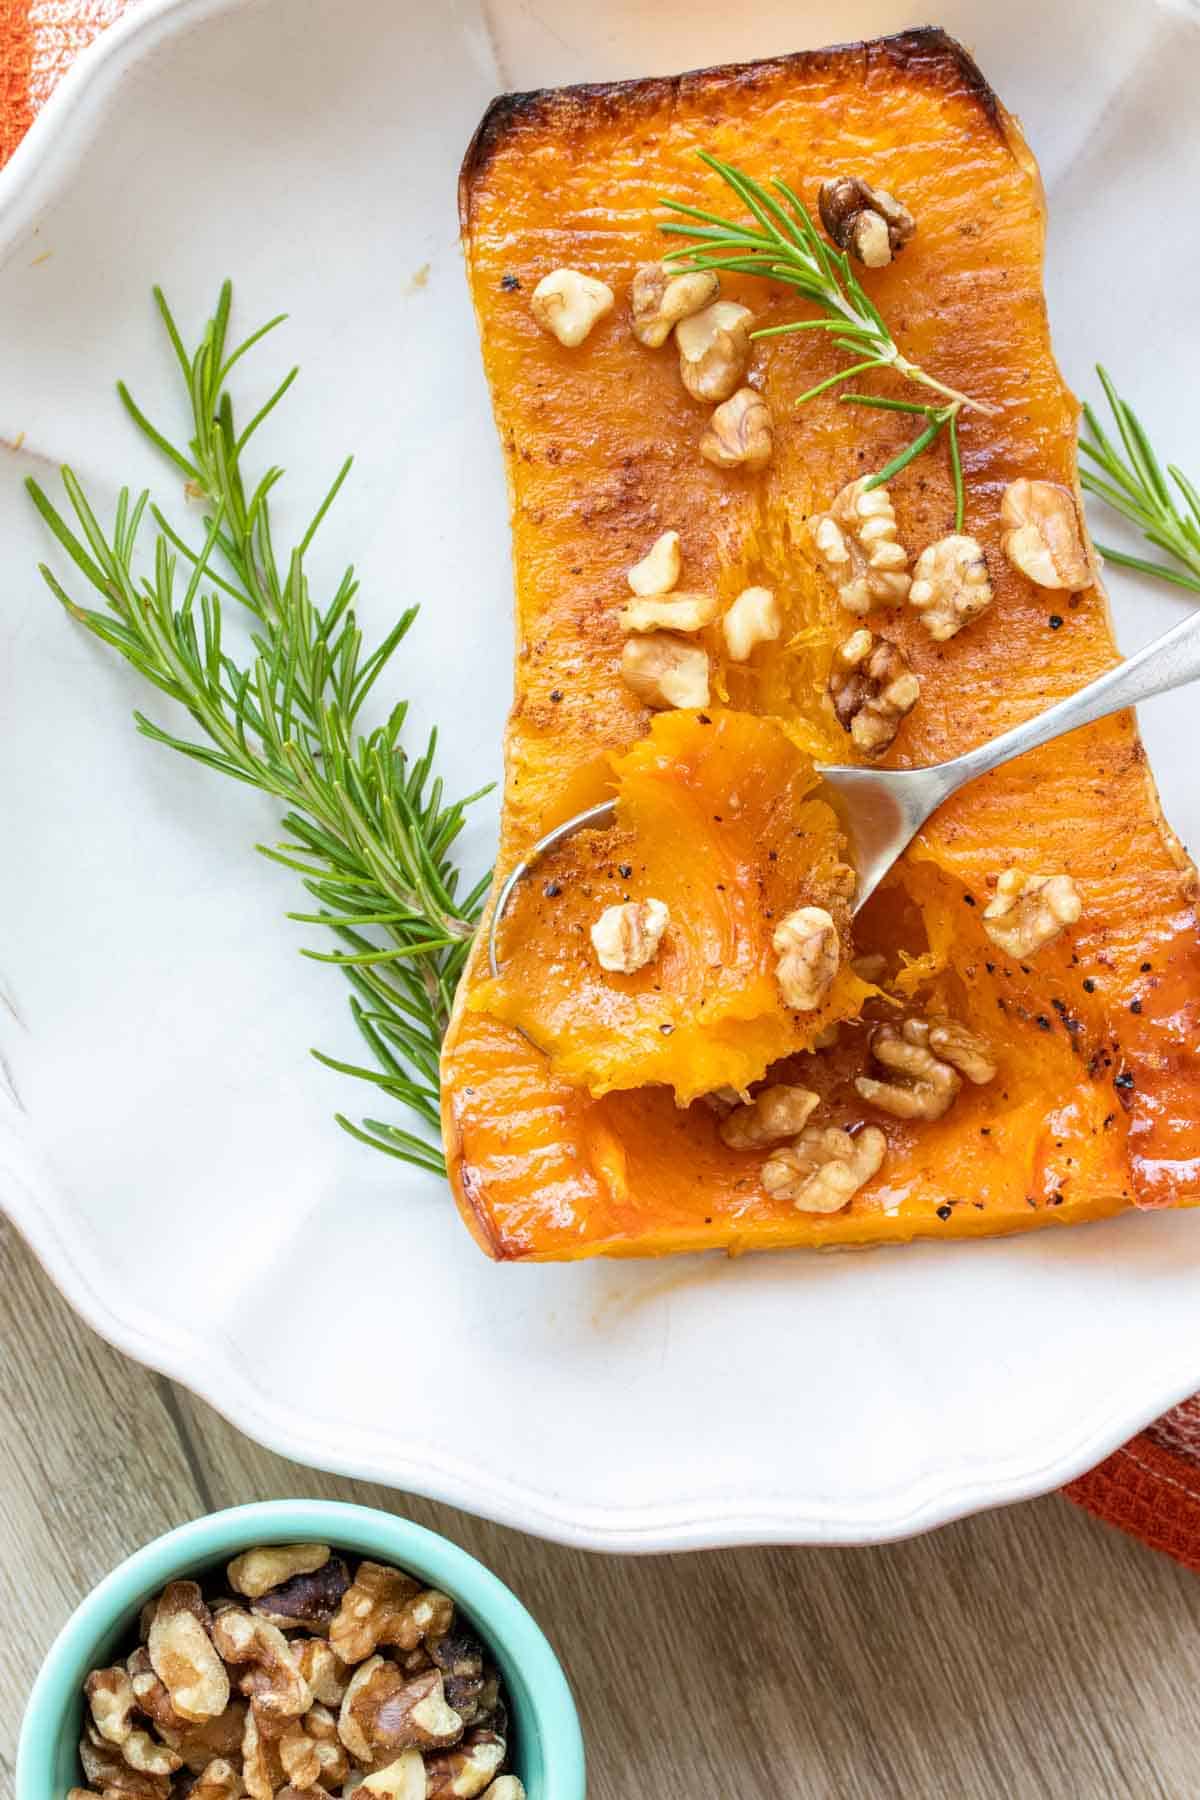
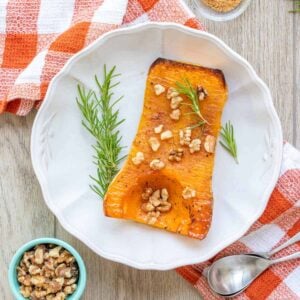
Roasting butternut squash is super easy. When I’m making the halved version, I just slice it in half, brush on some oil, sprinkle with salt and pepper, and pop it in the oven for about 45 minutes until it’s soft and golden around the edges. My boys are all about the version with crushed walnuts and a drizzle of maple syrup. It adds a nice amount of crunch and sweetness. I’ll also throw on a pinch of cinnamon or nutmeg when I want to add a little extra warmth.
I love that you can find butternut squash pretty much all year now, which means I get to make it at least a couple of times a month. Yes, I’m definitely that obsessed with it, ha! I also love that while it’s roasting, I can check off a few things around the house or start prepping my husband’s favorite spicy roasted Tandoori cauliflower to go with it. I hope you give it a try!
🥘 Ingredients
To make this easy roasted butternut squash, I use ingredients I already have in my pantry, and I’m pretty sure you’ll have them too.
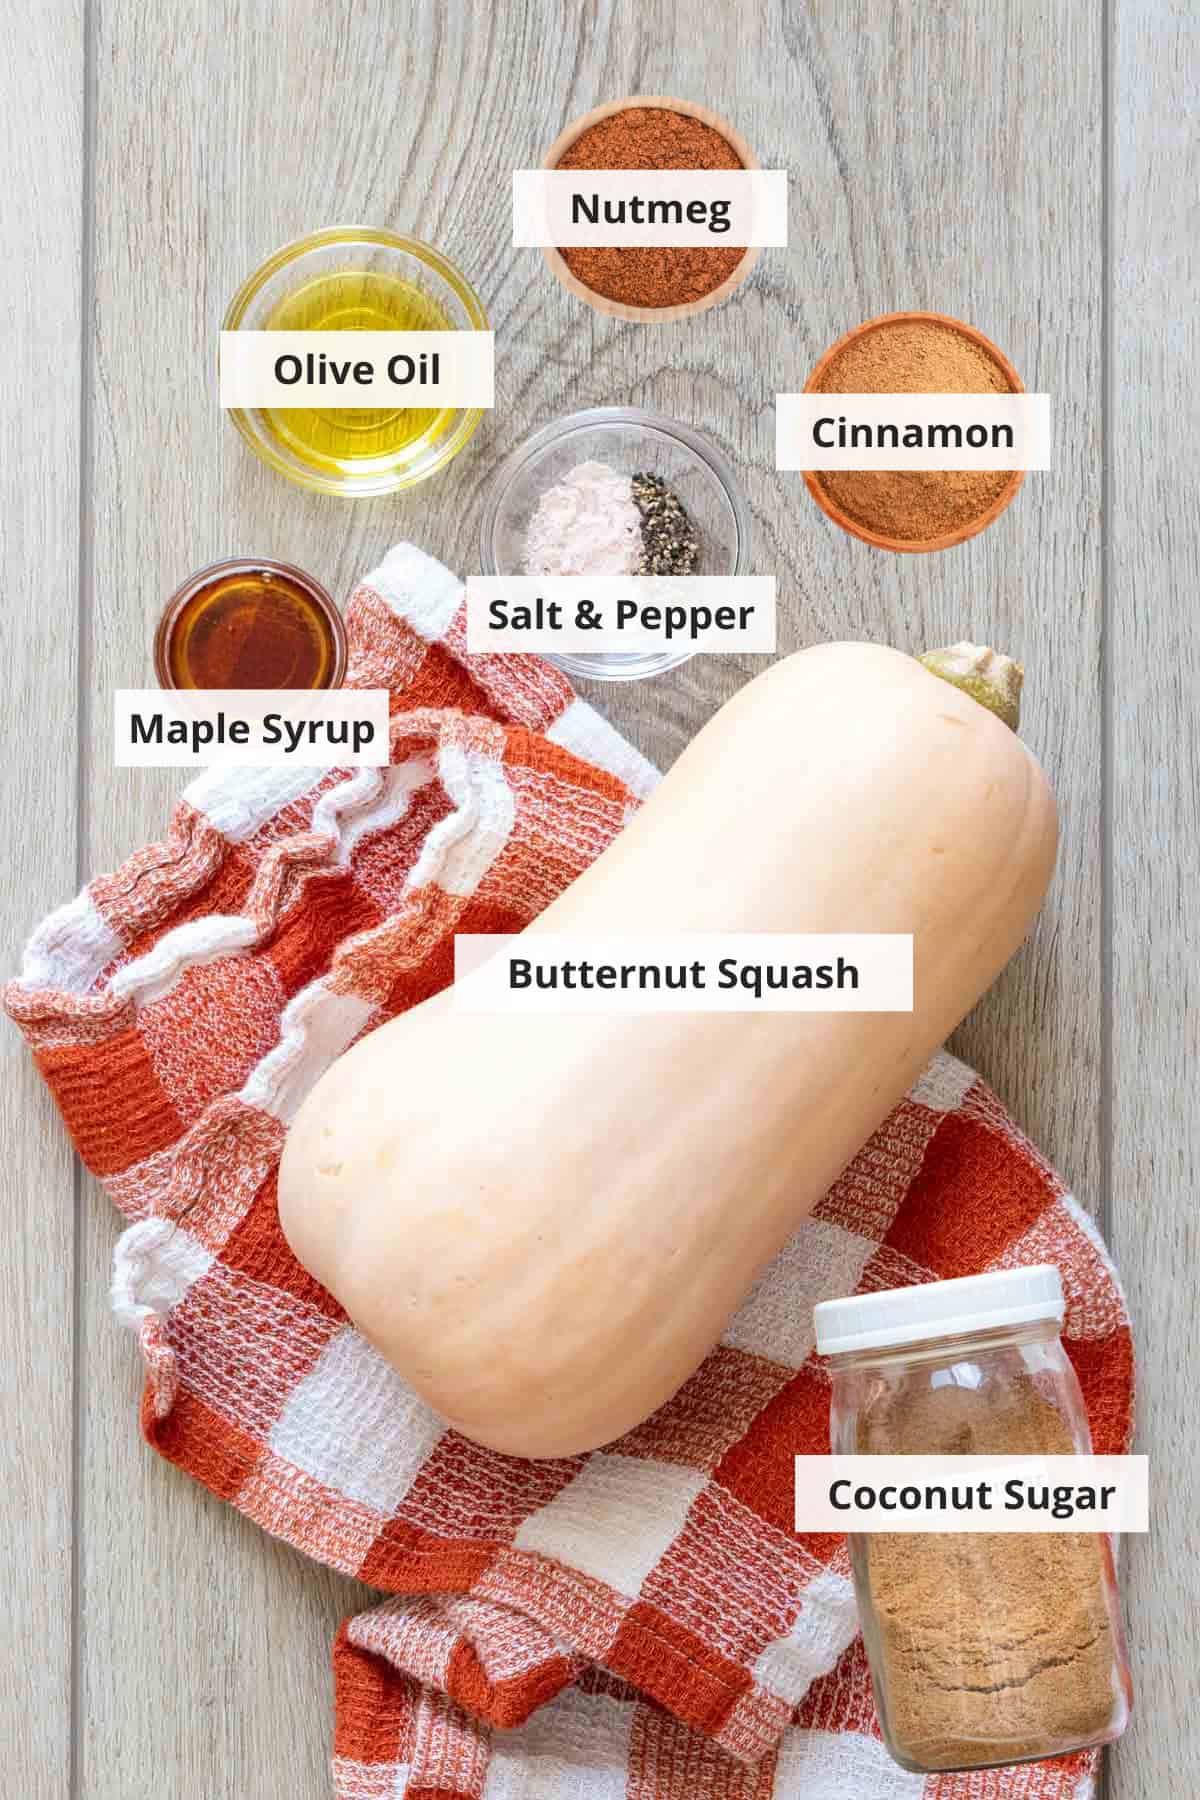
Butternut squash: I usually go for a medium-sized one. I slice it in half and roast it just like that, no peeling needed.
Oil: I use a little oil to help the edges caramelize and keep the squash from drying out. Olive oil is my usual pick, but any neutral one works.
Sea salt and ground black pepper: I sprinkle on just enough to bring out the natural flavor.
Sugar: I like adding a little sugar when I want it on the sweeter side. Both brown and coconut sugar work great.
Maple syrup: This is my favorite topping when I want a sweet glaze. I drizzle it over during the last few minutes of roasting.
Cinnamon: Just a pinch adds a warm flavor that pairs perfectly with the sweetness. My kids always notice when I use it.
Nutmeg: I use just a tiny bit of nutmeg for an earthy warmth. It’s optional, but I like it when I’m going for a more fall-inspired flavor.
🔪 How To Make
While roasting a whole butternut squash is definitely the easiest way, I’ve found that roasting it in halves results in more flavor. The bake time is about the same, but cutting it in half takes a little more effort upfront. Here’s what I do:
Trim the squash: I slice off the top and bottom of the butternut squash to give it a flat base. This makes it easier and safer to cut in half lengthwise.
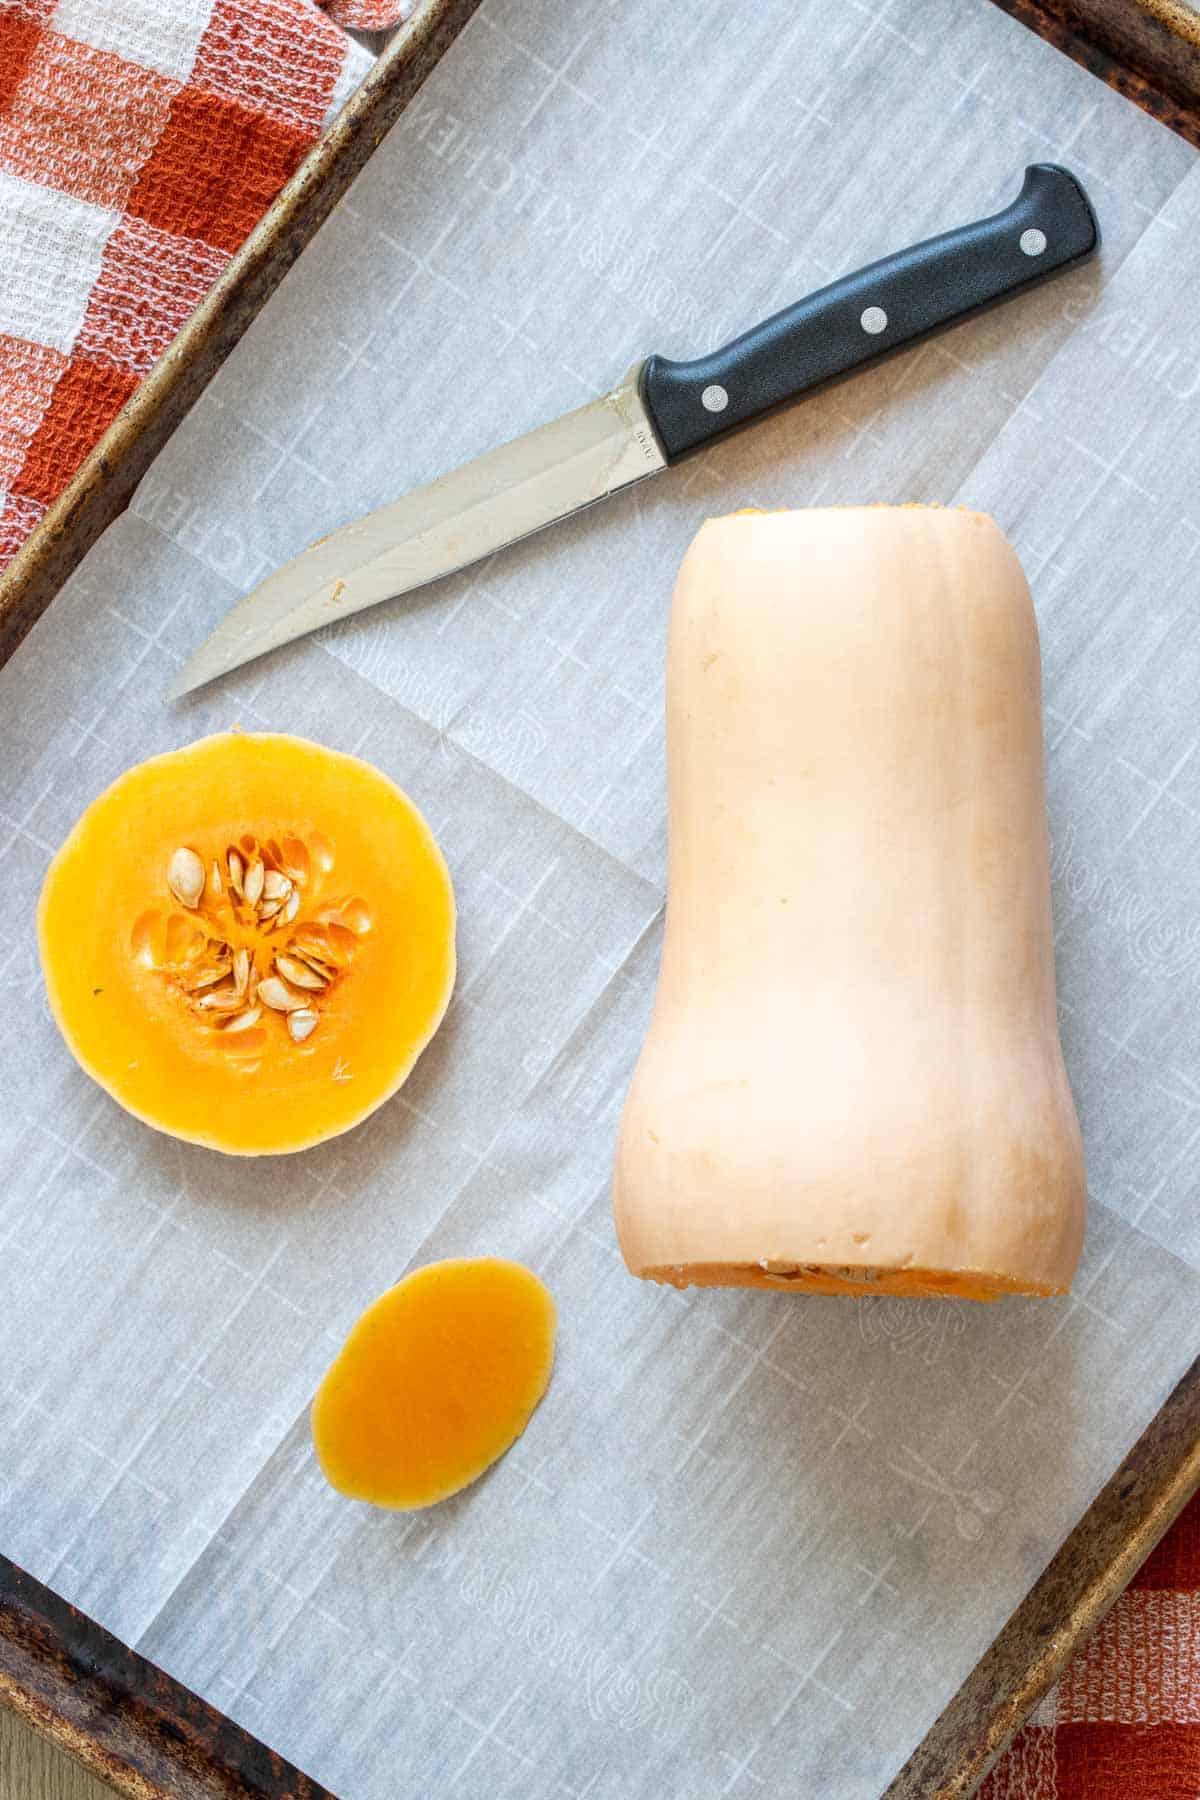
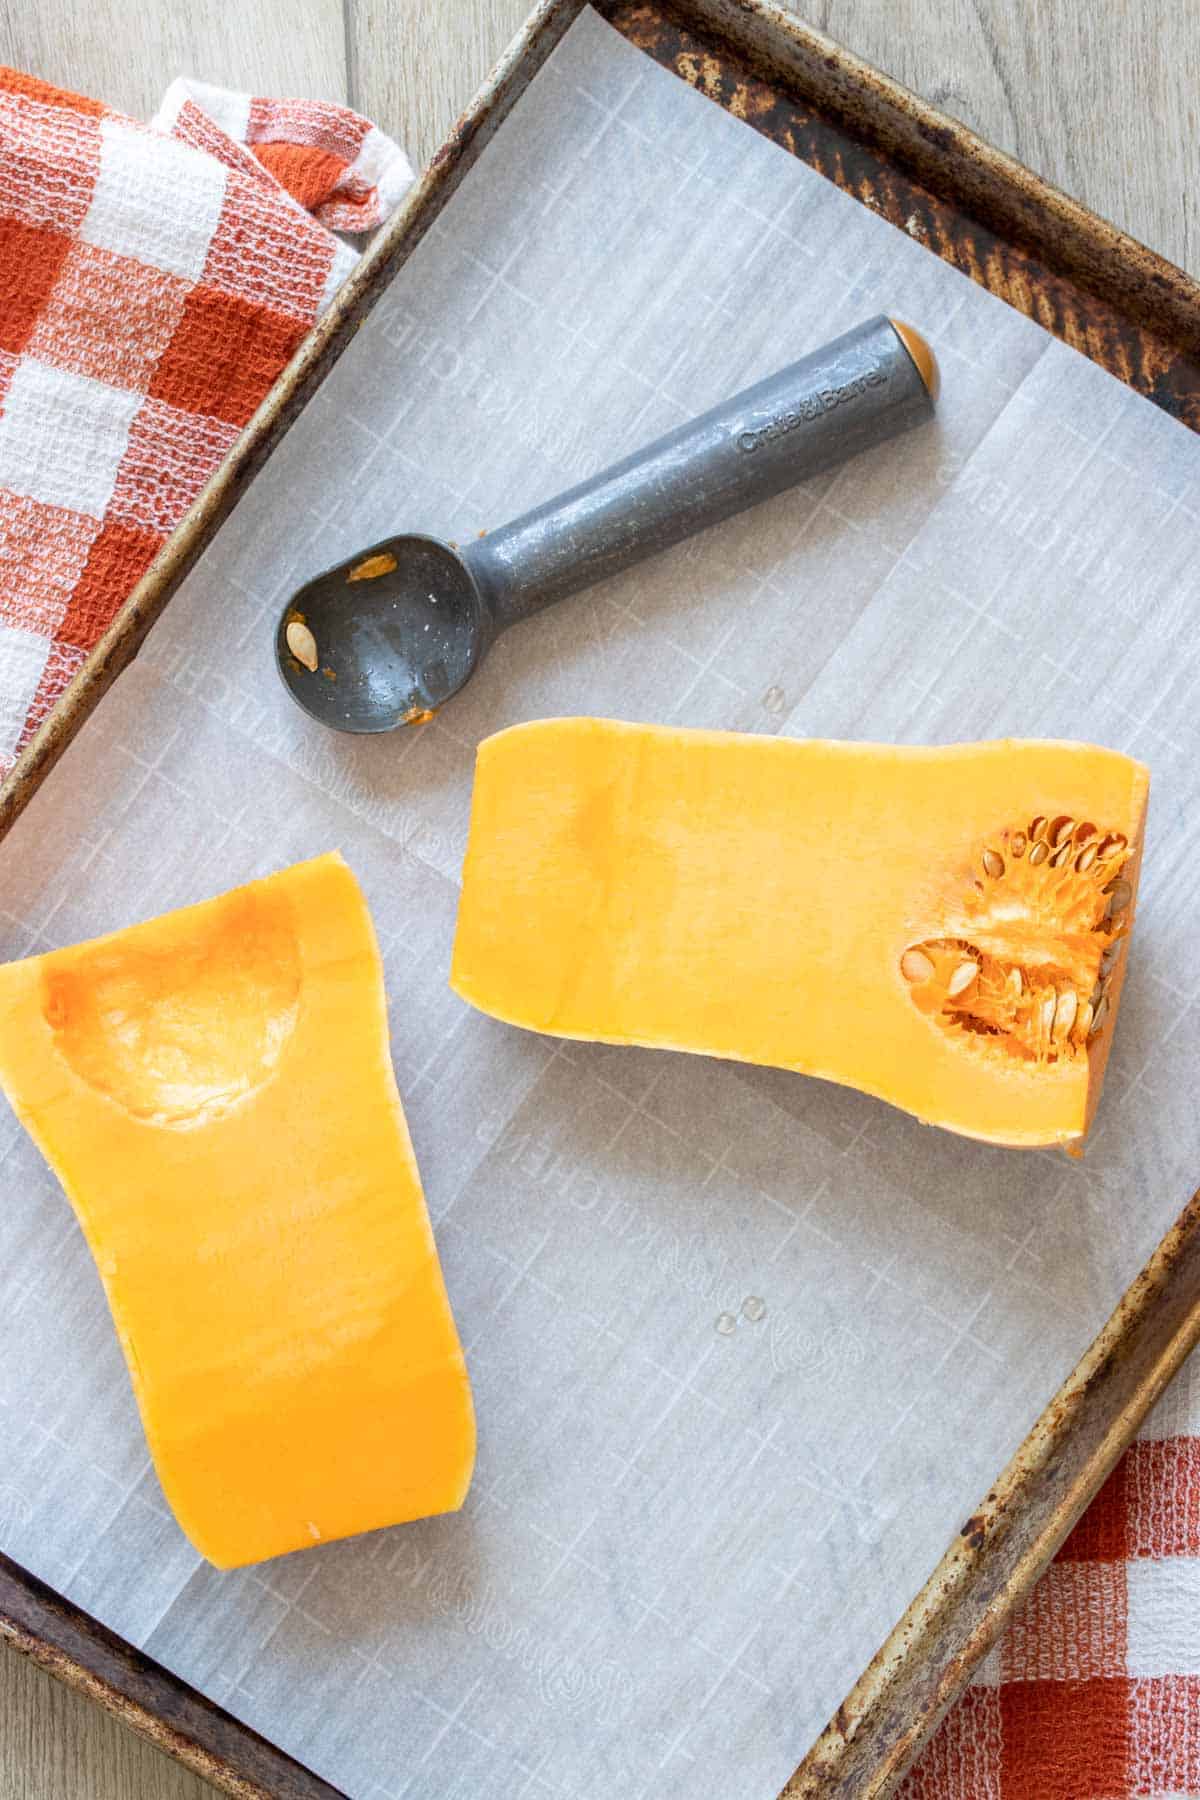
Cut and clean: I use a sharp knife to slice the squash in half lengthwise. Then I scoop out the seeds from each half with a spoon.
Season the squash: I rub the cut side of each half with a little oil or broth, then sprinkle on salt and pepper.
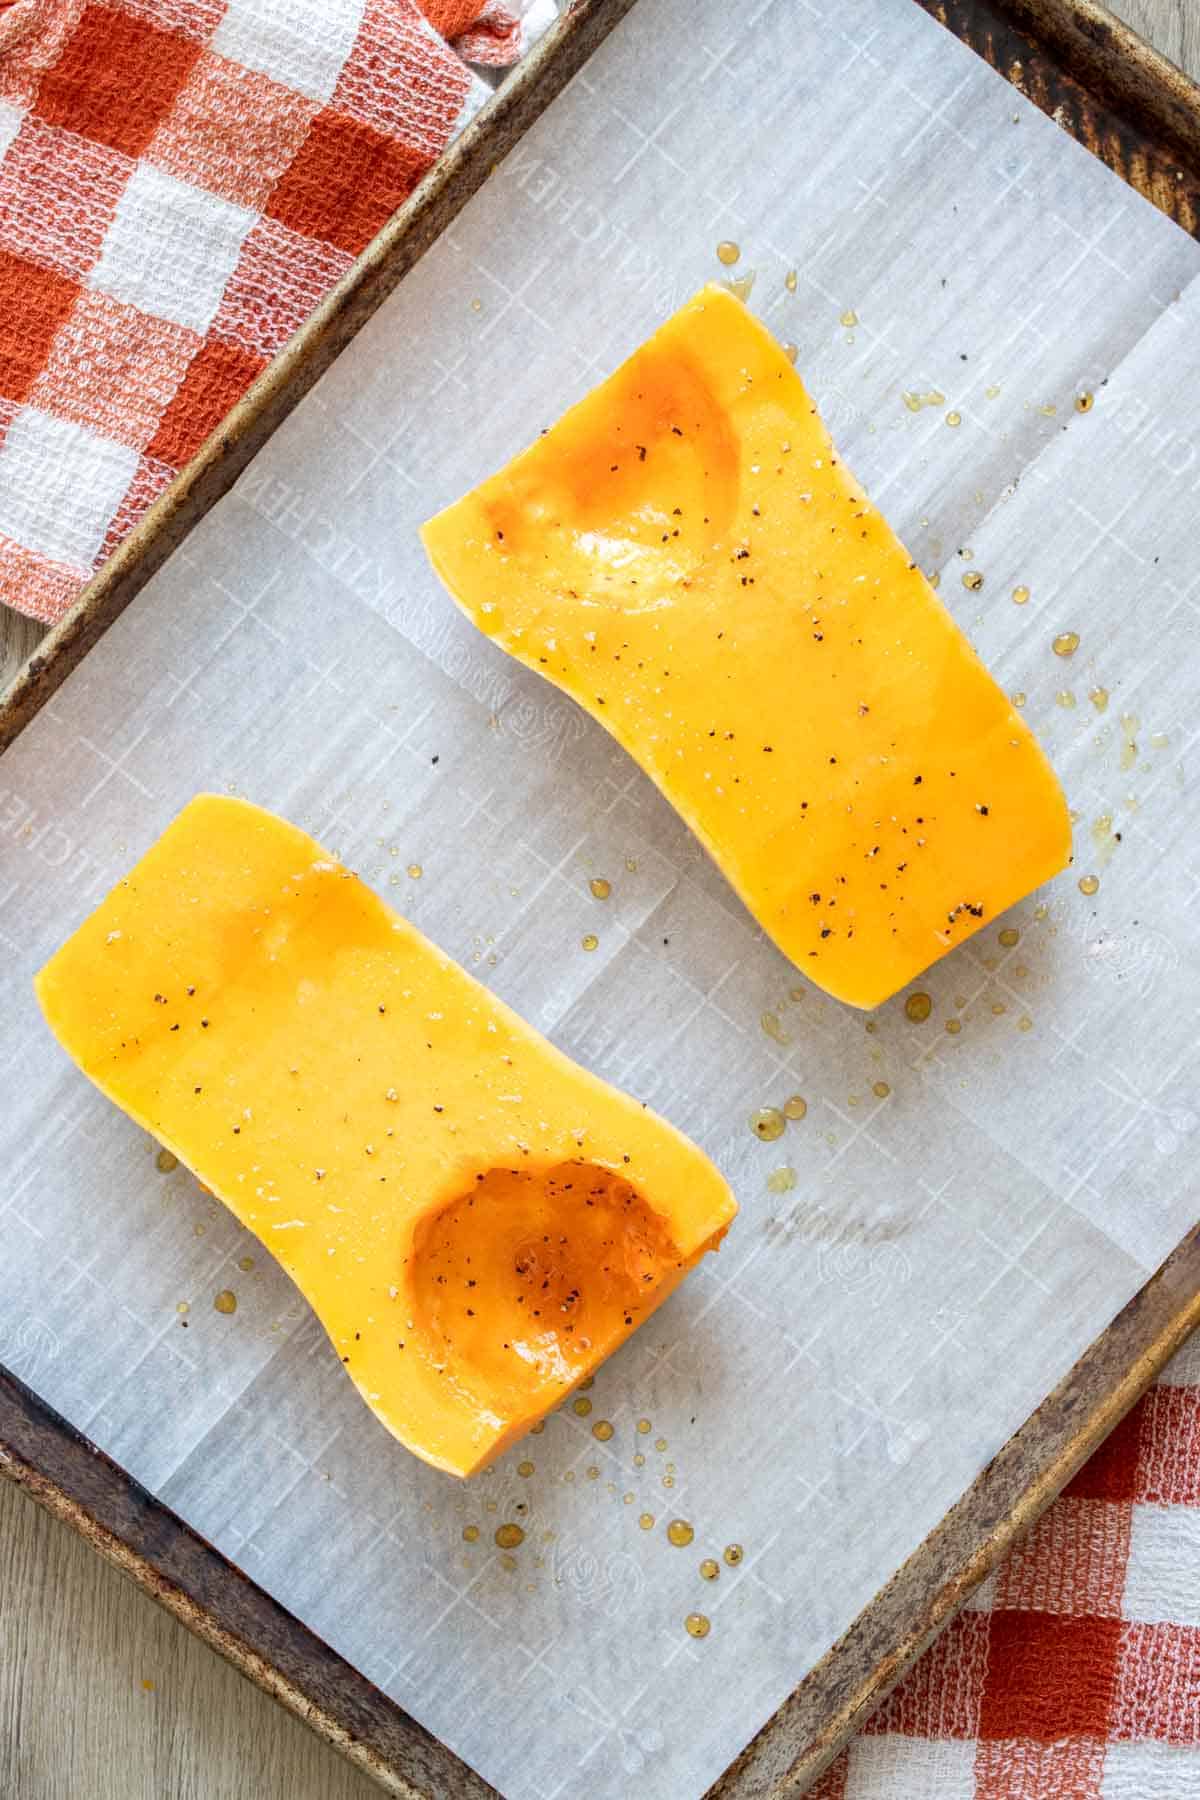
Bake: I place the squash halves cut-side down on a parchment-lined baking sheet. Then I roast them in the oven until they’re soft and golden.
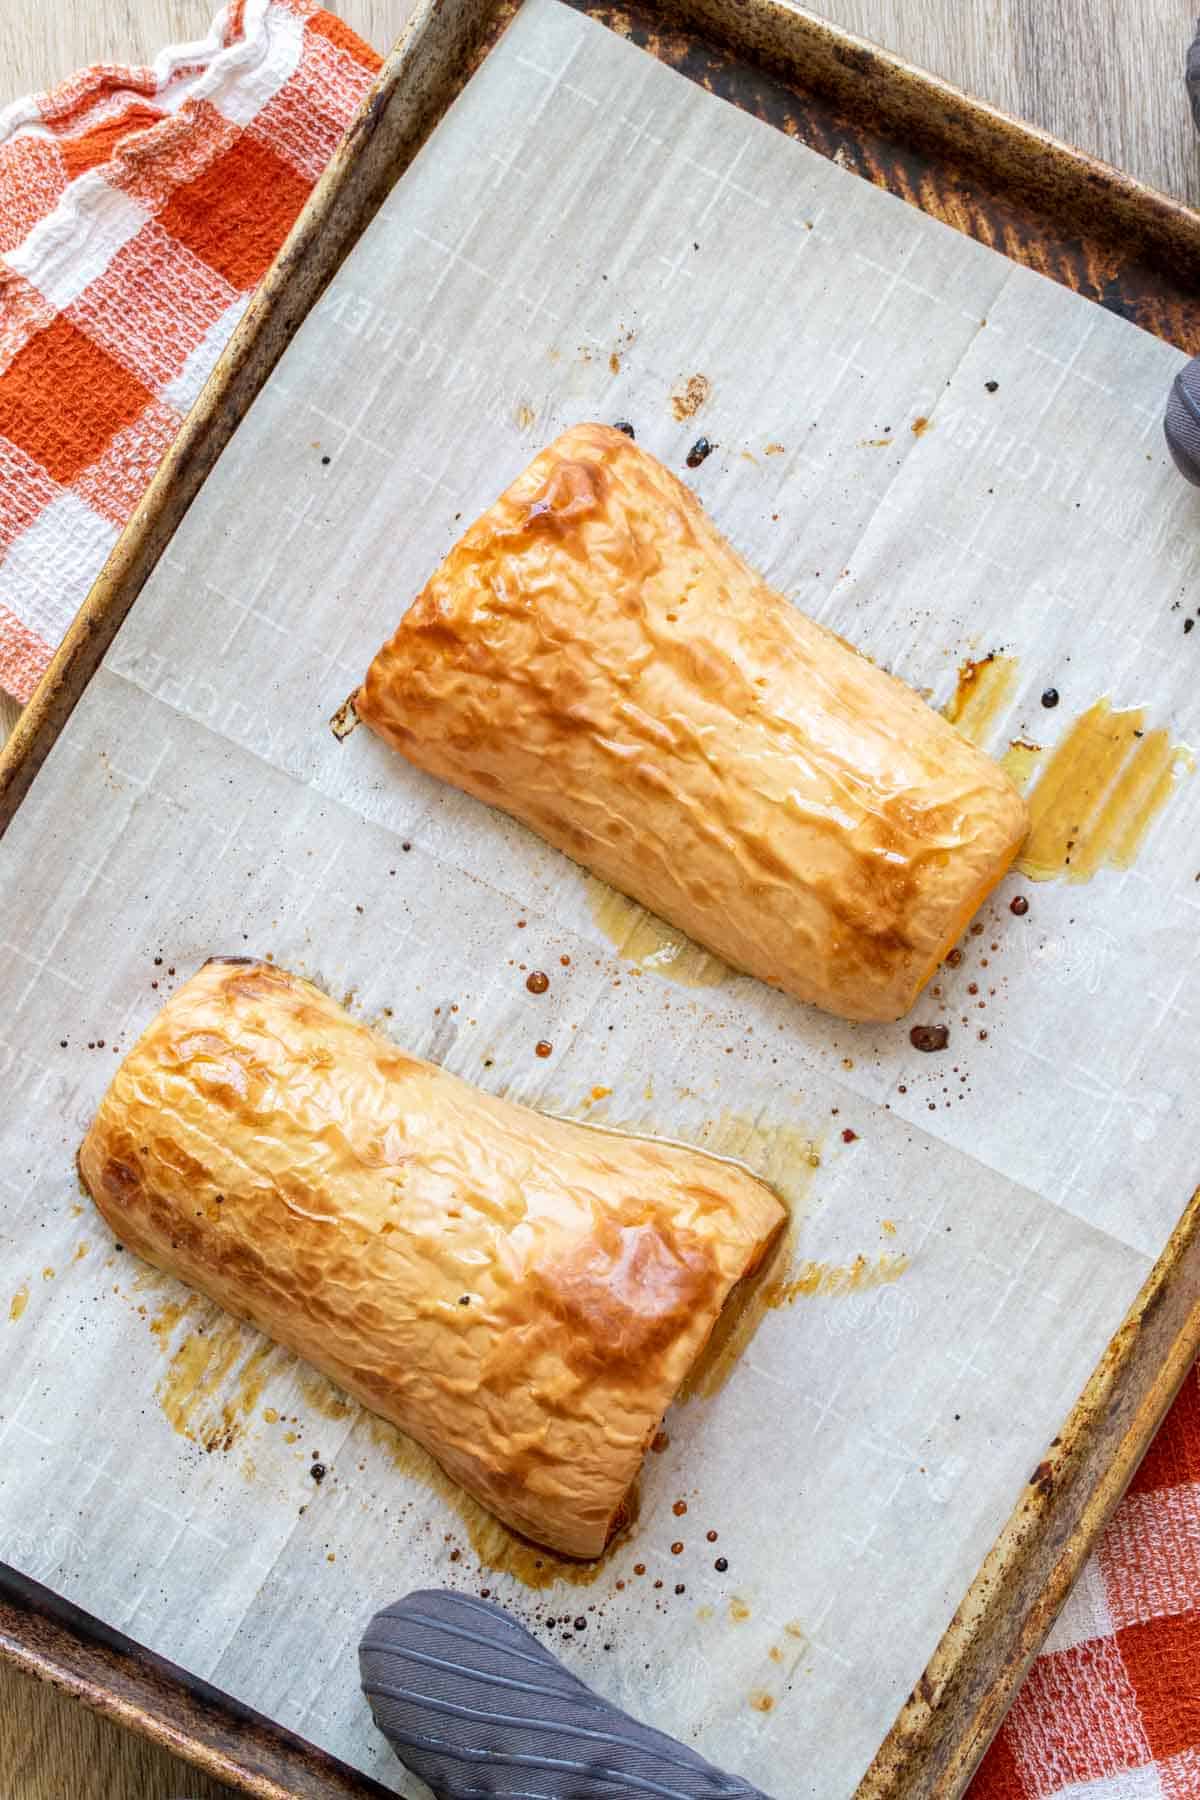
Check for doneness: I press a fork into the thickest part to see if it’s soft. Once it goes in easily, I flip the squash over.
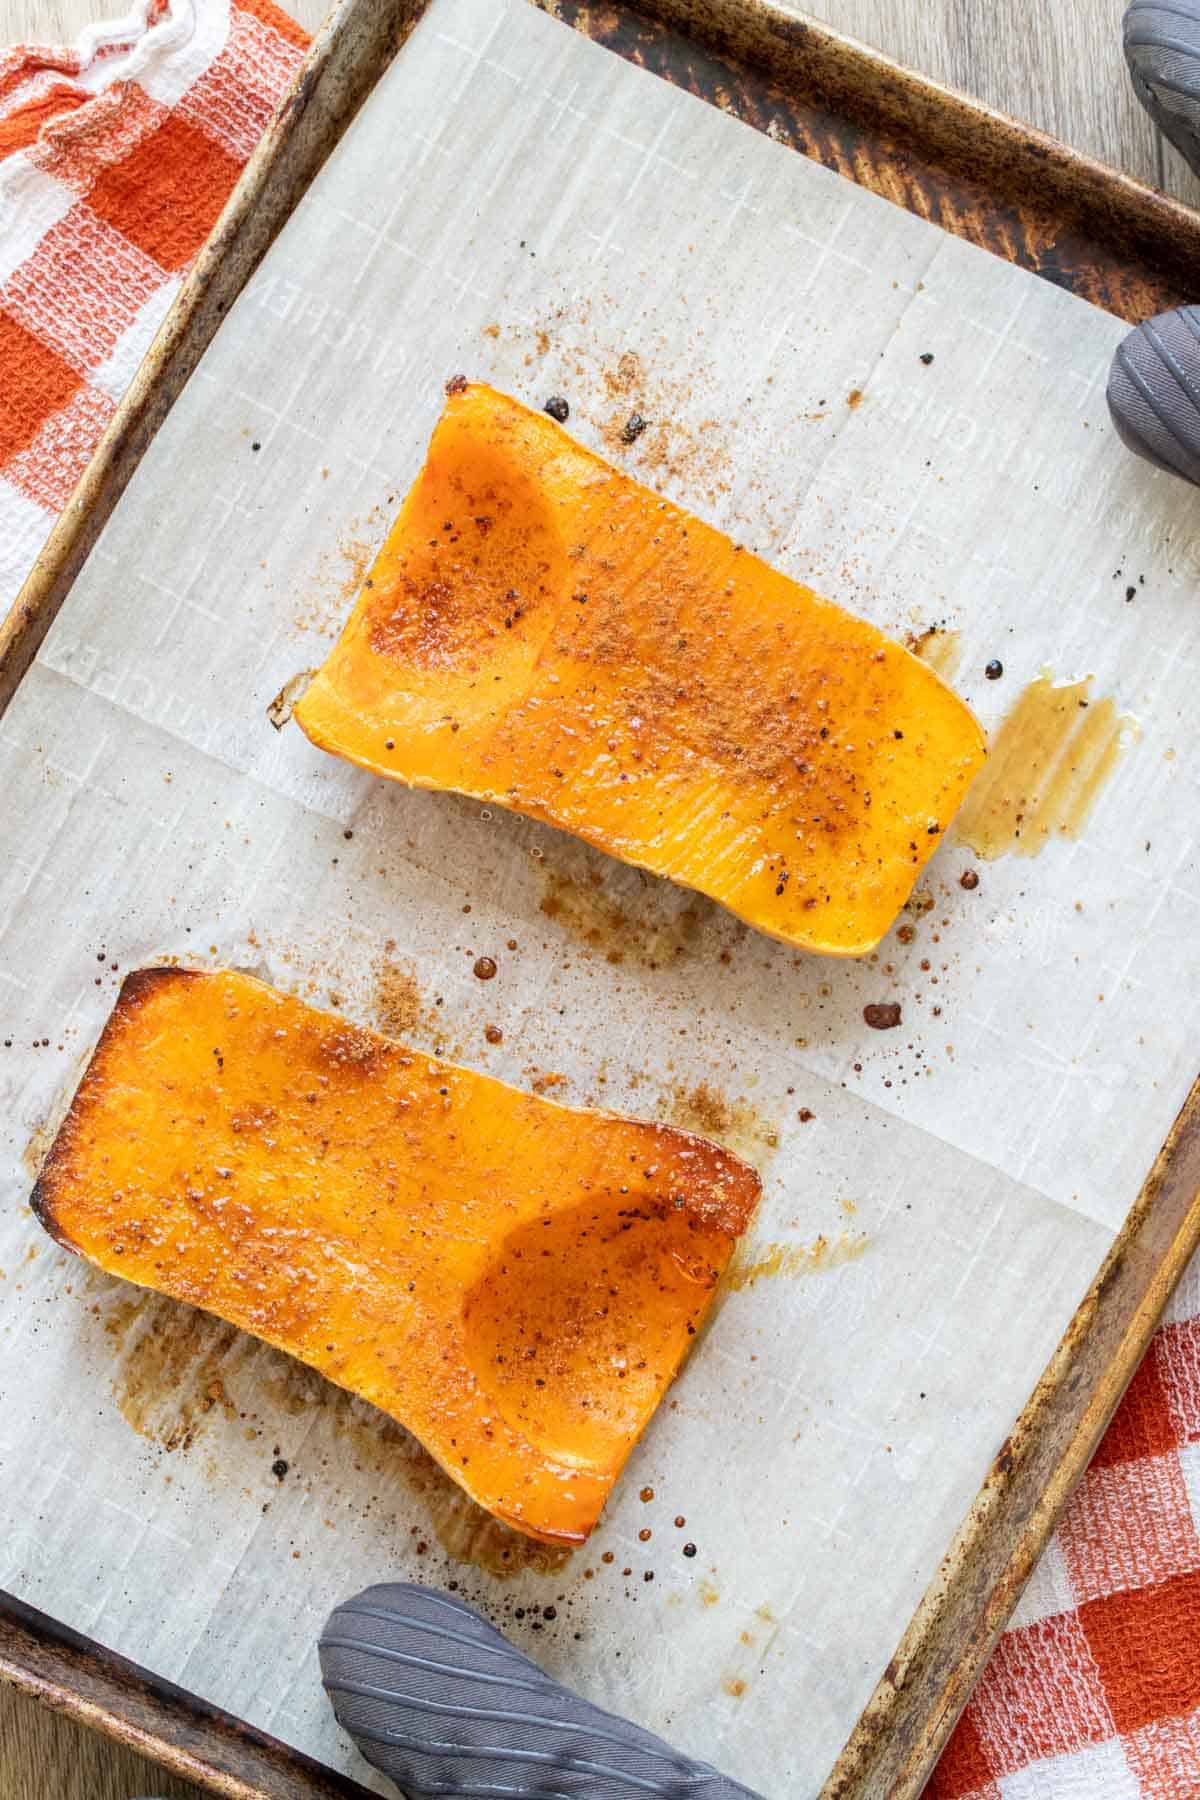
Add toppings: I sprinkle on any extras I want, like maple syrup, sugar, or spices. If I’m using nuts, I add them now so they toast slightly without burning.
💭 Expert Tips
My #1 Secret Tip for making this roasted butternut squash is to start with a really good squash. I always look for one that has a smooth beige skin without any green patches and feels heavy for its size. If the stem is still firm and brown, I know I’ve picked a good one. It makes such a difference in both the texture and flavor after roasting.
Other Tips To Keep In Mind:
- Use a sharp knife: Butternut squash can be tough to cut, so I always make sure my knife is nice and sharp. If the squash is too hard, I microwave it for a couple of minutes to soften the skin slightly before slicing.
- Line your baking sheet: I always line my sheet with parchment paper. It makes cleanup easier and keeps the squash from sticking.
- Don’t skip the oil: Even a small amount of oil helps the edges caramelize and brings out the natural sweetness of the squash.
- Adjust your roasting time: Every squash is a little different in size and thickness. I start checking it around the 40-minute mark by poking it with a fork to see if it’s soft.
📖 Variations
Here are four easy variations I like to make with roasted butternut squash, depending on what I’m serving it with:
Savory herb: I rub the squash with 1 tablespoon of olive oil, 1/2 teaspoon of garlic powder, and a pinch of thyme or rosemary. It’s simple and works well with roasted veggies or grain bowls.
Chili lime: I stir together 1 tablespoon of lime juice, 1/2 teaspoon of chili powder, and 1 tablespoon of olive oil. I brush it on before baking for a mild kick and a little tang.
Roast Butternut Squash Whole: First, I wash it well and poke holes all over with a fork to let the steam escape. Then I rub it with a little oil, salt, and pepper if I want extra flavor. I bake it until it’s soft and the skin turns brown and shriveled. Once it cools a bit, I slice it in half, scoop out the seeds, and it’s ready to serve.
🍽 Serving Suggestions
One of my favorite pairings for roasted butternut squash is this easy vegetable au gratin. It takes just 10 minutes to prep and has a creamy and cheesy sauce with a crispy topping that goes perfectly with the soft sweetness of the squash. I also love adding it alongside this comforting vegan cottage pie for a hearty dinner.
When I want something with a little more kick, I serve it with spicy vegan buffalo cauliflower wings. And if we’re having a kid-friendly night, I usually make my youngest son’s favorite healthy mac and cheese.
🧊 Storage Directions
Refrigeration: I store any leftover roasted butternut squash in an airtight container and keep it in the fridge for up to 3 days.
Freezing: I freeze the squash in smaller portions using airtight containers or freezer bags. It keeps well for up to 3 months, and I can just grab what I need when I want to use it in soups or casseroles.
Reheating: I reheat the squash in a 350°F oven for about 10 to 15 minutes.
❓Recipe FAQs
Do I need to peel the squash before roasting it?
No, you don’t need to peel it. I just cut the squash in half, scoop out the seeds, and roast it with the skin on. Once it’s soft, I use a spoon to scoop out the inside. It’s easy and saves a lot of time.
Can I use frozen butternut squash for this recipe?
I’ve tried frozen squash, but it doesn’t roast the same way. It’s already cut and often a little watery, so it doesn’t caramelize like fresh squash does. I usually save the frozen kind for soups or blended recipes.
What size squash should I use?
I like using a medium squash, around two to three pounds. It fits well on a baking sheet and is the right amount for our family of five when we’re serving it as a side.
🥣 More Vegan Side Dish Recipes!

Love this plant based side dish recipe? Please leave a 5-star rating 🌟 in the recipe below and/or a review in the comment section further down the page!
You can also FOLLOW ME on FACEBOOK, INSTAGRAM, and PINTEREST to see more delicious, healthy, family-friendly food, and if you have any questions, I’m here to help!
📋 Recipe Card
Roasted Butternut Squash
You really can’t beat my caramelized Roasted Butternut Squash. I love scooping it right onto a plate as a side, but I’ve definitely caught myself eating it straight with a spoon. I roast it in the oven with just oil, seasonings, and coconut sugar, and it’s ready in under an hour.
Servings: 8
Calories: 51kcal
Ingredients
- 1 butternut squash , medium sized
- 2 tsp of your favorite roasting oil or butter I like olive oil (see note for oil free)
- ¼ teaspoon sea salt
- 1/8 teaspoon ground black pepper
Optional toppings:
- Brown or coconut sugar
- Maple syrup about 1-2 tablespoons
- Cinnamon about ¼ to ½ teaspoon
- Nutmeg about 1/8 to ¼ teaspoon
- Nuts like pecans or walnuts
Instructions
- Preheat the oven to 400 F/ 205 C
- Cut the ends off of the squash and then cut in half length wise.
- Scoop out the seeds.
- Brush with oil or butter. Add any additional toppings now or waiting until the last 10 minutes of roasting. If using nuts, add them at the end or after it’s done baking.
- Place on a parchment lined baking sheet cut side down.
- Bake for 45-50 minutes until soft to the touch. If using toppings, you can also add them about 10 minutes before it is done. Mix them all in a bowl with a little more oil or butter, or if using maple you don’t need to add extra oil/butter. Turn halves over and brush with the mixture. Continue to roast cut side up.
- Allow to cool and use with your favorite recipes or enjoy as is!
Notes
- My #1 Secret Tip for making this roasted butternut squash is to start with a really good squash. I always look for one that has a smooth beige skin without any green patches and feels heavy for its size. If the stem is still firm and brown, I know I’ve picked a good one. It makes such a difference in both the texture and flavor after roasting.
- Use a sharp knife: Butternut squash can be tough to cut, so I always make sure my knife is nice and sharp. If the squash is too hard, I microwave it for a couple of minutes to soften the skin slightly before slicing.
- Line your baking sheet: I always line my sheet with parchment paper. It makes cleanup easier and keeps the squash from sticking.
- Don’t skip the oil: Even a small amount of oil helps the edges caramelize and brings out the natural sweetness of the squash.
- Adjust your roasting time: Every squash is a little different in size and thickness. I start checking it around the 40-minute mark by poking it with a fork to see if it’s soft.
Nutrition
Calories: 51kcal | Carbohydrates: 11g | Protein: 1g | Fat: 1g | Saturated Fat: 1g | Polyunsaturated Fat: 1g | Monounsaturated Fat: 1g | Sodium: 69mg | Potassium: 330mg | Fiber: 2g | Sugar: 2g | Vitamin A: 9966IU | Vitamin C: 20mg | Calcium: 45mg | Iron: 1mg


I cut it in half and glad I did! The edges were my favorite!
So easy and delicious! I loved the flavor combo with the Fall spices along with the crunch of the nuts.