Christmas Rice Krispie Treats
This post may contain affiliate links. As an Amazon Associate, I earn from qualifying purchases. Please read my disclosure.I love making these adorable Christmas Rice Krispie Treats with my family. They’re festive, fun, and so easy to make in less than an hour, they also make for a great holiday activity to do with the kids.

Rice Krispie treats have always been one of my favorite childhood desserts, so when the holidays came around, I thought, why not make them festive just like my Santa pancakes? By shaping them into holiday wreaths and adding colorful decorations, I turned this classic treat into something perfect for the season.
Since I made these for the first time, they’ve become a holiday tradition with my kids, kind of like setting up the Christmas tree! Every year, we look forward to making and decorating these festive treats together.
👩🏽🍳 Why I Love This Recipe
To be honest, wreaths are one of my favorite decorations to hang around the house during the holidays. So when I was deciding what shape to make for my Christmas rice krispie treats, it was an easy choice! Plus, they’re so simple to put together, which makes them even more fun to make.
These Christmas Rice Krispie Treats work so well because they’re simple, quick, and versatile. The ingredients are easy to find, and the steps are straightforward enough for little helpers to join in. They’re not overly sweet or complicated, which makes them perfect for a light holiday treat. The gooey marshmallow and crispy brown rice cereal combination is a classic that never goes out of style, and the colorful decorations make them festive without a lot of effort.
For me, this recipe is the best because it’s more than just a dessert, it’s a fun holiday activity that brings everyone together, just like decorating the Christmas tree. These rice krispie treats are chewy, sweet, and lightly crispy, with a playful look that makes them perfect for gifting or sharing at holiday parties. I hope you get a chance to make them with your kids this holiday season, it’s such a joyful way to create special memories together!
🥘 Ingredients
I kept my Christmas Rice Krispie treats recipe super simple, no fancy ingredients, just everyday staples transformed into something festive and fun!
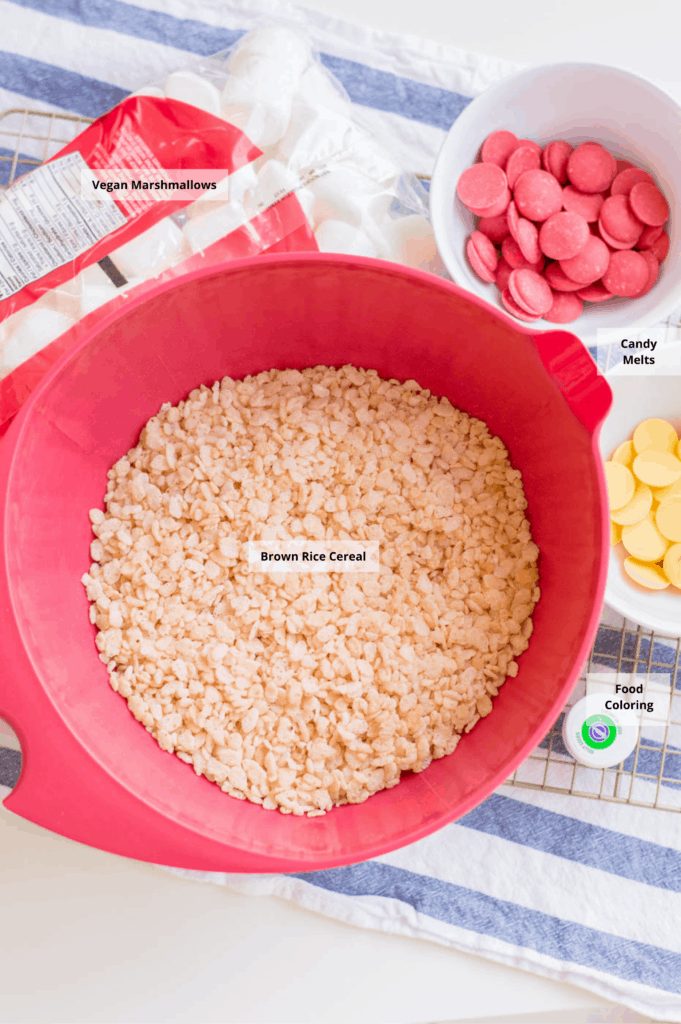
Rice Krispie Treats: I use rice cereal, marshmallows, and butter to make the base for these treats.
Natural Food Colors: I love using natural food coloring to get the bright green wreaths and red ribbons while avoiding artificial dyes. It keeps the treats fun and a little more wholesome!
Colored Candies: These are chocolate candies I melt to create the bows and balls for decorating. They add a festive and delicious finishing touch to the treats.
🔪 How To Make
You won’t believe how simple and fun my Christmas rice krispie treats are to make. I can’t wait to share this recipe with you.
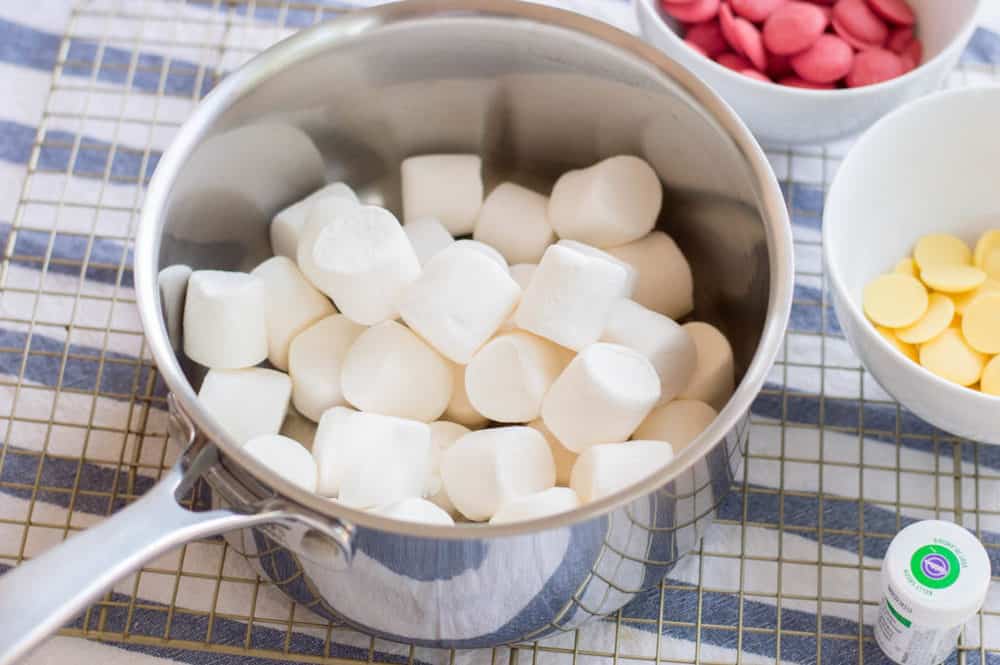
Step 1: I start by lining a baking sheet with wax paper and setting it aside. Then, in a medium saucepan over medium heat, I melt the butter, add the marshmallows, and stir until they’re completely melted. Once it’s smooth and gooey, I take it off the heat.
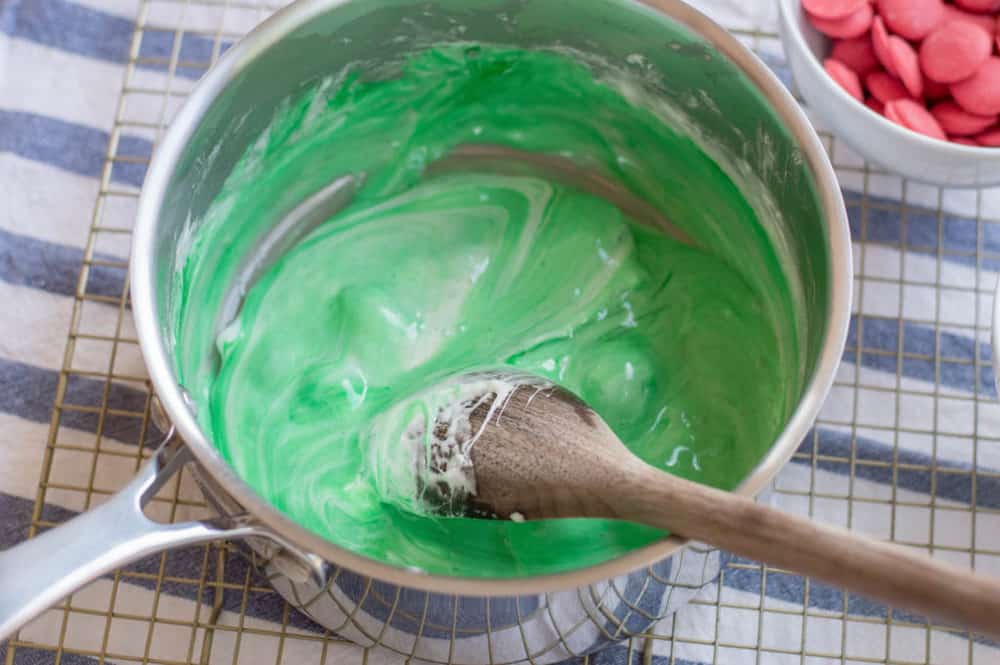
Step 2: Next, I add green food coloring to the melted marshmallows and mix until the color is evenly blended. It’s so satisfying to watch the festive green color come to life.
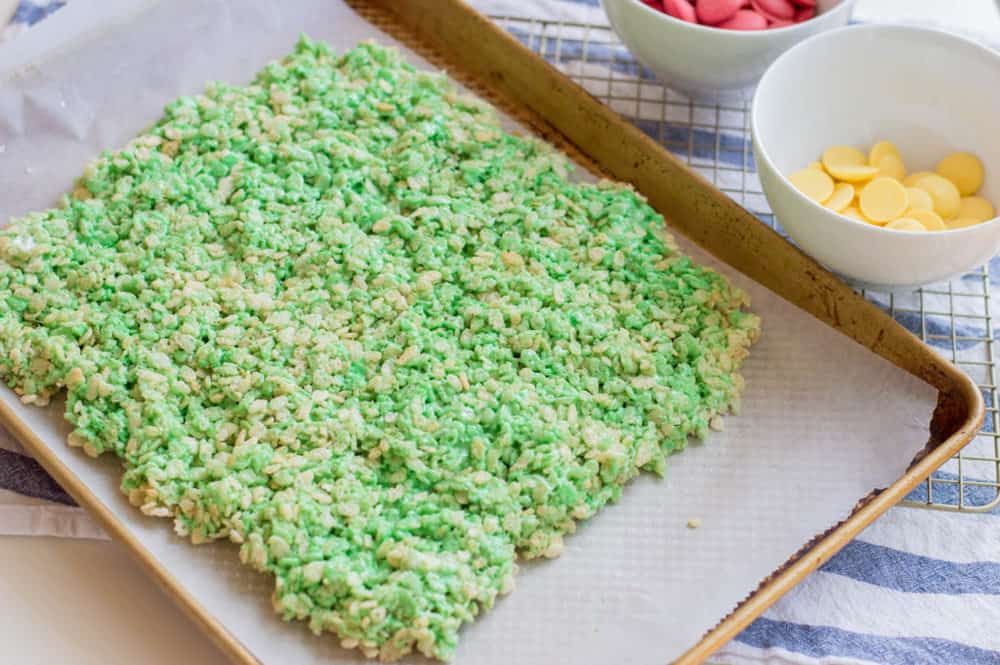
Step 3: I fold the rice cereal into the melted marshmallow mixture until everything is well combined. Then, I use a spatula to spread the mixture evenly onto the lined pan, shaping it into an 8×10-inch rectangle. It’s quick and easy to get it into the perfect shape.
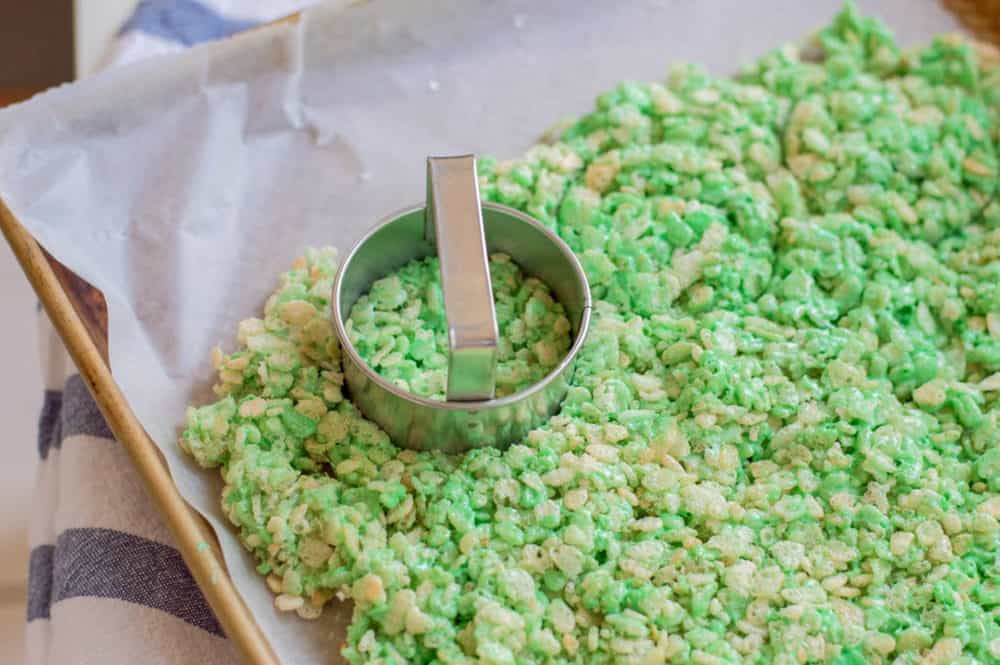
Step 4: I let the Rice Krispies set for about 10 minutes so they’re firm enough to cut. Then, I use a 2 ½-inch circular cookie cutter to cut out the wreath shapes and a smaller ¾-inch cutter to make the center holes. It’s so fun watching the wreaths take shape!
Step 5: I melt the red candy melts in a microwave-safe bowl, heating them in 30-second intervals and stirring in between until smooth. Once melted, I scoop the candy into a piping bag and pipe a red bow at the bottom of each wreath. To make the bow, I start with two circles connected like an infinity sign, then add two lines in the center.
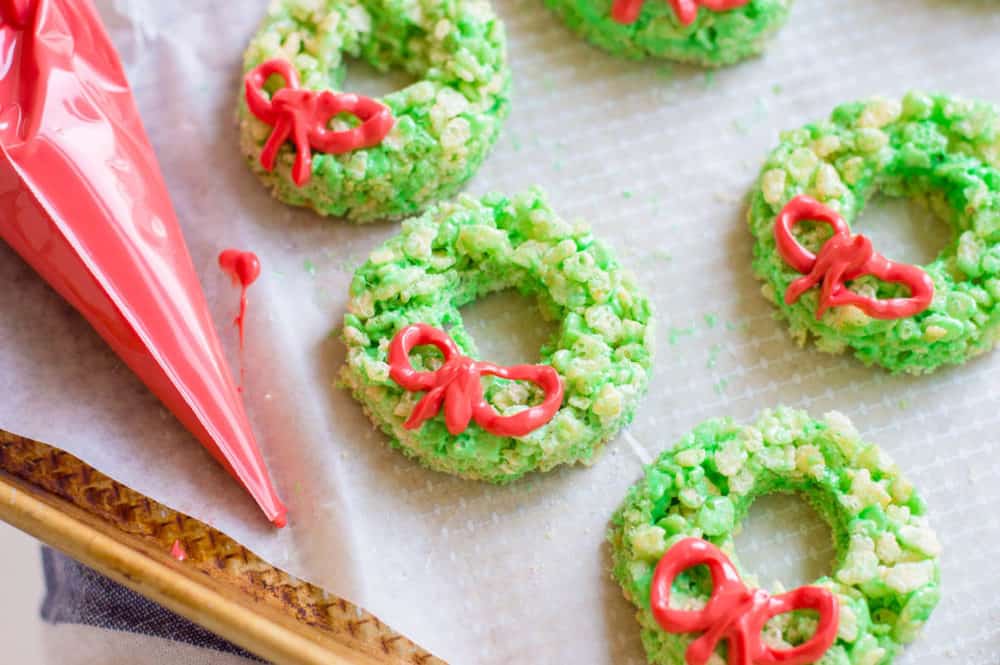
Step 6: I melt the yellow candy melts just like the red ones, heating in 30-second intervals and stirring until smooth. Then, I scoop the melted yellow candy into another piping bag and pipe small yellow dots around each wreath (about six per wreath). Once everything sets, they’re ready to serve!

💭 Expert Tips
My #1 Secret Tip for making the best Christmas Rice Krispie Treats is to avoid pressing the mixture too hard. I had a bad experience one year when I packed them in too tightly, they turned out dense and tough instead of soft and chewy. Now, I gently press just enough to spread them out evenly, and it makes all the difference for that perfect texture.
Other Tips To Keep In Mind:
- Use a Non-Stick Saucepan: I always use a large, non-stick saucepan to melt the marshmallows. It keeps everything from sticking and makes cleanup so much easier!
- Line Your Baking Sheet: Lining the baking sheet with parchment paper is a must. It makes removing the treats super easy once they’re set.
- Spread Evenly: To get an even layer, I either place parchment paper on top of the mixture and press with another baking sheet or use slightly wet fingers to press it down. Both methods work like a charm.
- Use Fresh Marshmallows: Fresh marshmallows are key to great-tasting treats. Stale marshmallows will leave your treats tasting off, so I always check before starting.
📖 Variations
I love making these Christmas Rice Krispie Treats because they’re so simple and festive, perfect for the holiday season! For a fun variation, try these:
Vegan: I make these treats vegan by using gelatin-free marshmallows like Dandies and vegan butter. For decorating, I check that the candies are dairy-free or swap them for vegan sprinkles.
Different Shapes: Sometimes I use a Christmas tree cookie cutter or other holiday shapes to switch things up. It’s such a fun way to make them even more festive!
Different Flavors: I love adding a drizzle of chocolate for a richer treat, or using peppermint marshmallows for a holiday twist. Vanilla extract or cinnamon sugar are also great options to try.
🍽 Serving Suggestions
These Christmas Rice Krispie Treats are a fun and festive way to bring holiday cheer to your dessert table! Serve them with a warm cup of hot oat milk chocolate or package them in gift bags for a sweet holiday surprise. I love packaging these Christmas Rice Krispie Treats in cute holiday-themed gift bags tied with a festive ribbon. Once they’re ready, my kids can’t wait to take them to share with their friends in the neighborhood. It’s become a little tradition for us, and I love seeing how much joy these simple treats bring to everyone.
🧊 Storage Directions
Refrigeration: I store the treats in an airtight container at room temperature for up to 3 days. If it’s warm in the house, I pop them in the fridge to keep them from getting sticky.
Freezing: To freeze, I wrap each treat individually in plastic wrap and place them in a freezer-safe bag. They stay fresh for up to 2 months, and I just let them thaw at room temperature before serving.
Reheating: While they don’t need much reheating, if they feel a little firm, I microwave them for about 10 seconds to soften them up. They taste as good as freshly made!
❓Recipe FAQs
If I don’t want to use marshmallows, I like to use honey to hold the Rice Krispies together. I just warm the honey first, then mix it with the melted butter, it works perfectly!
I’ve learned that if you cook marshmallows too long, they can get stiff and harden. As soon as they’re melted, I immediately take the pot off the heat to keep the mixture soft and gooey.
You don’t have to put Rice Krispie treats in the fridge unless your kitchen is particularly warm. I usually store them at room temperature in an airtight container to keep them soft and chewy, but if it’s warm, popping them in the fridge can help prevent them from getting sticky. Just let them come to room temperature before serving.
Love this plant based burger recipe? Please leave a 5-star rating 🌟 in the recipe below and/or a review in the comment section further down the page!
You can also FOLLOW ME on FACEBOOK, INSTAGRAM, and PINTEREST to see more delicious, healthy, family-friendly food, and if you have any questions, I’m here to help!
📋 Recipe Card
Christmas Rice Krispie Treats
Ingredients
- 3 tbsp butter
- 40 marshmallows regular size
- 1/4 tsp natural green food dye
- 6 cups brown rice cereal
- 1/2 cup red candy melts
- 1/2 cup yellow candy melts
Instructions
- Line a baking sheet with wax paper set aside.
- In a medium saucepan, melt butter over medium heat.
- Add marshmallows and stir until completely melted. Remove from heat.
- Add gel food coloring to melted marshmallows and mix until tinted.
- Add rice cereal and fold until all ingredients are well combined.
- Use a spatula to evenly spread the rice cereal treats mixture onto the lined pan. Shape the it to be about 8 inches x 10 inches.
- Allow the Rice Krispies to set for about 10 minutes.
- Use a circular cookie cutter, 2 ½ inches in diameter in size and cut out circle-shaped rice cereal treats. Use another cookie cutter, ¾ inch in diameter and cut out circles in the center of each treat. You should get about 12 treats.
- Take all the leftover scraps of the rice krispie mixture and reform it on the baking sheet, repeat the cookie cutter (large then small) process in the step above. You should be able to get 4 more treats.
- Add red candy melts into a microwave safe bowl. Microwave in 30-second intervals, mixing between each interval.
- Scoop the melted candy into a piping bag. Pipe out a red bow on the bottom of each rice cereal treat wreath. To form the shape of a bow, begin by piping out two circles attached together, similar to an infinity sign. Next, pipe out two lines in the center.
- Next, melt the yellow candy the same way you did the red candy melts. Scoop into another piping bag, and pipe out little yellow circle dots around the wreath (about 6).
- Allow to set and serve.
Notes
- Avoid pressing the mixture too hard. I had a bad experience one year when I packed them in too tightly, they turned out dense and tough instead of soft and chewy. Now, I gently press just enough to spread them out evenly, and it makes all the difference for that perfect texture.
- I always use a large, non-stick saucepan to melt the marshmallows. It keeps everything from sticking and makes cleanup so much easier!
- Lining the baking sheet with parchment paper is a must. It makes removing the treats super easy once they’re set.
- To get an even layer, I either place parchment paper on top of the mixture and press with another baking sheet or use slightly wet fingers to press it down. Both methods work like a charm.
- Fresh marshmallows are key to great-tasting treats. Stale marshmallows will leave your treats tasting off, so I always check before starting.







These are so fun for the kiddos to help make during the holidays and we don’t even need to turn on the oven to make them. Love it!
Yay! So happy to hear you liked these Jess!
These are so pretty and such a great fun idea to do with the kids too. Love it!
Aw thank you so much Amanda! 🙂
These are absolutely adorable!! I’m making a bunch and taking over to neighbors to spread some holiday cheer!
Awesome! I hope you and your neighbors love them!
These look so cute! I’ll be giving them a go with my kids soon!
Thank you so much Beth! Enjoy!!
Kids will love these over the Christmas period! What a fun idea 🙂
Yay! So happy to hear that Chris!
Those look super cute and good fun for kids to make. Christmas definitely needs to start early this year.
Thank you so much! My kids had a blast making these! 🙂 Haha I agree – Christmas couldn’t come early enough!