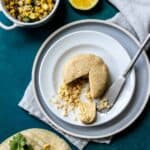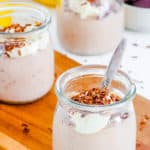
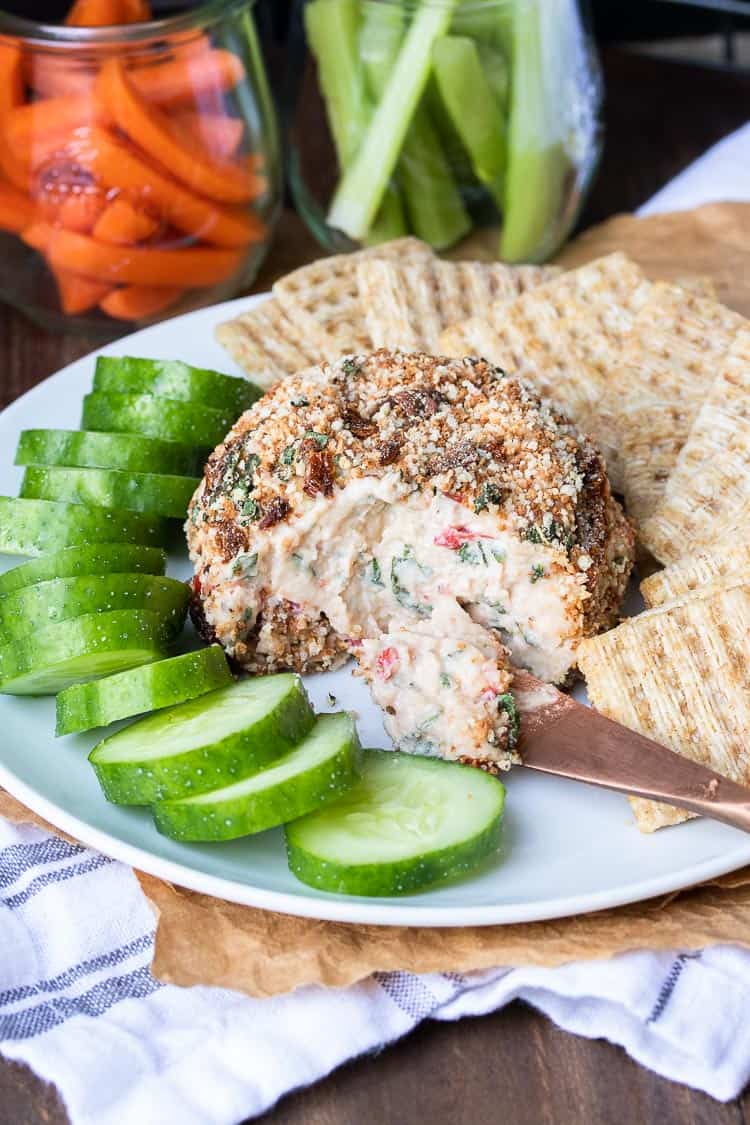
Vegan Bruschetta Cheese Ball
This post may contain affiliate links. As an Amazon Associate, I earn from qualifying purchases. Please read my disclosure.Tangy, creamy, full of flavor and dairy free! You won’t believe how these healthy ingredients come together to make a bruschetta flavored vegan cheese ball.

From my vegan cheese dips to my vegan cheese sauces, I am no beginner when it comes to all things creamy and delicious. The difference is that mine are made with all whole food ingredients, which means no store bought processed stuff, and mine are actually healthy. This vegan cheese ball is no exception.
I love the fresh flavors of bruschetta. So when it came to making a vegan cheese ball, bruschetta was my go to. I have seen the dairy variety all over the internet lately, and of course I thought, I can do that vegan. I love a good challenge.
It took some trial and error to make the liquid ratio just right, it wasn’t a dip so it needed some structure. And because we have fresh tomatoes we are working with, it easily got watery fast. To counteract some of that but keep the tomato flavor, I used sun-dried tomatoes too. Plus, they have a perfect tang which helps with the cheesy flavor in vegan cheese.

Making a vegan cheese ball
A few things to remember, patience is key when blending the base. As much as I love my Vitamix, a blender isn’t the best tool here. Mostly because you need the cashews and little liquid you are using to have room to blend. A food processor does this job much better.
That being said, it is hard for a food processor to get nuts really smooth like a high speed blender. So for this recipe, I took the idea I used in my grateable vegan Parmesan cheese (oh have you not made this one? Do it. Now.) and applied it here. Grind the cashews dry first. Then you can go on with your recipe.
It’s a pretty easy method:
- After you get a nice grind to the nuts, add the liquid and a few other ingredients. This is where the patience comes in and you need to blend and scrape until you get a smooth creamy product. Then you can pulse in your fresh tomatoes and basil.

- At this point, this is more of a creamy spread versus a ball. So there is a little trick in getting it just right. You put it in a cheese cloth, or if you are not that fancy then use a random piece of cloth like I did. Any towel or napkin works fine. Let it sit for 4-6 hours, but over night is best, so that the little moisture it has is sucked up!

- You can then make the breadcrumb coating, because we can’t have bruschetta without bread. Be careful not to burn it, especially if you are not using oil. You can store this in a container until you are ready to coat the cheese ball.
- Once your vegan cheese ball is all done, you can serve it with crackers, fresh veggies, or even just spread it on your tongue and cut out the middle man.


How to keep fresh ingredients, well, fresh
There is nothing worse than getting excited to make a delicious recipe…and finding your produce is rotten. Especially fresh tomatoes and we cannot do a bruschetta cheese ball without them. Do you pack your three kids into the car and brave the store for more? Do you say screw it and order a pizza? It really is a tossup in my house.
The bottom line is, the struggle with storing produce correctly is real. Which is why I got all tingly and giddy when I found out about the new FreshWorks Countertop containers by Rubbermaid. They store produce that does best on the countertop, get this, ON the countertop! Genius right? So you don’t have to lose flavor by storing them in the fridge. Yesssssss.

The trick is in the Freshvent lid that helps regulate the oxygen and carbon dioxide inside the container. Plus it has little legs so that you get airflow on all sides. And to top it all off, they are super cute! They look clean and streamlined, and stack together perfectly so you don’t have your entire counter taken up.
I need my tomatoes full of flavor and my bananas to not be mushy and attract every fruit fly on the block. So I decided to give these containers a try with the tomatoes and basil for this recipe, plus some bananas and sweet potatoes for fun. I kept half out of the containers, and the other half in. The difference in the tomatoes especially was legit!

I was pretty sad to see how the tomatoes out of the container ended up. It kind of felt like tomato murder, and I can’t bring myself to let it happen again. So I am saying #LongLiveProduce and keeping my precious cargo inside these containers from now on. If you’re like me, a produce snob who likes to eat good food, get yourself to Target, Walmart, Bed, Bath & Beyond or Amazon.com and get some of these little lovelies.
Then make this bruschetta ball, because you can’t let good tomatoes go to waste! And don’t miss my other amazing flavor, the Smoky Jalapeño Ranch Vegan Cheeseball!
Other great appetizers to try out:
- Vegan Summer Rolls
- Healthy Twice Baked Vegan Potato Skins
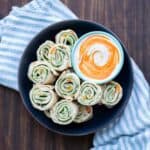
- Raw Mexican Zucchini Roll Ups with Veggie Walnut “Meat”

Vegan Bruschetta Cheese Ball
Tangy, creamy, full of flavor and dairy free! You won't believe how these healthy ingredients come together to make a bruschetta flavored vegan cheese ball.
Servings: 6
Calories: 158kcal
Ingredients
- 1 cup raw cashews
- 3 tablespoons distilled white vinegar
- 1 teaspoon garlic , chopped (about 2-3 cloves)
- ½ teaspoon sea salt
- ¼ teaspoon ground mustard
- ¼ cup fresh tomatoes , chopped
- 2 tablespoons fresh basil , sliced
- 2 tablespoons sundried tomatoes , chopped (dried, not in oil)
Breadcrumb topping:
- ½ cup breadcrumbs , gluten free if needed
- 2 tablespoons fresh basil , sliced
- 2 tablespoons sundried tomatoes , chopped (dried, not in oil)
- ½ teaspoon sea salt , optional (see note)
Instructions
- Grind the cashews in a food processor until you get a fine powder. You are grinding them dry, not soaked.
- Add the vinegar, garlic, salt and mustard and blend until you get a smooth paste, scraping the sides as you go.
- Add in the fresh tomatoes, basil and sundried tomatoes and pulse to incorporate. Don’t puree too much because you want some texture.
- Now scrape out the creamy mixture and place it in cheese cloth, a tea towel or just any piece of cloth. Wrap it up into a ball and rubberband it (see the post for photos).
- Put the ball in a mesh strainer and then put that over a bowl (see photo in the post on this too). Place it in the fridge for at least 4-6 hours, but overnight is best. This will help draw out the small amount of moisture that is in the cheese, firming it up a bit. You don’t have to use a strainer but that helps keep its shape.
- Now, if you simply can’t wait and must eat this now, or just don’t want to deal with cloth, then you can definitely eat this as a spread. You can simply put it in a bowl, and top with the breadcrumb topping or skip the breadcrumbs all together.
- To make the breadcrumb topping, place all ingredients in a pan and heat on medium low, constantly mixing, until browned a bit. This takes about 3-5 minutes max. You can use a drizzle of oil if you prefer to get an even crispier result. You can do this the same day you make the cheese ball, then store in a container until the next day when you coat it.
- When ready to finish the cheese ball, pour the breadcrumbs onto a plate. Take the cheese ball out of the cloth and place it on the breadcrumbs. Slowly roll it around, or use your hands to coat the ball.
- Serve with crackers and veggies!
- The cheese ball will soften the longer it is out of the fridge, but once coated in breadcrumbs still retains its shape well.
Notes
- You can use apple cider vinegar if you prefer but the distilled white vinegar gives it a much better tang for a more cream cheese type flavor.
- The cheese ball itself has plenty of salt so you don’t need more in the breadcrumb topping, but if you want to add more you can.
- Note that this is not meant to be a hard cheese. It is meant to be a soft cheese ball, just like the traditional dairy kind. It will get thicker and a bit firmer after letting it set overnight in the cloth, but it won't get hard like parmesan or cheddar cheese. Think more along the lines of a goat cheese like ball or a thick cream cheese.
Nutrition
Calories: 158kcal | Carbohydrates: 14g | Protein: 5g | Fat: 9g | Saturated Fat: 1g | Sodium: 184mg | Potassium: 270mg | Fiber: 1g | Sugar: 2g | Vitamin A: 150IU | Vitamin C: 2.3mg | Calcium: 12mg | Iron: 1.7mg